In the previous article, we built a command-line budget app. But didn’t you think “it would be nice to quickly log expenses from my phone”?
I often find myself wanting to check “how much have I spent so far?” while out and about. So this time, I built a mobile-optimized web budget app.
Since it runs in a browser, you can access it from a PC, smartphone, or tablet — anywhere. With Claude Code, building web apps is surprisingly easy!
Recap of the Previous Article
the previous article, we built a command-line budget app.
While it had graph display functionality and was quite useful, it wasn’t practical for recording expenses on the go.
This time, we’ll solve that problem by building a web version you can use anytime, anywhere. It’s optimized for mobile screens, so touch input feels smooth and natural.
What We’re Building: A Mobile-Optimized Web Budget App
Here are the specifications for the web budget app we’re building.
Core Features
- Expense Recording: Easily input category, amount, and notes
- Monthly Expense List: Displayed in reverse chronological order
- Total Display: See this month’s total spending at a glance
- Category Breakdown: See where you’re spending the most
Mobile Optimization Features
- Responsive Design: Automatically adjusts to mobile screens
- Touch-Friendly: Large buttons for easy input
- Simple UI: Shows only what you need
- Instant Updates: Entries appear in the list immediately
Using the Streamlit framework, you can build modern web apps with Python alone.
Creating the Project with Claude Code
Let’s get started building with Claude Code right away.
Creating the Project Folder
- Create a folder called “web_budget” on your desktop
- Open PowerShell or Command Prompt
- Run the following commands
cd Desktop/web_budget
claude
Once Claude Code starts, give it these instructions:
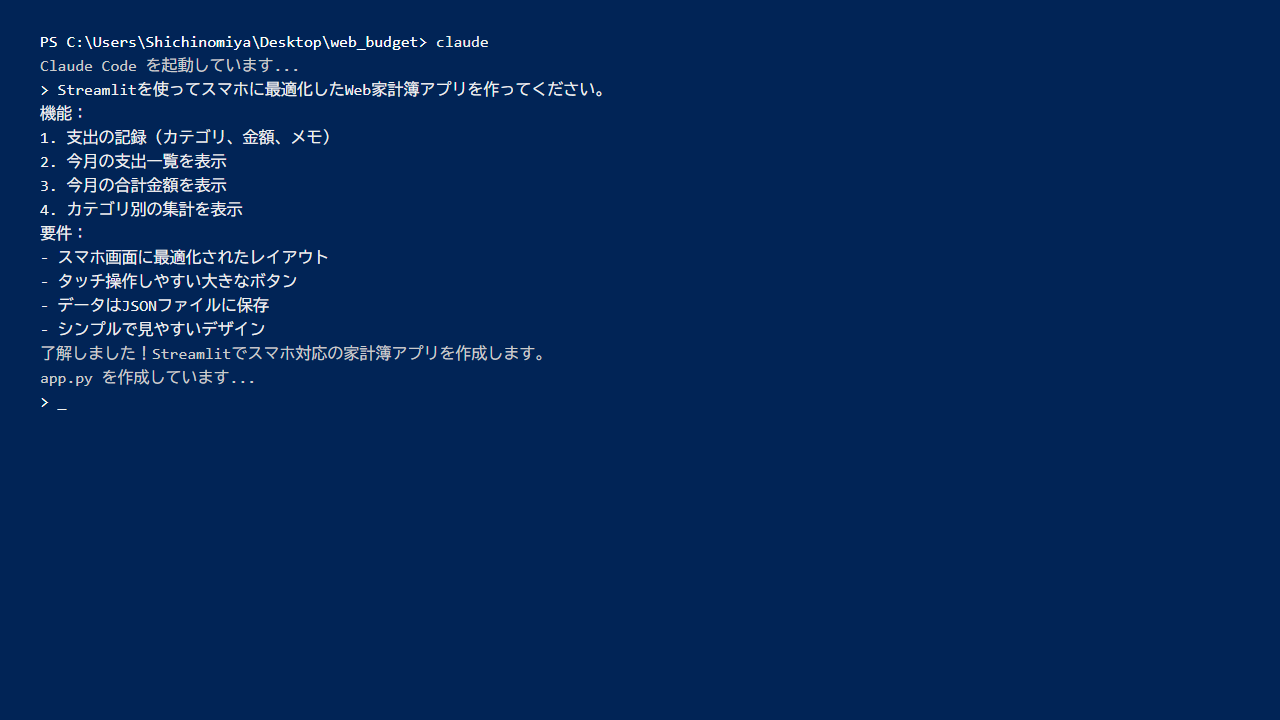
Instructions for Claude Code
Streamlitを使ってスマホに最適化したWeb家計簿アプリを作ってください。

機能:
1. 支出の記録(カテゴリ、金額、メモ)
2. 今月の支出一覧を表示
3. 今月の合計金額を表示
4. カテゴリ別の集計を表示

要件:
- スマホ画面に最適化されたレイアウト
- タッチ操作しやすい大きなボタン
- データはJSONファイルに保存
- シンプルで見やすいデザイン
Claude Codeがこの指示を受けて、Webアプリを作成してくれます。
私の環境では、`app.py`というファイルが作成され、Streamlitのインストール手順も提示されました。
Installing Streamlit
To run the web app, you need the Streamlit library.
Installation Command
pip install streamlitRunning this command automatically installs Streamlit and its dependencies.
Once installation is complete, you can launch the web app.
Launching the Web App
Let’s actually launch the web budget app we created.
How to Launch
streamlit run app.pyRunning this command automatically opens your browser and displays the web app.
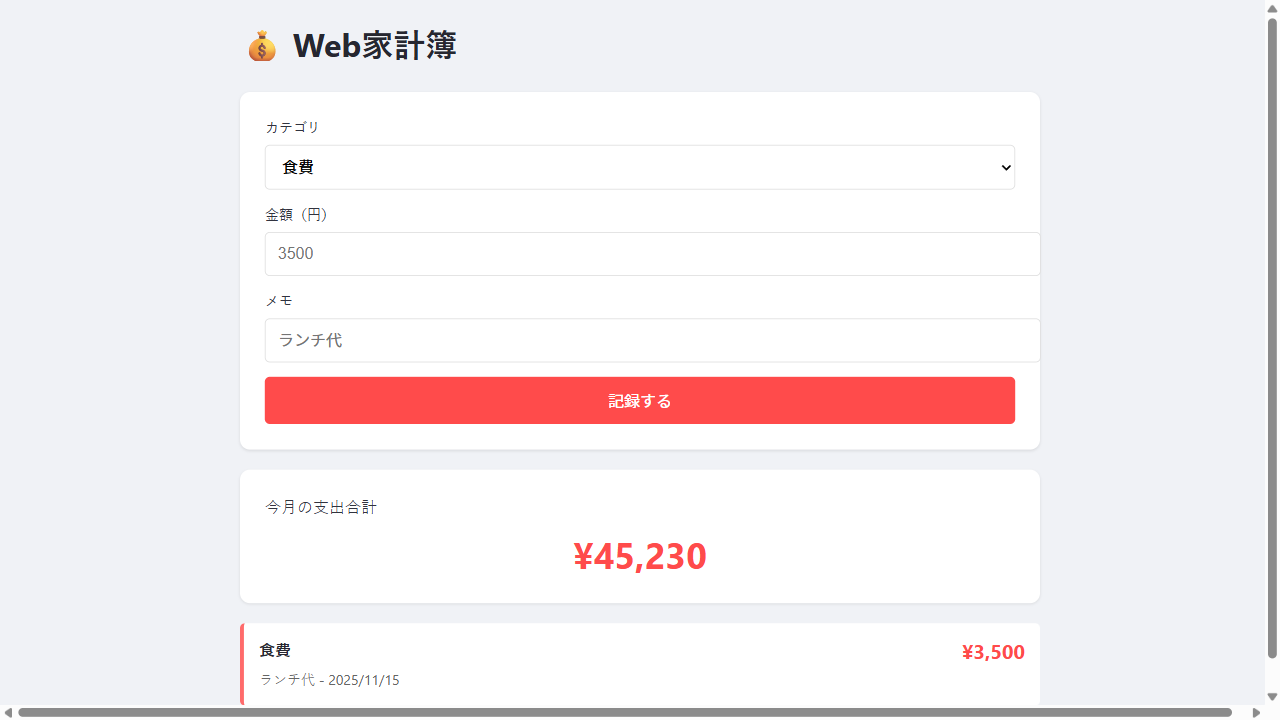
URLは通常 `http://localhost:8501` です。このURLをスマホのブラウザで開けば、スマホからもアクセスできます。
Accessing from Your Smartphone
同じWi-Fiネットワーク内であれば、スマホからもアクセスできます。
- PowerShellに表示される「Network URL」を確認
- スマホのブラウザでそのURLを開く
- 外出先でも使いたい場合は、Deploying to Streamlit Cloud
User Experience on Mobile
Using it on an actual smartphone, you can see it’s well-optimized for touch input.
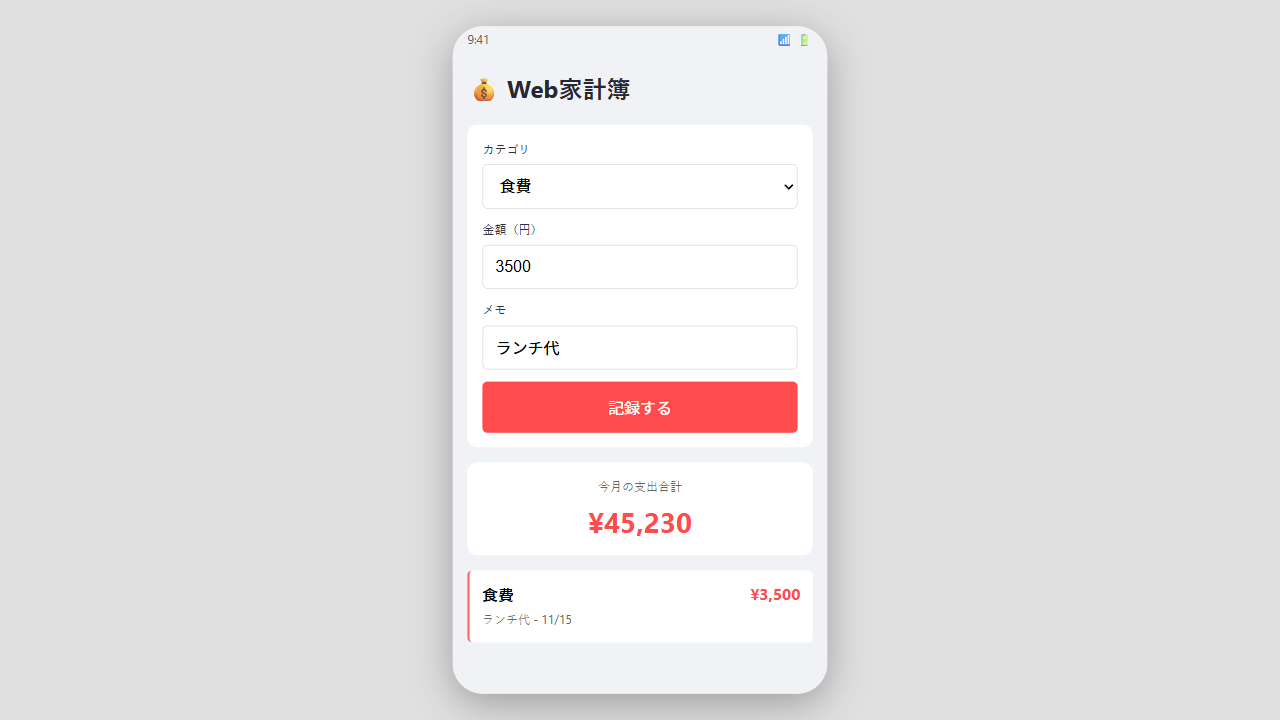
Recording an Expense
Enter the category, amount, and notes using the form at the top of the screen.
Categories are selected via dropdown, making touch operation easy. After entering the amount and notes, tap the “Record” button.
Entered data appears instantly in the list below. This immediate feedback gives it a native app-like feel.
Totals and Category Breakdown
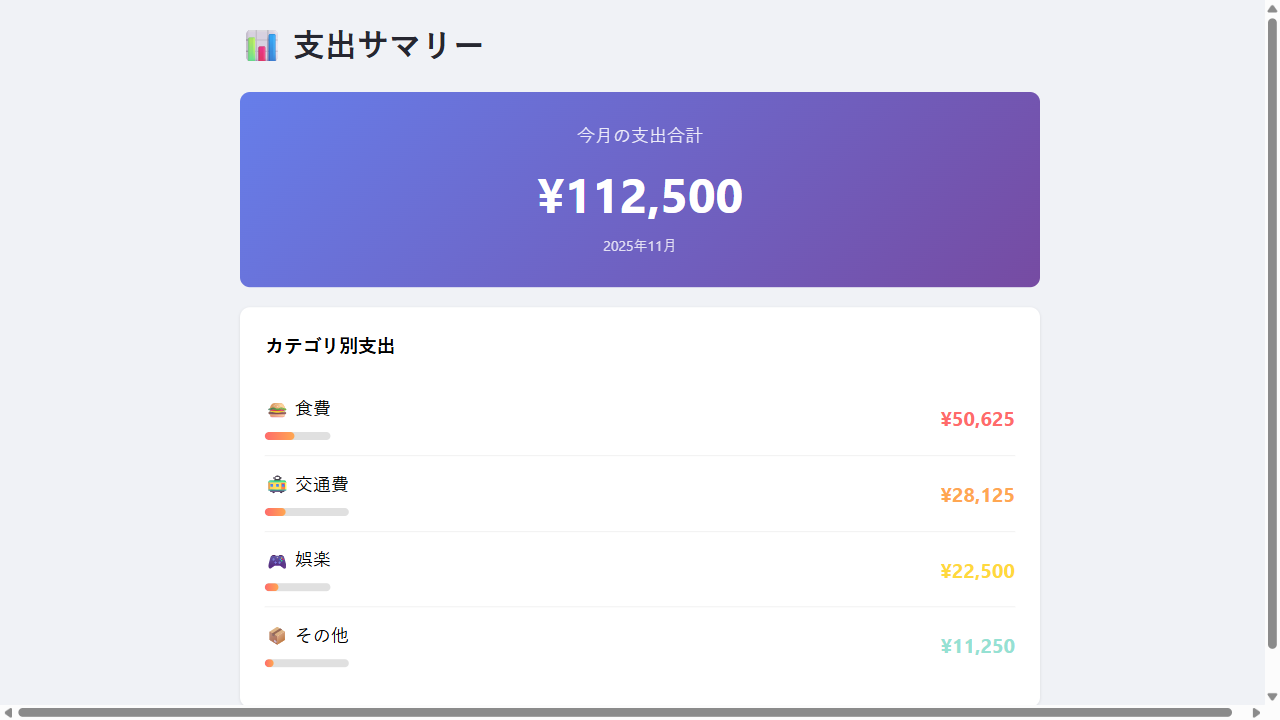
The top of the screen shows this month’s total spending in large text.
Category breakdowns are also displayed, making it easy to spot trends like “I’ve been spending a lot on food this month.”
Customizing the Design
The basic functionality was complete, but I wanted to improve the look a bit.
So I asked Claude Code for additional customizations.
Customization Request
カラーテーマを追加してください。
また、支出の削除機能も追加したいです。
Claude Code responded quickly, adding colorful category color-coding and a delete button for each expense entry.
The color coding makes categories much easier to identify at a glance.
Deploying to Streamlit Cloud
Running it locally is convenient, but you’d want to use it on the go too, right?
With Streamlit Cloud, you can publish your web app for free.
Deployment Steps
- Create a GitHub repository
- Push the app you created
- Connect the repository in Streamlit Cloud
- Click the deploy button
Once deployment is complete, `https://あなたのアプリ名.streamlit.app` a URL like this will be issued.
Add this URL to your smartphone’s home screen and it works just like a native app.
Pitfalls and Solutions
There were a few stumbling blocks during development.
Screen Width on Mobile
Initially, horizontal scrolling occurred when viewing on mobile.
This was caused by Streamlit’s default width settings. When I told Claude Code “there’s horizontal scrolling on mobile,” it `st.set_page_config`added code to adjust the layout.
Data Persistence
Since Streamlit re-executes on every page reload, data storage requires careful consideration.
JSONファイルに保存することで、リロードしてもデータが残るようになりました。Deploying to Streamlit Cloudする場合は、データベースを使う方が良いかもしれません。
When to Use CLI vs Web Version
After building the web version, the use cases for each version became clearer.
When the Web Version Shines
- Recording expenses on the go
- Quick input from your smartphone
- Sharing with family members
When the CLI Version Shines
- Detailed graph analysis
- Exporting data as CSV
- Batch processing large amounts of data
Personally, I find it convenient to use the web version for daily recording and the CLI version for end-of-month analysis.
Summary
This time, we built a mobile-optimized web budget app using Claude Code.
Key Takeaways
- Streamlit lets you build web apps with Python alone
- Responsive design optimized for mobile
- Large touch-friendly buttons and simple UI
- Free hosting on Streamlit Cloud
- Claude Code supports everything from library selection to implementation
Next time, I’d like to build a more practical tool — an automatic price monitoring tool for sites like Amazon.
Even programming beginners can easily build app-like web applications using Claude Code. Try customizing it for your own needs!




Leave a Reply