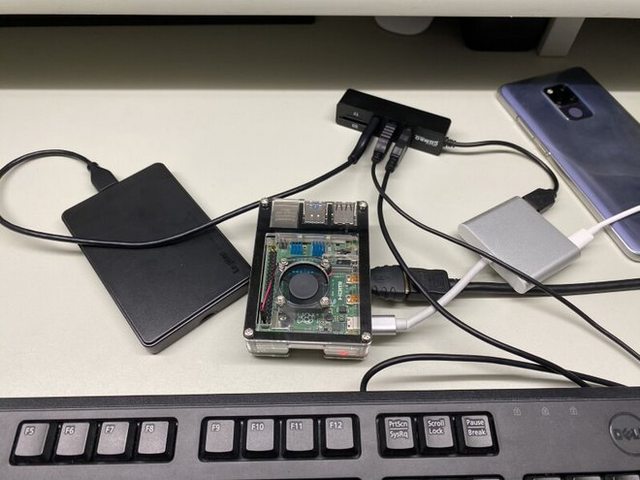
In a previous article on my old site, I posted about installing ARM Windows 10 on a Lumia 950 XL. This time, it’s the Raspberry Pi 4 edition.
There had been talk of ARM Windows 10 running on the Raspberry Pi 3, but with a bit of extra work, it can also run on the Pi 4.
One prerequisite is that you need to own a Raspberry Pi 3. If you don’t have one, grab one on Amazon or borrow one from a friend.
I’ll include a method at the very end of the installation section that works even without a Pi 3 (though I wouldn’t recommend it).
I’d like to take this opportunity to thank Marcin (@Marcinoo97) for publishing the technique used in this guide.
If you’re interested in running ARM Windows 10 on a Microsoft Lumia 950 XL, check out the articles below:
[Preparation] Running ARM Windows 10 on a Lumia 950 XL
[Installation] Running ARM Windows 10 on a Lumia 950 XL
0. What You’ll Need
– Raspberry Pi 4
– Raspberry Pi 3
– A Type-C to Type-A hub (with power delivery)
– microSD card
– USB flash drive (the fastest you can get is recommended)
1. Important Notes
The “ARM Windows 10” used in this guide does not have an official ISO released by Microsoft. Instead, we use Microsoft’s officially published “Unified Update Platform (UUP)” to gather the necessary files and build an ISO from them. This requires helper software, which we’ll be using in this guide.
This is absolutely not about downloading from an unauthorized third-party source. This same method is used by Microsoft’s own “MediaCreationTool” for creating Windows 10 installation USB drives and ISOs.
Also, and this should go without saying, ARM Windows 10 still requires license activation.
There are many articles out there about installing ARM Windows 10 on a Lumia 950 or Raspberry Pi 3 that vaguely claim “the license key might be different for ARM, so we’re not sure.” If architecture differences meant different licenses, then x86 and x86_64 would also require different licenses. While Windows XP did have a separate “Professional x64 Edition,” from Vista onward, the license has been universal. Therefore, arm64, x86, and x86_64 all use the same license.
I was also able to activate Windows with a standard license key when I installed it on the Lumia 950 XL, so please have a regular license key ready.
Let’s make sure this doesn’t end up as just a dream.
The license activation process on the Lumia 950 XL is documented in the article below:
[Installation] Running ARM Windows 10 on a Lumia 950 XL – 5. Windows 10 License Activation
2. Preparing the ISO
In the previous Lumia 950 XL article, I skipped this part because there were too many steps. Since this guide has fewer steps overall, I’ll include it here.
As mentioned in the notes above, we’ll use Microsoft’s officially published “Unified Update Platform (UUP)” to gather the files and create an ISO.
UUP (Unified Update Platform) Generation Project (v2.4.8 RC2) [by @rgadguard & mkuba50]
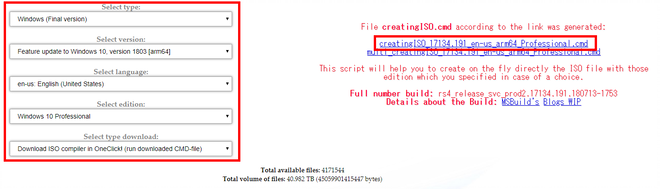
Go to the site above and configure the left-side selection panel as follows:
Select type → Windows (Final Edition)
Select version → Feature update to Windows 10, version 1803 [arm64]
Select language → English (Japanese probably works too)
Select Edition → Match it to your license (Windows 10 will auto-switch editions to match your license key anyway)
Select type download → Download ISO compiler in OneClick! (run download CMD-file)
Then click “creatingISO_17134.191_en-us_arm64_Professional.cmd” on the right side to download the .cmd file.
Open the downloaded “creatingISO_17134.191_en-us_arm64_Professional.cmd” and a Command Prompt window will launch.
Just leave it running until it finishes. Minimize the window and move on to the next step while the download is in progress.
3. Downloading the Deployment Software and UEFI
– Dism++
Just download them normally, but be sure to appreciate the volunteer developers who made these tools.
4. Deploying ARM Windows 10 with WoR Imager
Once you’ve successfully created the ISO from “2. Preparing the ISO,” it’s time to deploy Windows 10 onto a USB flash drive.
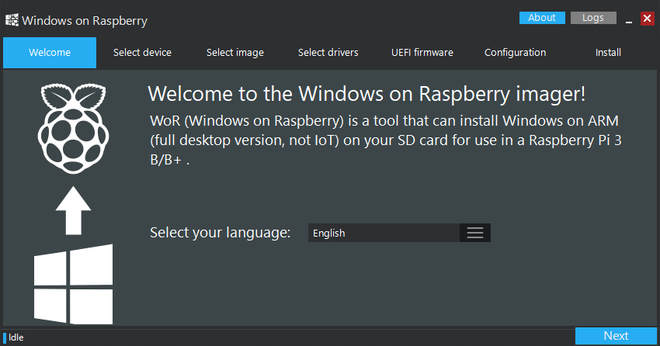
Launch WoR imager. You’ll be greeted with a language selection screen — pick your preferred language.
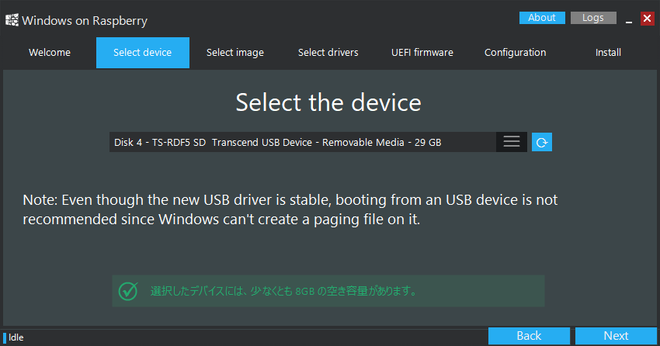
Next is device selection. Choose your USB flash drive. (Important: see the note below)
Select the ISO you downloaded earlier and choose the edition.
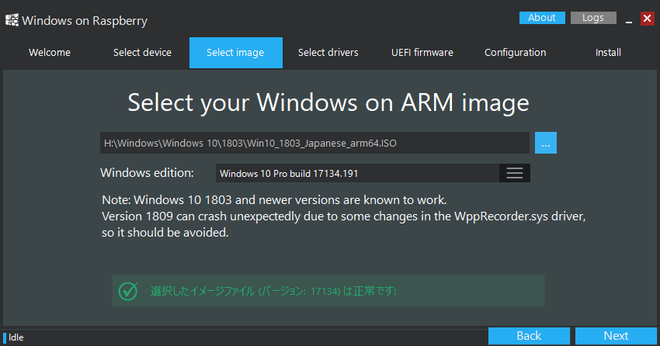
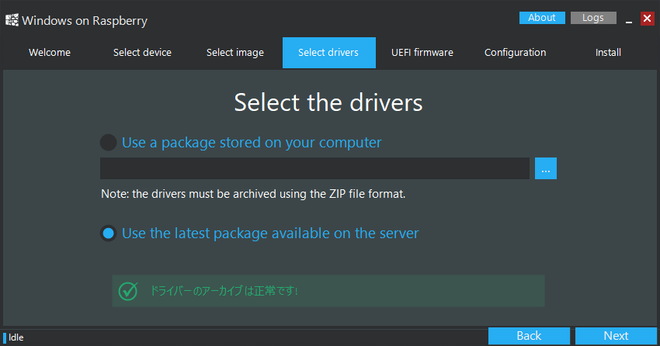
Set drivers to auto-download.
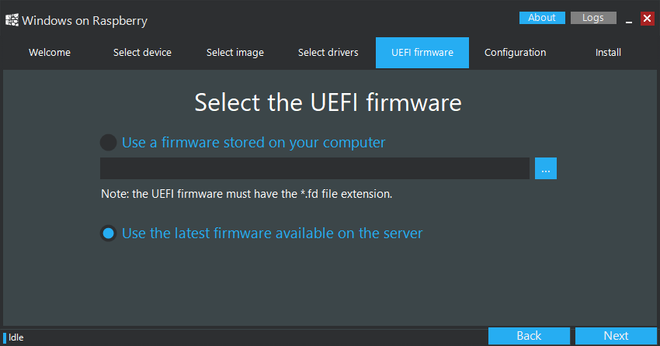
Set UEFI to auto-download as well.
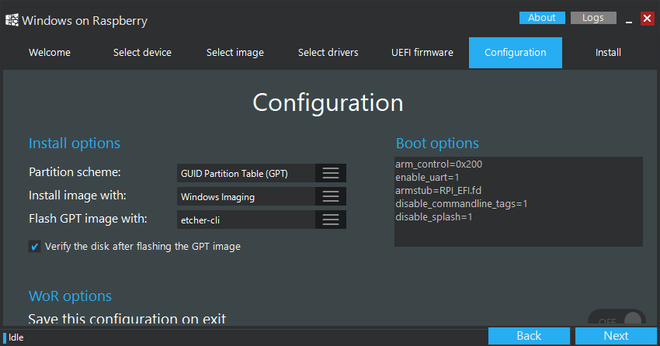
This is the final settings screen. Change “Partition scheme” to “GPT” and proceed.
This is the confirmation screen. If everything looks good, go ahead and click “Install.”
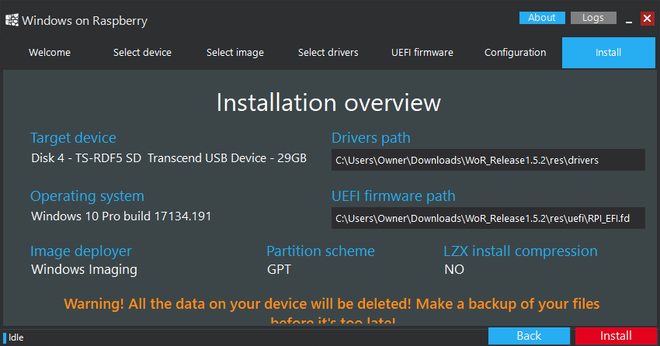
Installation takes quite a while. Unless you’re using a SanDisk Extreme Pro USB drive, expect it to take at least 30 minutes.
For reference, I used a USB 3.0 card reader with a SanDisk Extreme Pro SD card that I normally use with my DSLR. It was super fast.
When it succeeds, you’re done.
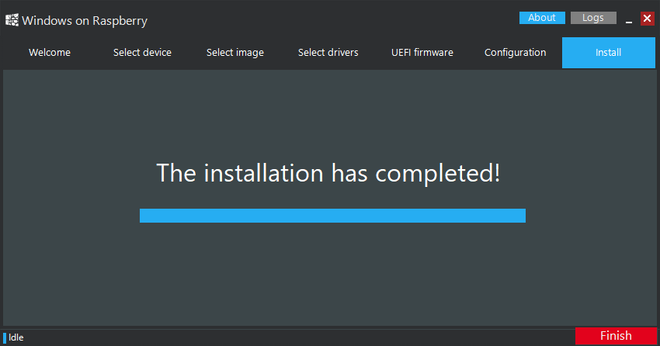
* Important Note *
For those of you thinking “A USB drive (or eMMC) is too slow! I’ll use an SSD!” — for some reason, using an external SSD causes drive letter issues and triggers errors. Worse, it can result in a RAW + write-protected state.
If it’s already too late, go to Device Manager, uninstall the driver for the SSD in question, and then reformat it.
Even formatting on another OS (like macOS) still results in RAW + write-protected, so uninstall the driver first.
5. Post-Processing with diskpart
Open an elevated Command Prompt (run as administrator) and launch Diskpart.
Use list disk to display all storage devices connected to your PC and find the USB flash drive.
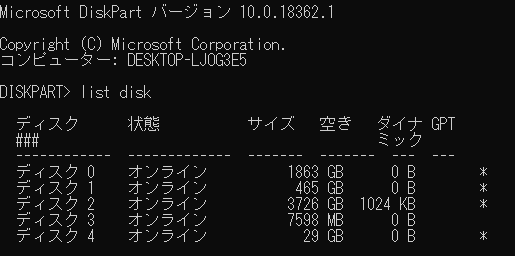
In this case, based on the capacity, the USB drive is disk 4. Type select disk 4 to target disk 4.
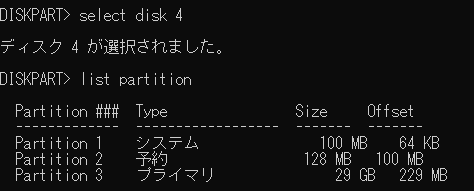
Type list partition to list the partition information.
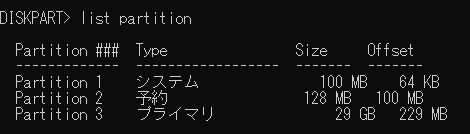
We want to target the EFI partition, so type select partition 1.
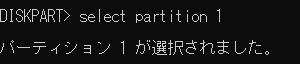
Type set id=ebd0a0a2-b9e5-4433-87c0-68b6b72699c7 to set the partition ID.

Type assign letter K to assign drive letter K to it.

Open another elevated Command Prompt window.
Type bcdedit /store K:\EFI\Microsoft\Boot\bcd /set {default} recoveryenabled no.

Type bcdedit /store K:\EFI\Microsoft\Boot\bcd /set {default} truncatememory 0x40000000.

Go back to the Command Prompt window running Diskpart.
Type remove letter=T to remove the drive letter.

Type set id=C12A7328-F81F-11D2-BA4B-00A0C93EC93B to set the bootable partition ID.

Close all Command Prompt windows. The post-processing is now complete.
Safely eject the USB drive before physically removing it from your PC.
5. Initial Boot on Raspberry Pi 3
Insert the prepared USB drive into the Raspberry Pi 3 and boot it up.
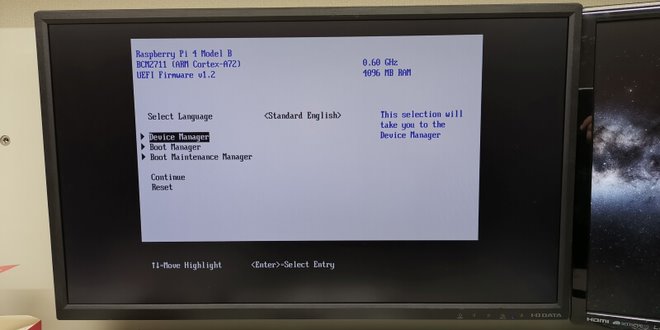
(I forgot to take a photo, so the image shows a Pi 4, but the process is essentially the same.)
Press the “Esc” key during the UEFI loading screen to enter this settings menu.
Select “Device Manager.”
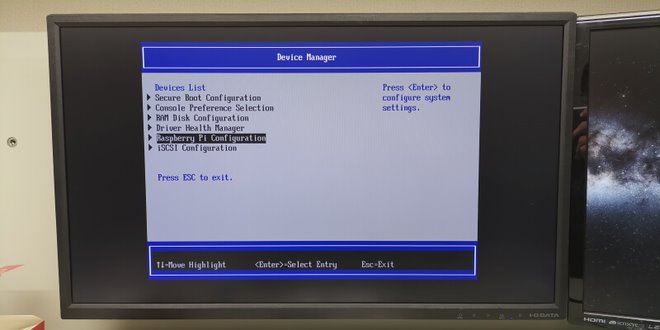
Select “Raspberry Pi Configuration.”
Select “Chipset Configuration.”
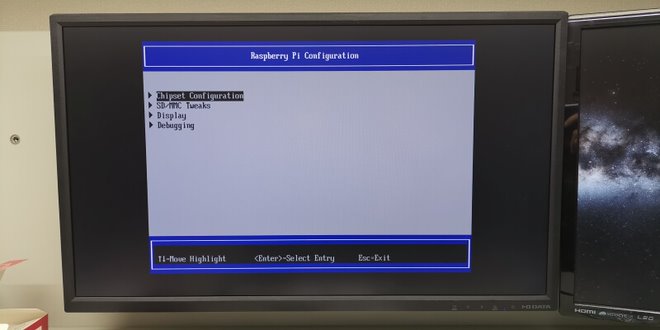
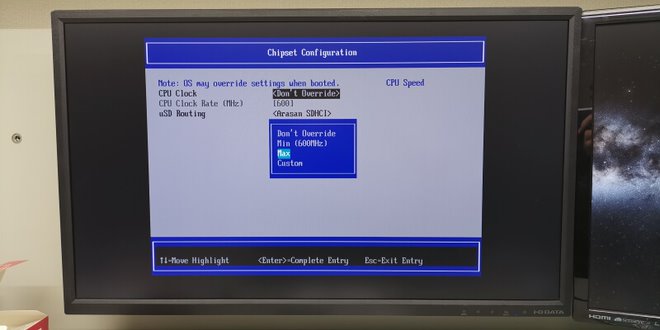
You’ll see a screen where you can change the SoC clock speeds. Select “CPU Clock” and change it to “Max.”
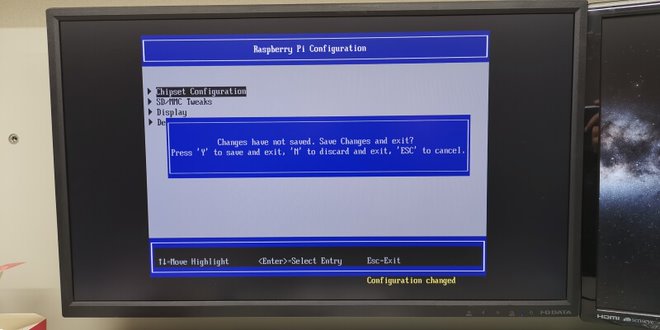
After making the selection, press “Esc” twice. A save confirmation dialog will appear — press “Y” to save.
Select “Reset.” This means reboot, not undo — your saved settings won’t be lost.
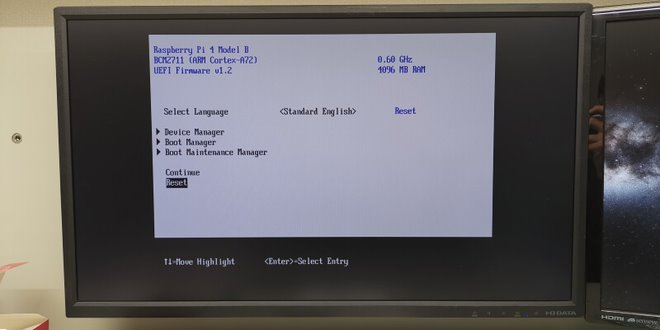
Enter the UEFI settings again and confirm that the clock speed shown on the right side is at maximum. Then select “Continue.”
From here, just let Windows 10 boot up, complete the out-of-box experience (OOBE) setup as usual, and shut down.
That’s it for the Raspberry Pi 3 portion.
6. Removing Pi 3 Drivers That Interfere with Pi 4
Insert the USB drive used with the Raspberry Pi 3 into your PC and assign a drive letter to the Windows partition.
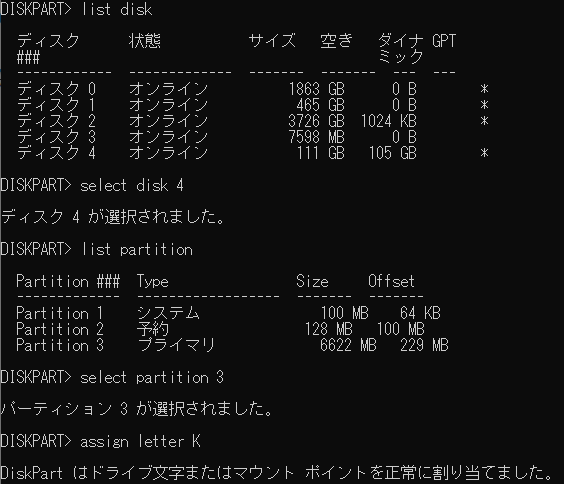
We already covered how to assign a drive letter in step 5, so I won’t go into detail, but here’s the Diskpart log for reference.
(I used a 120GB SSD, so think of it as a USB drive.)
Extract the previously downloaded “Dism++” and run the executable that matches your PC’s architecture.

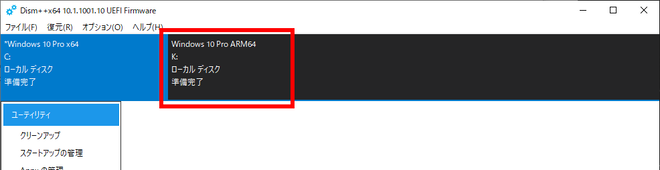
When Dism++ launches, you’ll see this screen. Click the “ARM 64” tab to switch to the correct target.
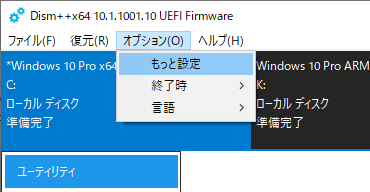
Next, switch to “Expert Mode.” Click “Options” then “More Settings.”
(The direct translation of “More Settings” from Japanese was “More Settings” — pretty straightforward, right?)
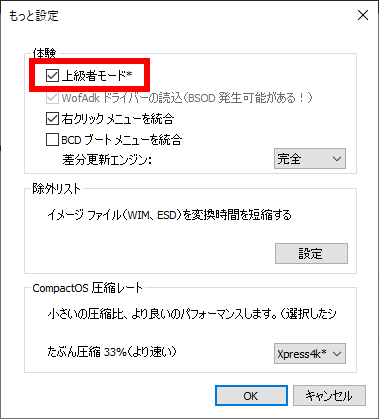
In the settings, check “Expert Mode” and click “OK.”
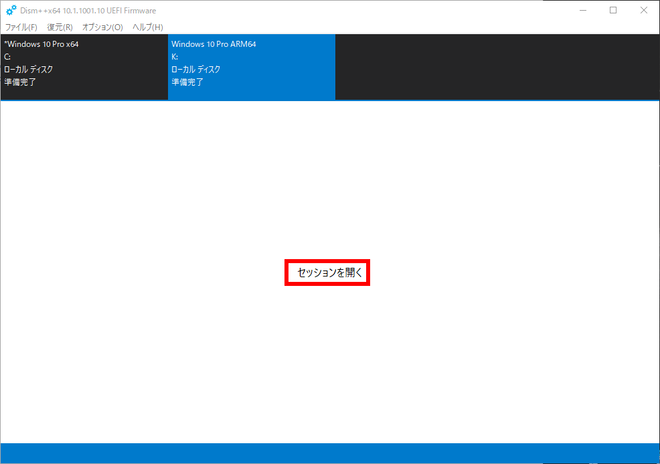
Next, click “Open Session” to load the Windows installation data from the USB drive.
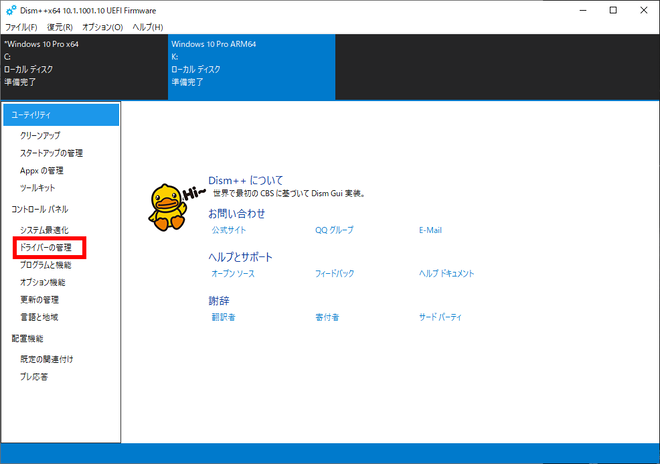
From the left menu, click “Driver Management.”
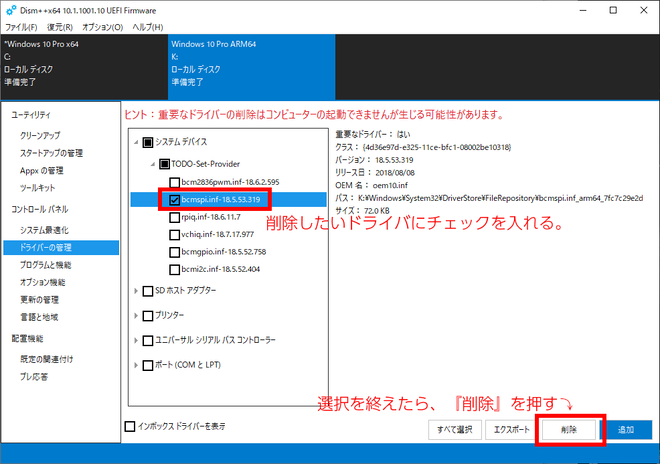
A list of drivers will appear.
Find “lan7800,” “lan9500,” “SerPL011,” and “bcmauxspi,” check them, and click “Delete” in the bottom right.
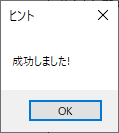
A success dialog will appear after deletion. You’re done with this step.
Finally, safely eject the USB drive before removing it from your PC.
7. Booting on Raspberry Pi 4
Connect the following to your Raspberry Pi 4 using a Type-C hub with power delivery: the USB drive with the cleaned-up drivers, a keyboard, a mouse, and the microSD card containing the UEFI.
Ideally you’d want a Type-C hub with power delivery and at least 3 USB ports, but budget constraints led to this rather messy setup.
(The USB drive was too slow, so I ended up copying everything to an SSD.)
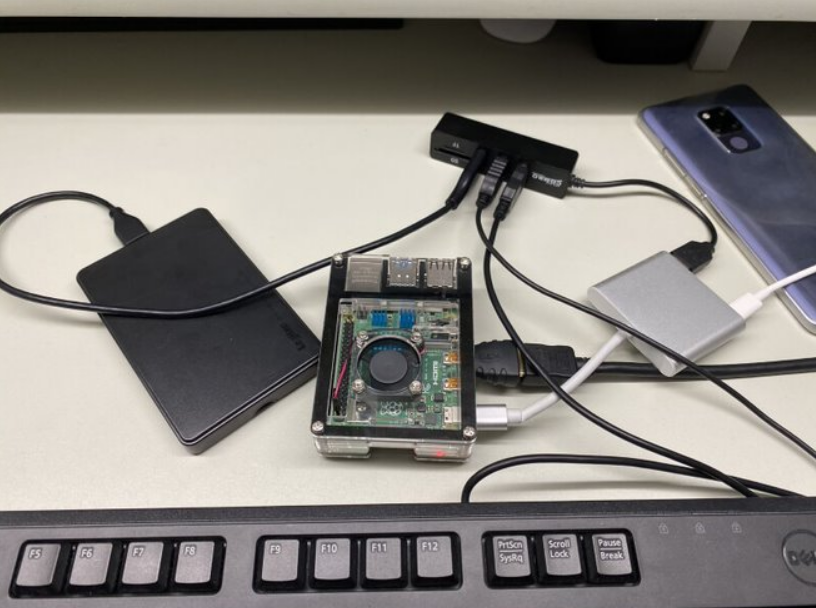
After booting, follow step 5 to set the CPU clock to maximum before proceeding.
You’ll get a BSoD on the first boot, but the second boot should work normally. If you see the lock screen, congratulations — you’ve done it!
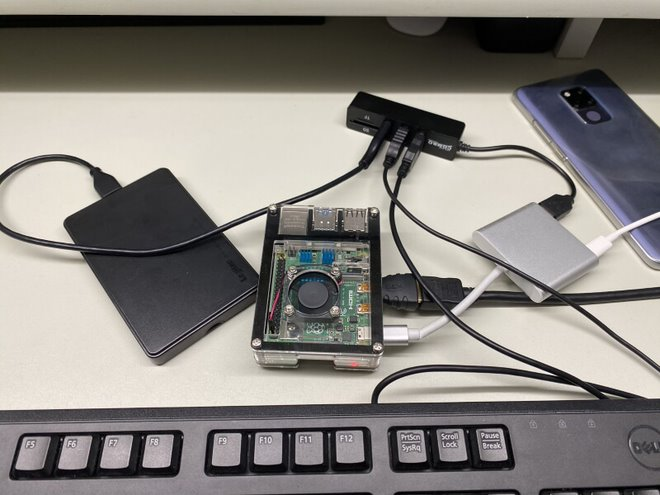
8. Performance Impressions
Honestly, it’s faster than I expected. Much like how people say a Celeron PC can run smoothly with an SSD, the SSD likely contributes a lot here.
It’s noticeably faster than the Lumia 950 XL setup I tried before.
Here’s what Task Manager looks like. It correctly identifies the BCM2711 Cortex-A72. Only 1GB of RAM is recognized — apparently this is a “USB xHCI” issue.
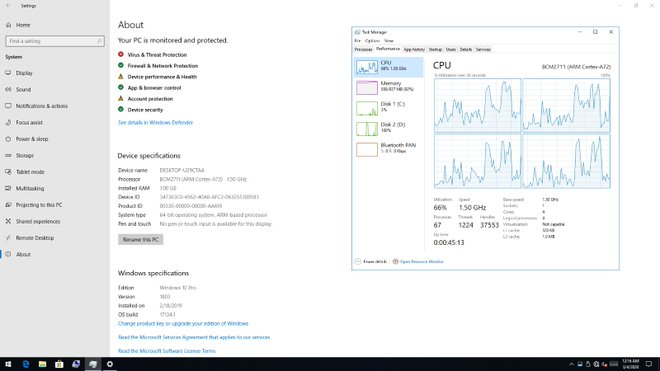
Booting from a microSD card reportedly allows full RAM recognition. I tried booting from microSD as well, but unfortunately my limited knowledge wasn’t enough to get it working.
However, as expected, the lightning bolt icon appears when using a USB mouse/keyboard or running intensive tasks.
This icon indicates insufficient power, suggesting that 5V 3A (15W) may not be enough.
Then again, plugging an SSD (5V-1A) into a USB 3.0 port (5V-0.9A) was already pushing it… haha.
Using a 3.5-inch HDD with its own power supply might eliminate the lightning bolt and allow smoother operation.
I’d like to experiment with that when I have the time.
As for the “method that works without owning a Pi 3” mentioned at the beginning, please refer to the references section. I take no responsibility for the outcome.
9. References
– How-to: installing windows 10 arm64 (17134) on your raspberry pi 3 and 4


Leave a Reply