![[2018] Installing Windows 7 Starter on a VAIO type P to Make It Usable Again](https://miyagadget.page/wp-content/uploads/2023/08/g3cFO3Vl.jpg)
Last November I picked up a VAIO type P (VGN-P80H), but honestly, after playing with it for about two weeks, it had been sitting unused ever since…
I had also tried installing Windows 10 on the type P, but it was far too sluggish to be practical.
Still, letting it collect dust felt like a waste, so I decided to try making it actually usable.
Here are the specs:
| CPU | Intel Atom Z520 1.33 GHz |
| RAM | 2GB |
| SSD | 64GB |
| Display Resolution | 1600×768 |
First off, the CPU is the real bottleneck. As I mentioned in a post on my old Blogger site,
the Atom Z520’s PassMark score is a whopping 215 points — an astonishingly low number.
*As of 2023, it scores 122 points. For reference, my main rig’s Ryzen 9 7950X scores 63,462 points.
The desktop PC my father used when I was a kid (Pentium 4 2.4GHz) scored 264 points. That’s a CPU from 2002. To put it another way, the Atom Z520 is roughly Pentium III-level.
As you can probably tell, this is an extremely underpowered CPU…
And yet, back in the day, Sony shipped this thing with Vista pre-installed. Wild, right?
Anyway, back to the main topic: the challenge here is to take this ultra-low-spec PC and somehow make it usable. That’s the goal of this article.
So, the OS I chose for this project is…
Windows 7 Starter (ta-da!)
That’s right — it’s the Windows 7 edition that everyone has been mocking for ages. You all called it a black mark on history, remember?
But let’s take a look at Windows RT, which Microsoft released in 2016:
– Cannot run x86/x64 programs
– Half-baked update support
– Only a handful of Windows Store apps available
Now, let’s revisit Windows 7 Starter with that in mind.
See? It’s not so bad after all. Apart from the 2 GB RAM limit, it works just fine for everything else.
*Aero is disabled and unnecessary applications have been stripped out. But that actually helps with performance, so let’s count it as a plus.
*I know comparing an ARM-based OS to this might draw some criticism, so just to be clear — this comparison is meant as a lighthearted aside. Please take it with a grain of salt.
*Some people claim that “Starter limits you to three concurrent apps — deal-breaker!” but that restriction was actually lifted. So currently, there are no critical limitations. And even for things like wallpaper customization, community-made freeware has you covered.
With that said, let’s install Windows 7 Starter on the type P.
What You’ll Need
– Windows 7 32-bit ISO (any edition is fine)
– USB flash drive
– A USB drive with a Windows XP install disc image (only needed if you swapped to an SSD via a ZIF-to-mSATA adapter)
– Patience and determination
– Rufus
– For drivers, please refer to the Windowsroom8 guide: Clean-Installing Windows 8 on a VAIO Type P
Procedure
1. Burn the Windows 7 ISO to a USB Drive
If you’re tinkering with a type P, you probably don’t need me to explain this — but just in case, here are the steps.
Plug in your USB drive and launch the Rufus tool you downloaded.
Load the Windows 7 ISO into Rufus (drag and drop works).
Verify the settings and click “Start.”
Then just wait until it says “Ready.”
2. Enable All Edition Selection
Once the USB write is complete, open the USB drive.
Navigate to “Windows\sources” and delete the “ei.cfg” file.
That’s it — all Windows 7 editions are now selectable during installation.
3. Format the SSD Using a Windows XP Install Disc (ZIF-to-mSATA adapter users only)
Please refer to my old blog post for details on this step.
4. Install Windows 7 Starter
Plug in the USB drive and boot from it.
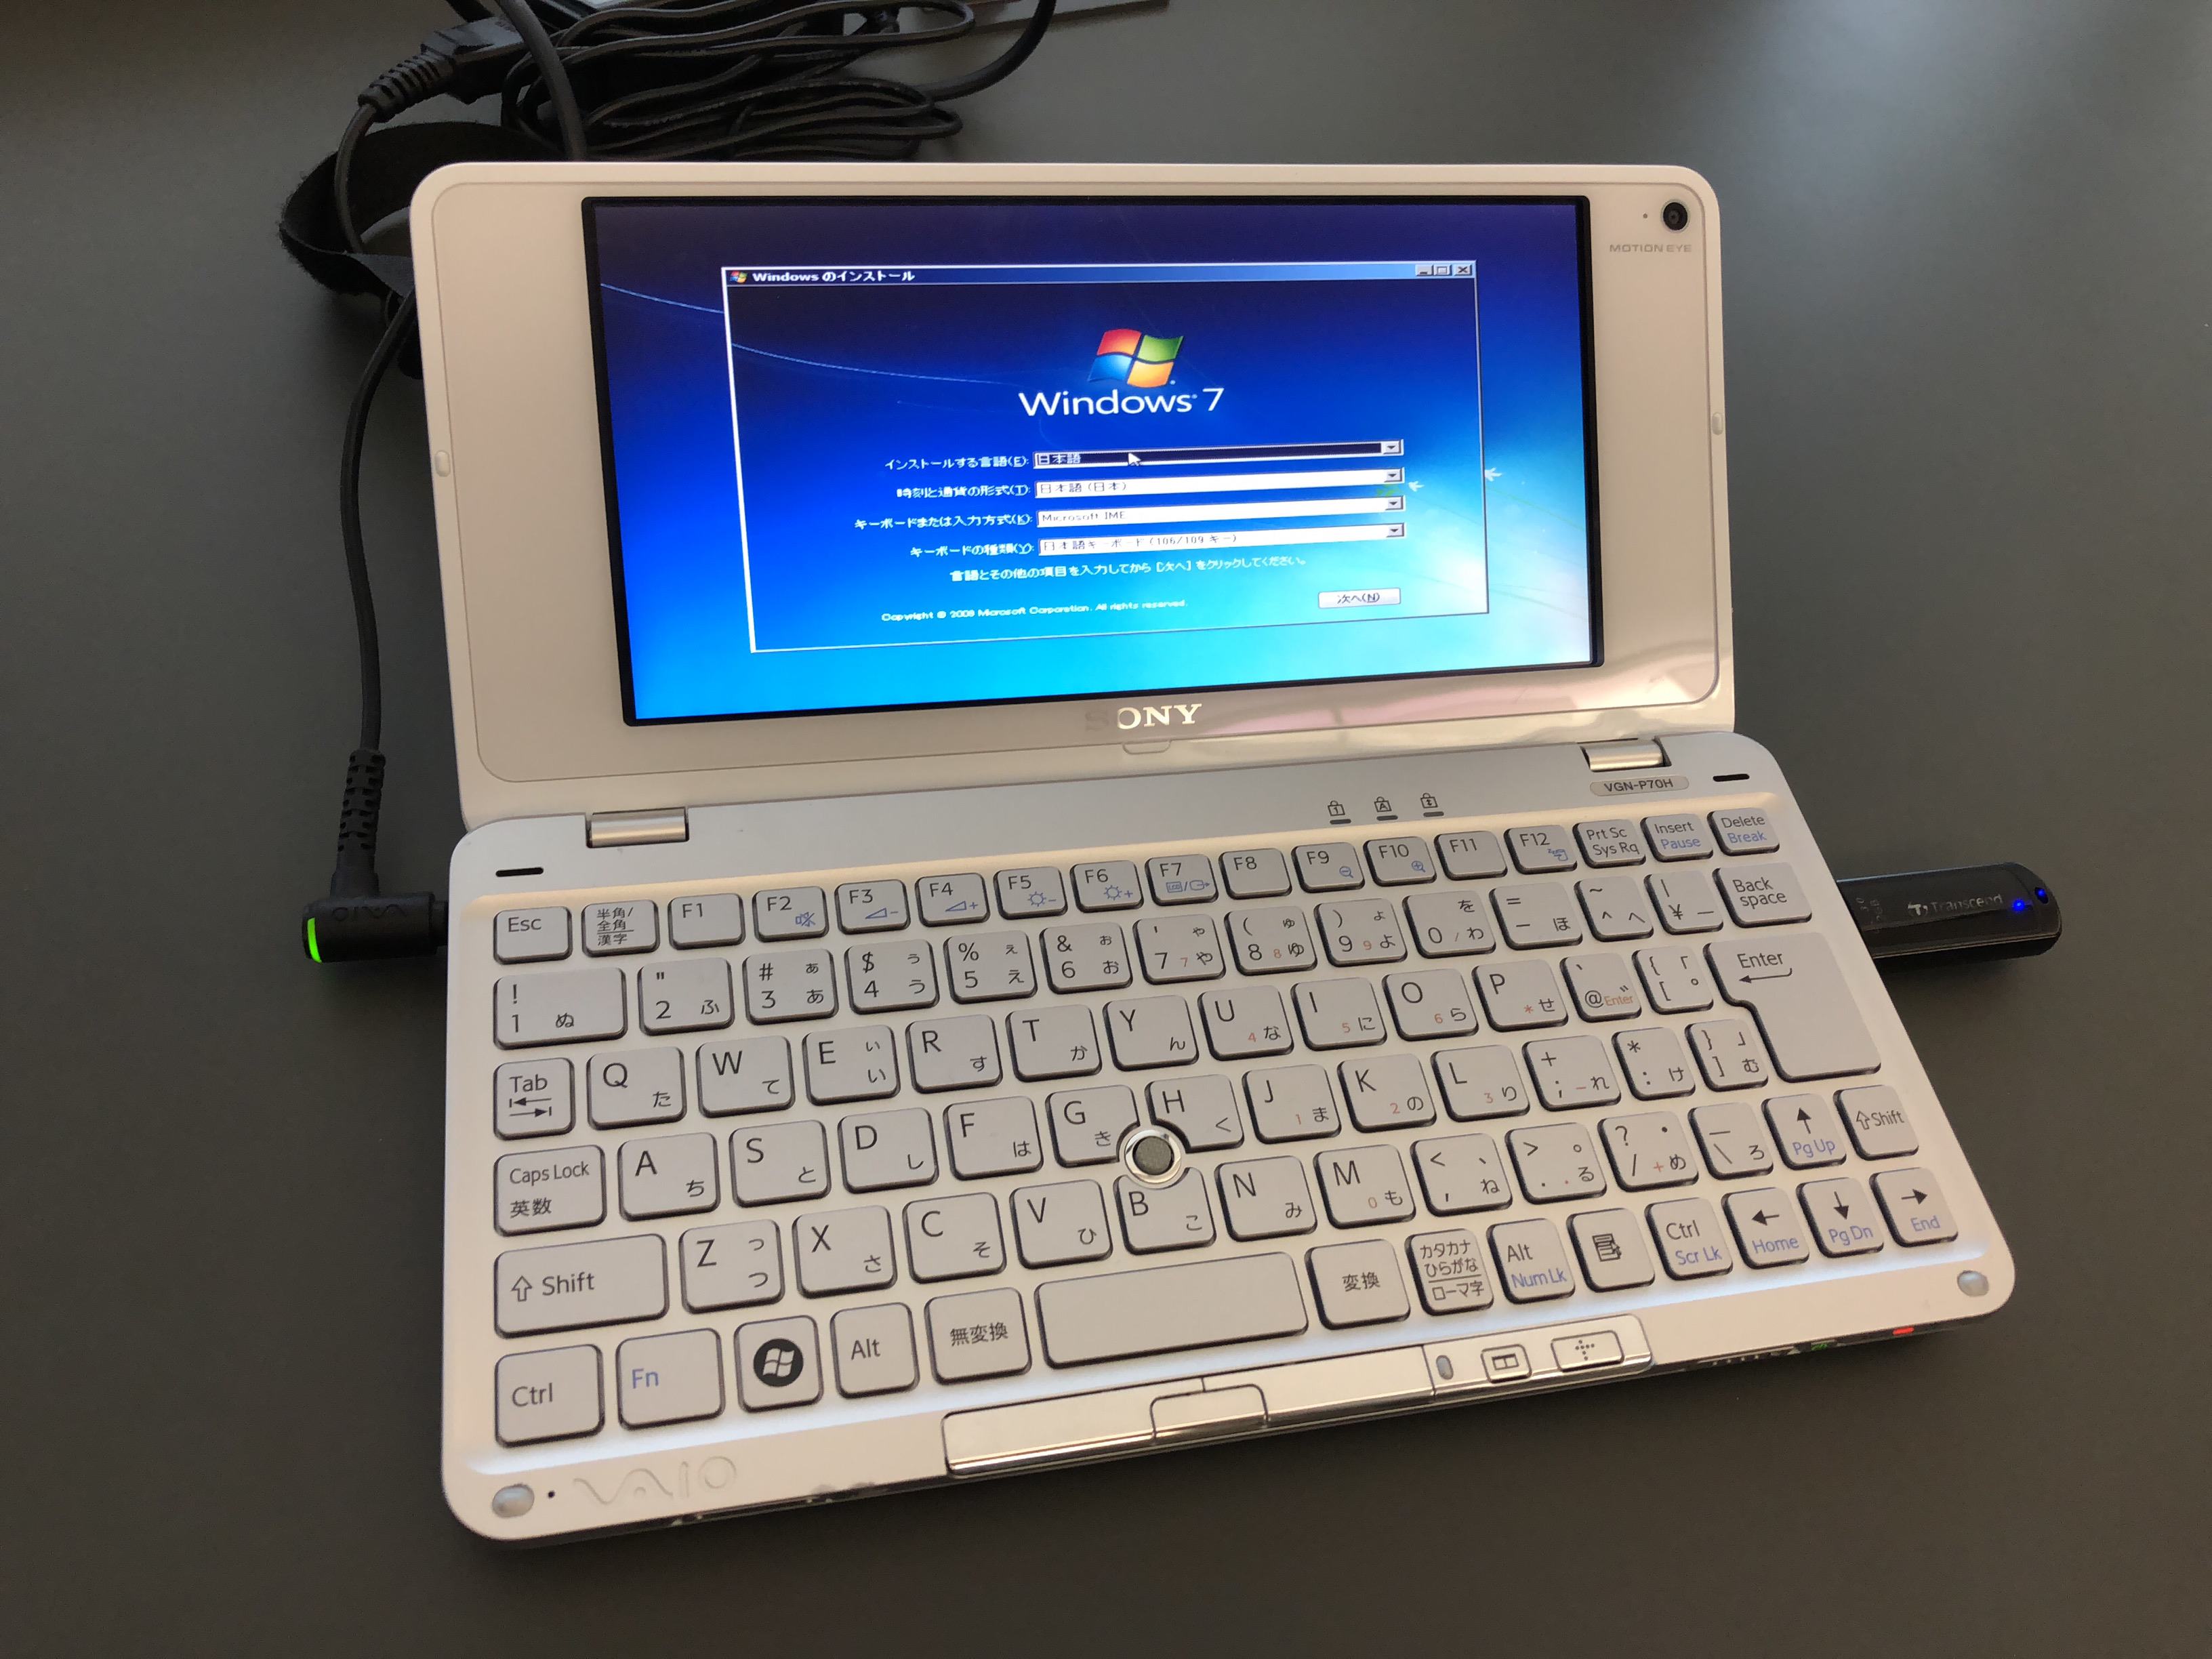
From here, just proceed with the standard Windows 7 installation process.
Make sure to select the Starter edition when prompted.
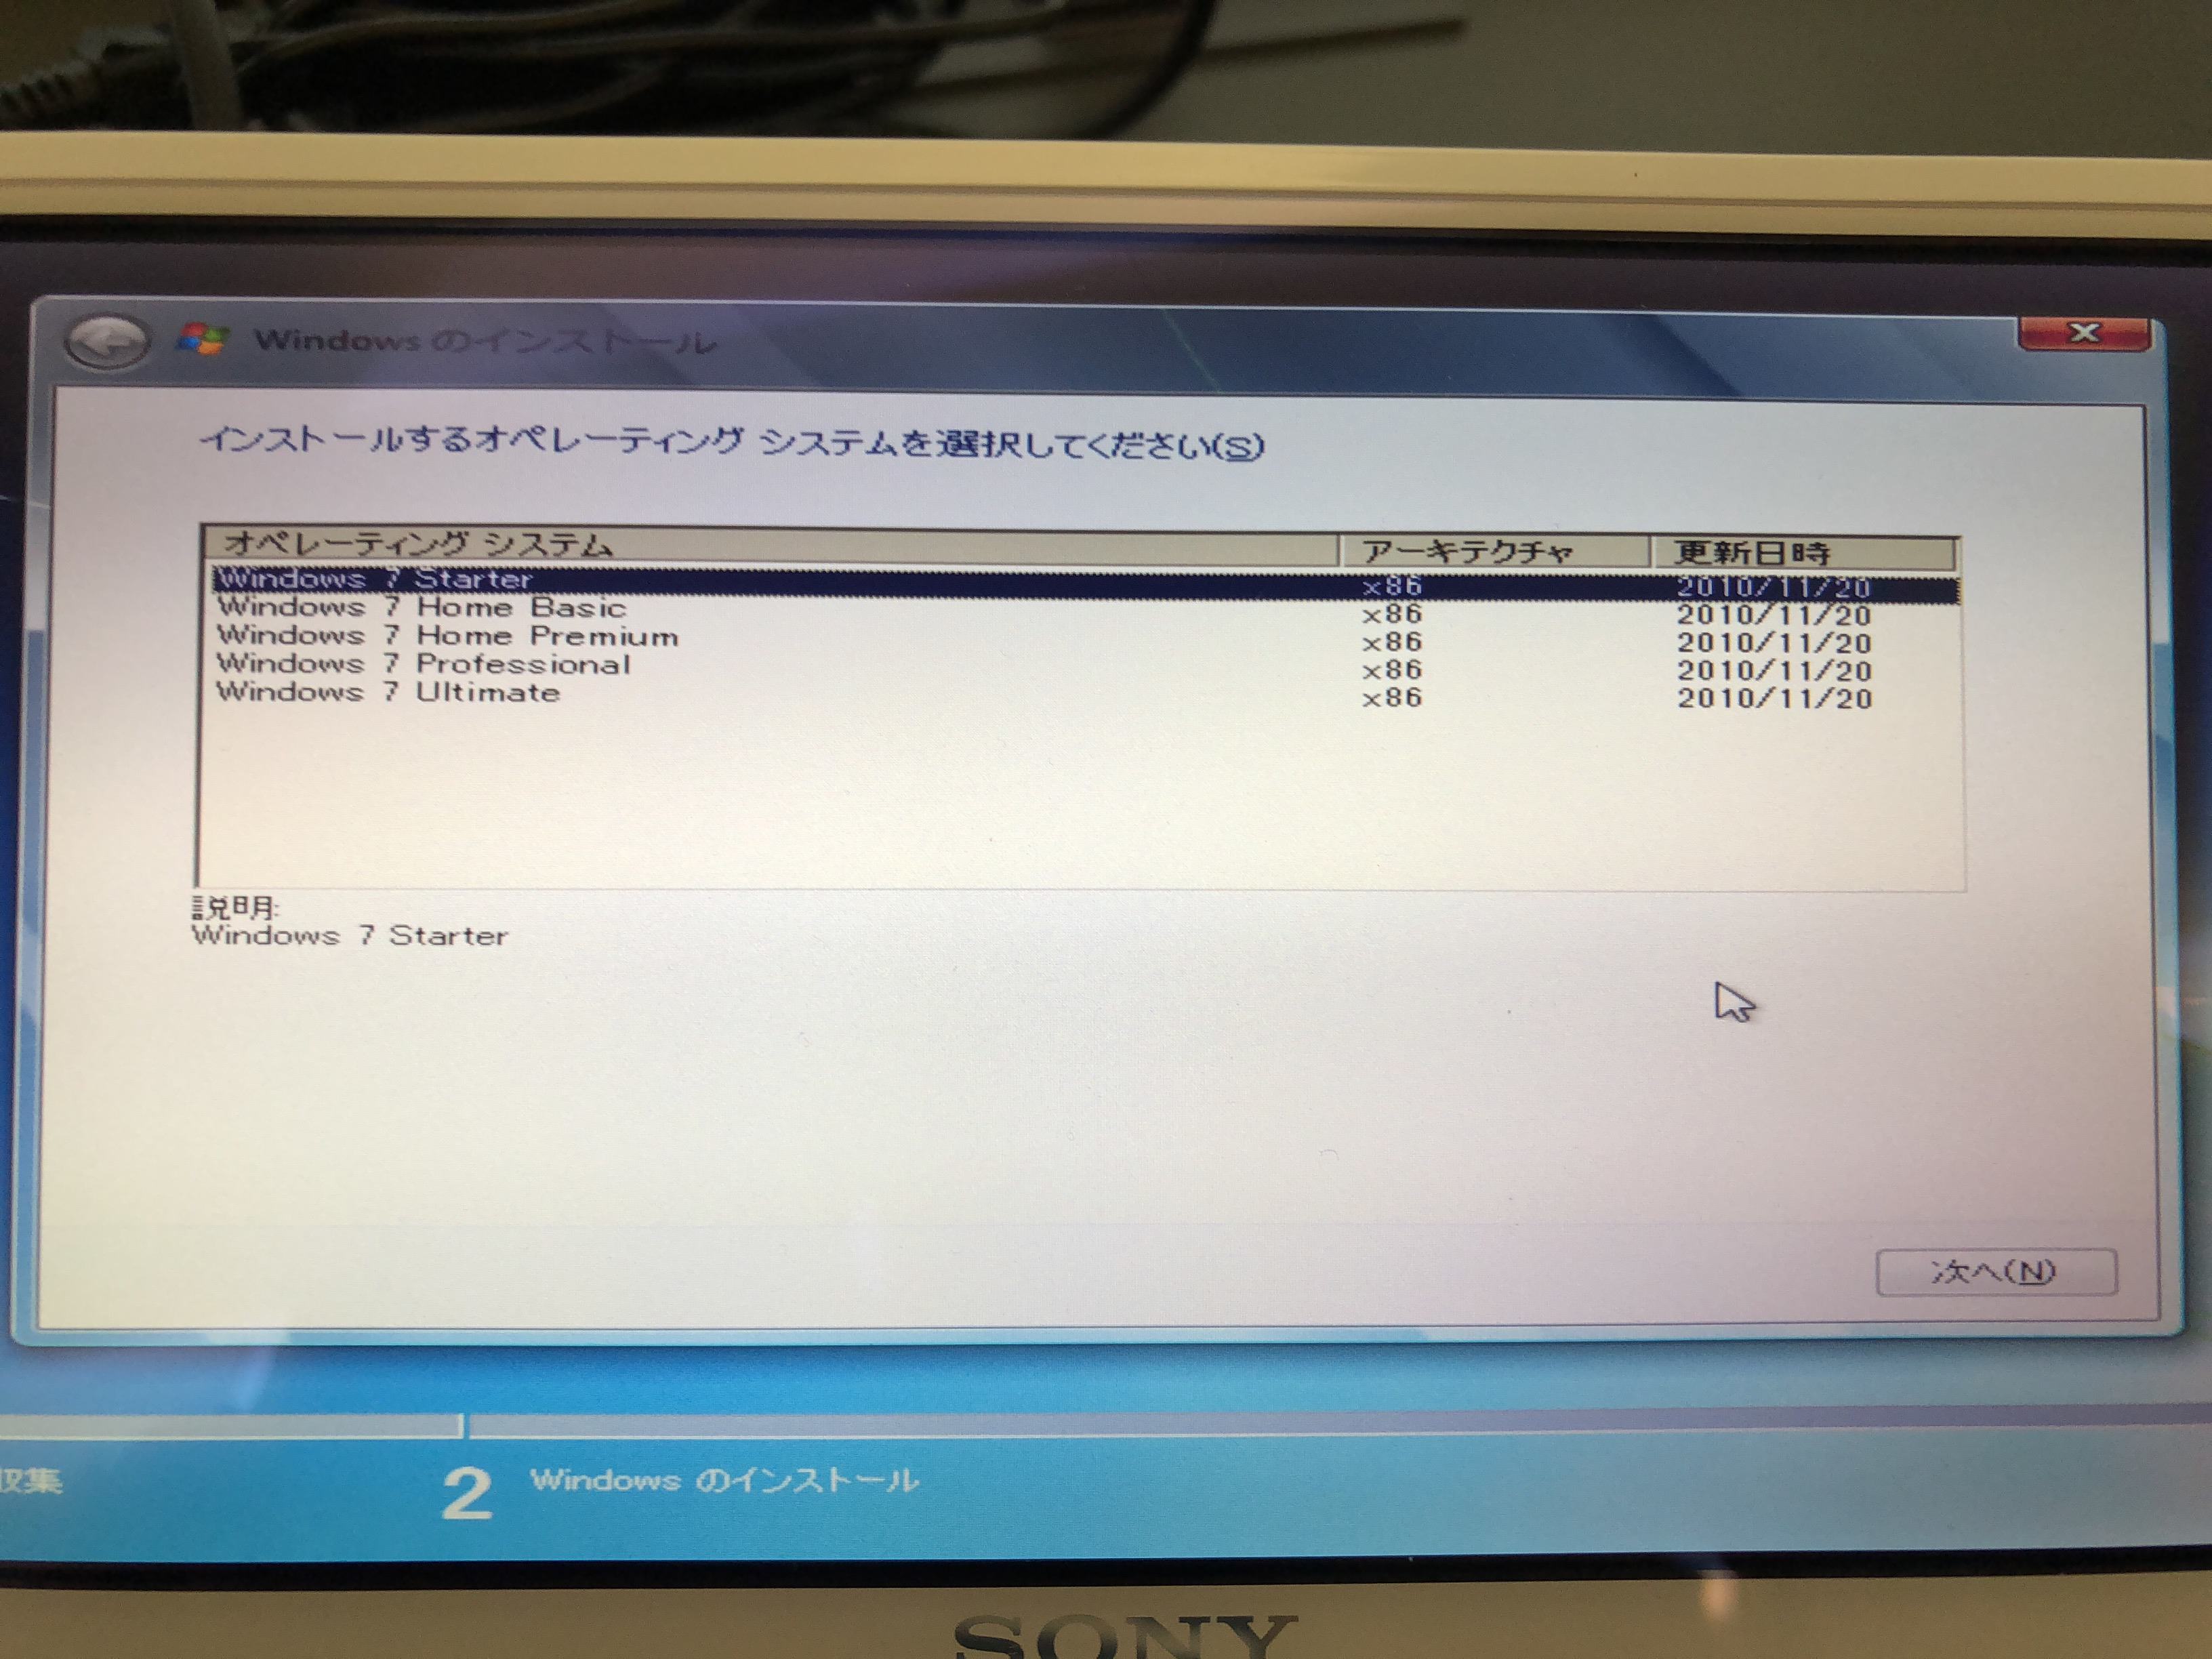
When asked for a product key, enter the key for the edition you had before removing ei.cfg.
5. Setup and License Activation
Once you reach the setup screen, disable TRIM first.
Press “Shift + F10” to open the Command Prompt.
Enter the following command:
fsutil behavior set DisableDeleteNotify 1
If it displays “DisableDeleteNotify = 1,” then TRIM has been successfully disabled.
For the rest of the setup, just follow the wizard’s prompts as usual.
Now, about license activation — this is the trickiest part.
Technically, there’s no retail (non-OEM) license for the Starter edition anywhere in the world.
However, for some reason, the product key from the edition you had before removing ei.cfg will pass activation just fine.
It’s a genuine mystery, but since it goes through Microsoft’s official activation servers without any third-party tools, it should be fine. (Though it might be a gray area terms-wise.)
6. Install the Drivers
Modern Windows is pretty good at finding drivers automatically, so you’ll likely see very few unknown devices in Device Manager.
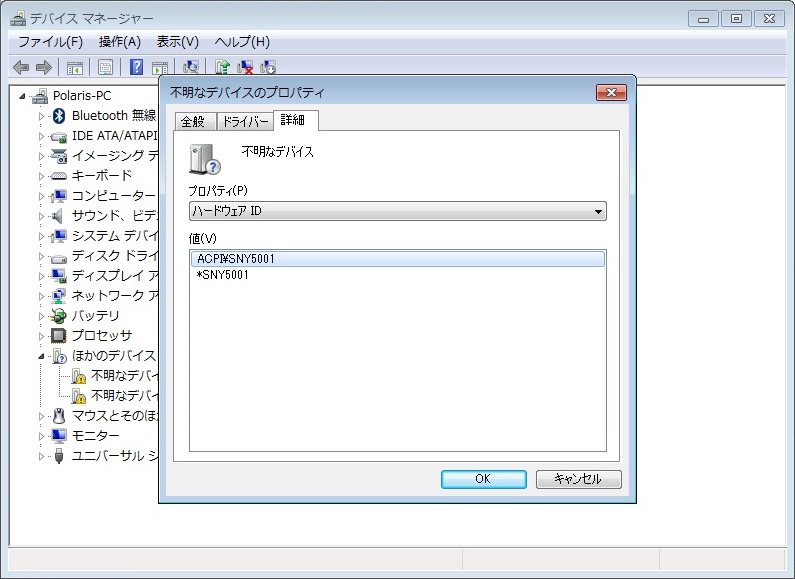
Once the driver installation is done, you’re all set.
Good work!
Final Thoughts
After using it for a bit, don’t you think “Starter is actually fine”?
With Aero disabled and unnecessary apps stripped out, the system feels surprisingly snappy.
We all bashed this edition relentlessly, but for an underpowered netbook, it’s genuinely more than enough.
Windows XP also had a Starter edition, and for low-spec PCs, it might have been a solid choice too.
You might wonder if Windows 10 has a similar feature-limited edition — it doesn’t.
In an era where budget Atom (Celeron N) chips match or exceed Core 2 Duo performance, high-performance SoCs like Snapdragon exist, and eMMC, UFS, and SSDs are all affordable, there’s simply no need for such an edition anymore.
Anyway, that’s enough rambling for today. I’ll wrap it up here.
Next time, I’m planning to write about pushing Windows 7 Starter’s performance to its absolute limits. Stay tuned!


Leave a Reply