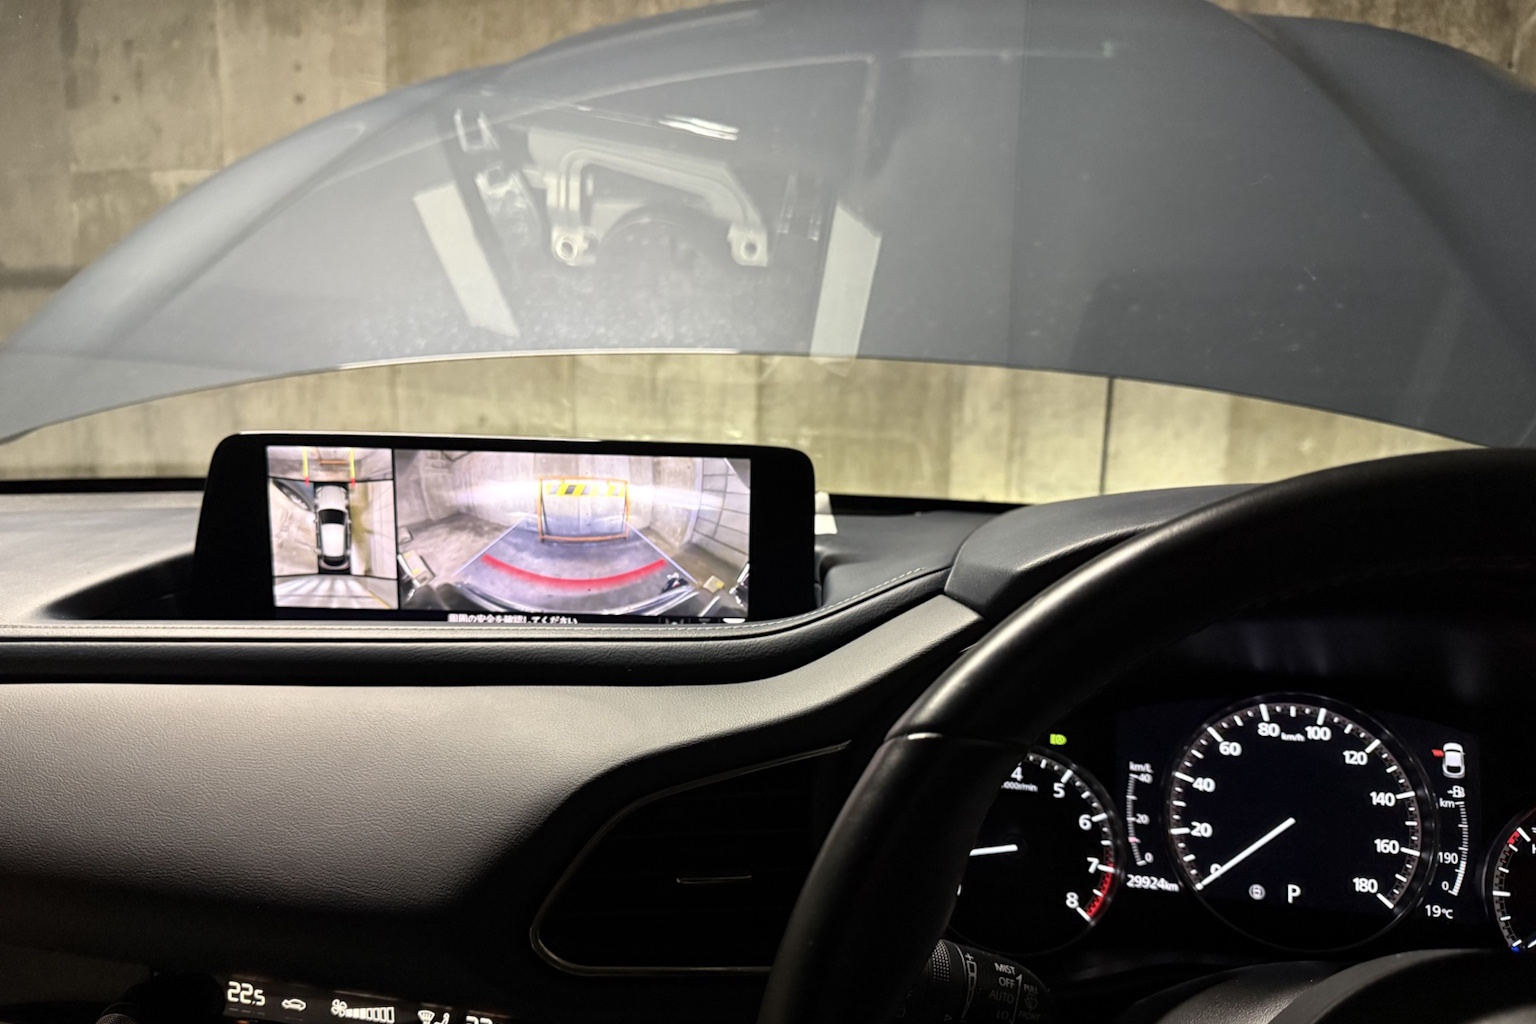
Hello, I’m Shichinomiya (@shichinomiya_s).
This is my first article about cars.
This guide will show you “How to upgrade the Mazda Connect display from 8.8 inches to 10.25 inches on a CX-30.”
Since it’s a sibling vehicle(?), the same procedure should work for the Mazda 3 as well.
Background
The number one complaint about my CX-30 was the screen size.
Currently, I drive a Mazda CX-30, a compact SUV.
While I’ve had complaints about poor visibility, terrible city fuel economy (gasoline model), and less cargo space than expected,
the biggest complaint was “the navigation screen is too small.”
This 2019 model came equipped with an 8.8-inch display audio system.
At the time, only Tesla and a few others offered large screens, so it might have been acceptable, but as navigation screens have gotten larger in many vehicles over the years, the 8.8-inch screen started feeling a bit small.
With the 2023 annual update introducing a 10.25-inch model, I thought, “Maybe I could swap it out for a 10.25-inch screen?” That’s what led to this project.
The Journey to Find a 10.25-inch Monitor
The CX-30 has grades that include “Driver Monitoring” functionality.
Because the monitoring sensor is mounted on the side of the monitor, there are two different part numbers:
DMTR-611J0 (with Driver Monitoring – Right-hand drive)
DMTP-611J0 (without Driver Monitoring – Right-hand drive)
I purchased the “DMTP-611J0” this time.
My vehicle is a 2021 “PROACTIVE Touring Selection” grade, so this is a change from with monitoring → without monitoring.
*There was information that the cable connector for the driver monitoring sensor changed, making it incompatible. I had a source for this somewhere…
I purchased the 10.25-inch monitor on eBay. I monitored Yahoo Auctions for about six months, but nothing ever came up. (Few totaled vehicles?)
I recommend registering the part number on both eBay and Yahoo Auctions.

Purchase Cost Breakdown
The price is shown in the screenshot above, but here’s the breakdown of the purchase cost:
| Amount | Local Price | |
| Item + Shipping | ¥67,000 | (GBP 333.00) |
| Import Tax | ¥4,900 | |
| Total | ¥71,900 |
Looking at it this way, it’s expensive. The weak yen really hit hard…
I’ve seen it listed on eBay for around $199 at times, so it’s all about luck and timing.
Delivery Process
It shipped via FedEx International Economy. Surprisingly, it came from Peru. I’d understand if it came from the UK, but why from a left-hand drive country…

It arrived in exactly 7 days. Since I live in a FedEx direct delivery area, it should be a bit faster.
It arrived in a massive box, about 180 size. I regret not taking a photo…
<No image>
Installation
Now let’s install the 10.25-inch monitor.
Just to be safe, I disabled “Driver Monitoring.”
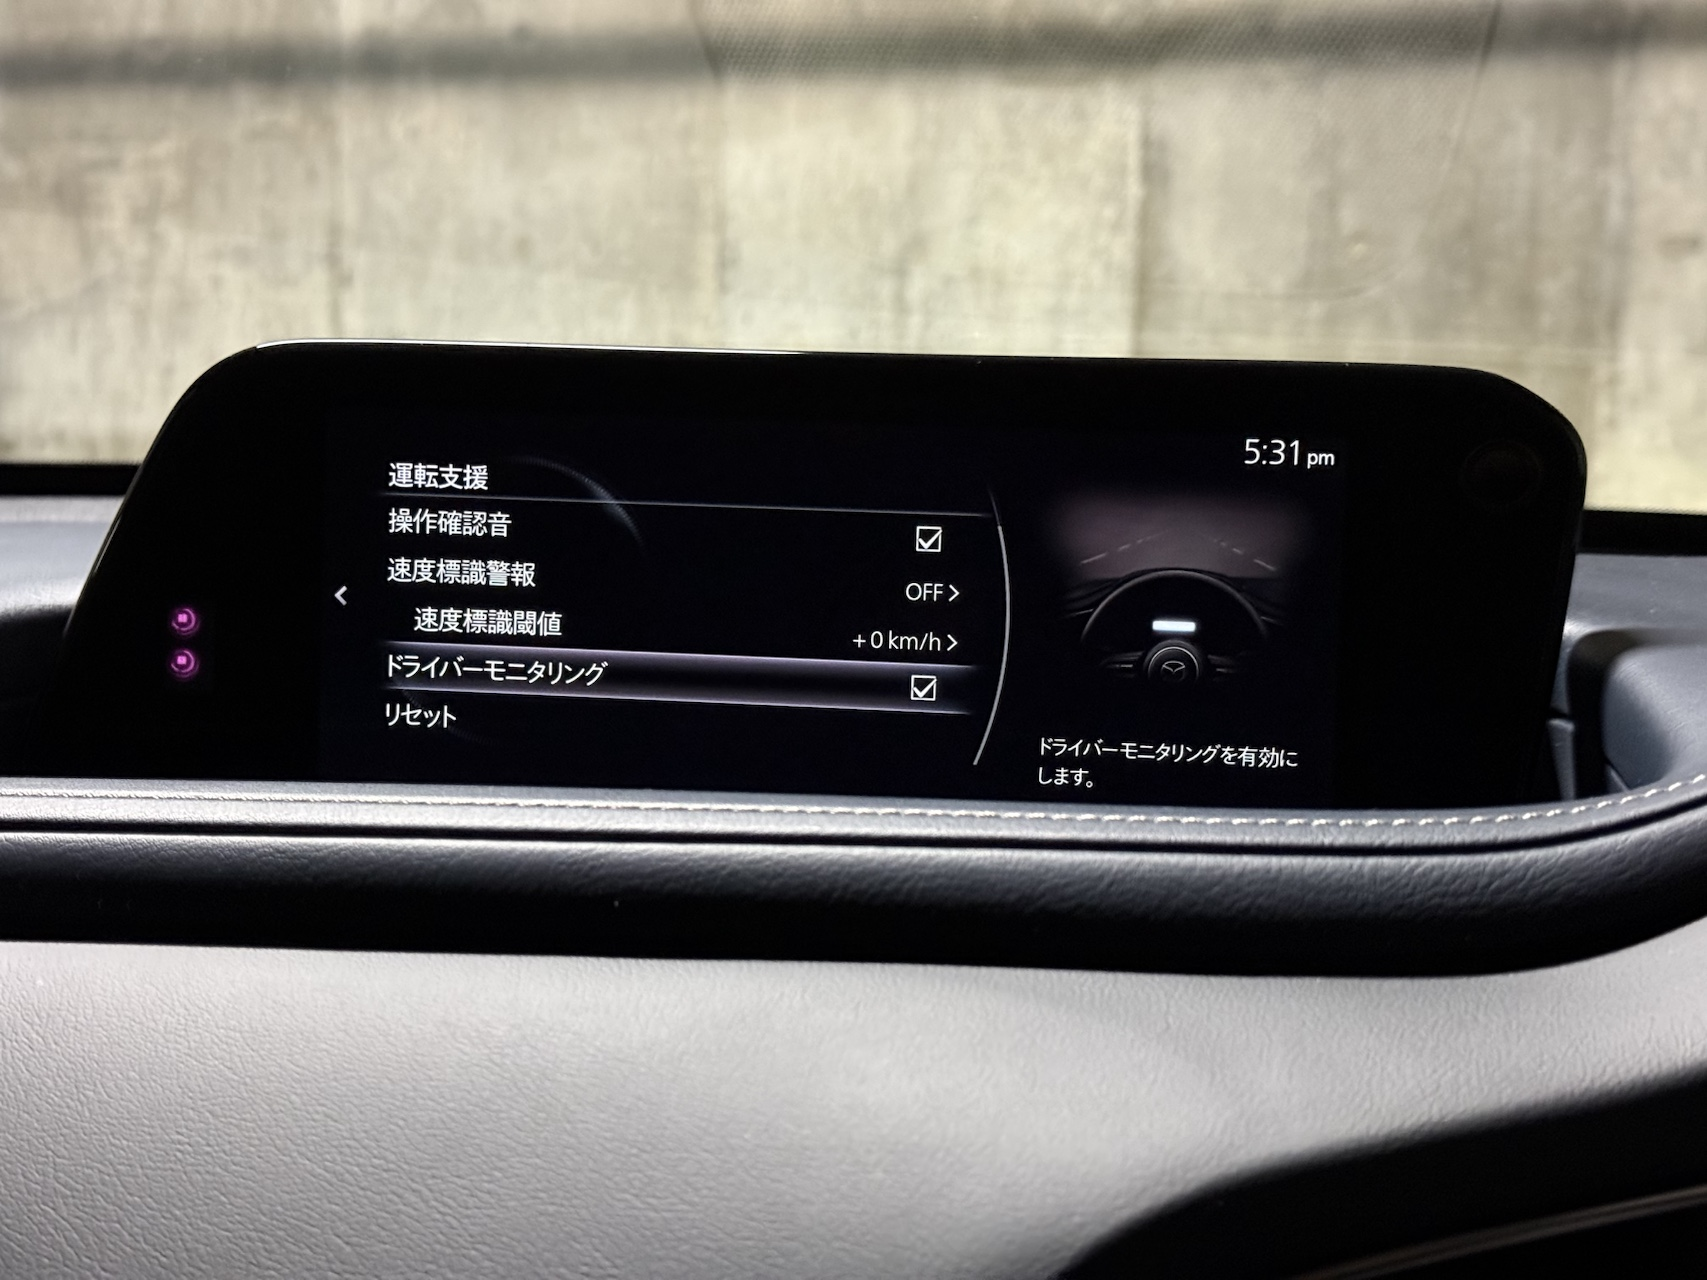
*I worked in my apartment’s underground parking garage, so it’s very dark and hard to see…
① Remove the battery negative terminal
Loosen the 10mm nut and remove the battery negative terminal.
To prevent current flow, insulate it properly once removed.
② Remove the panel behind the Mazda Connect
Remove the panel behind the Mazda Connect inside the car. Protect the sides with masking tape to prevent scratches.
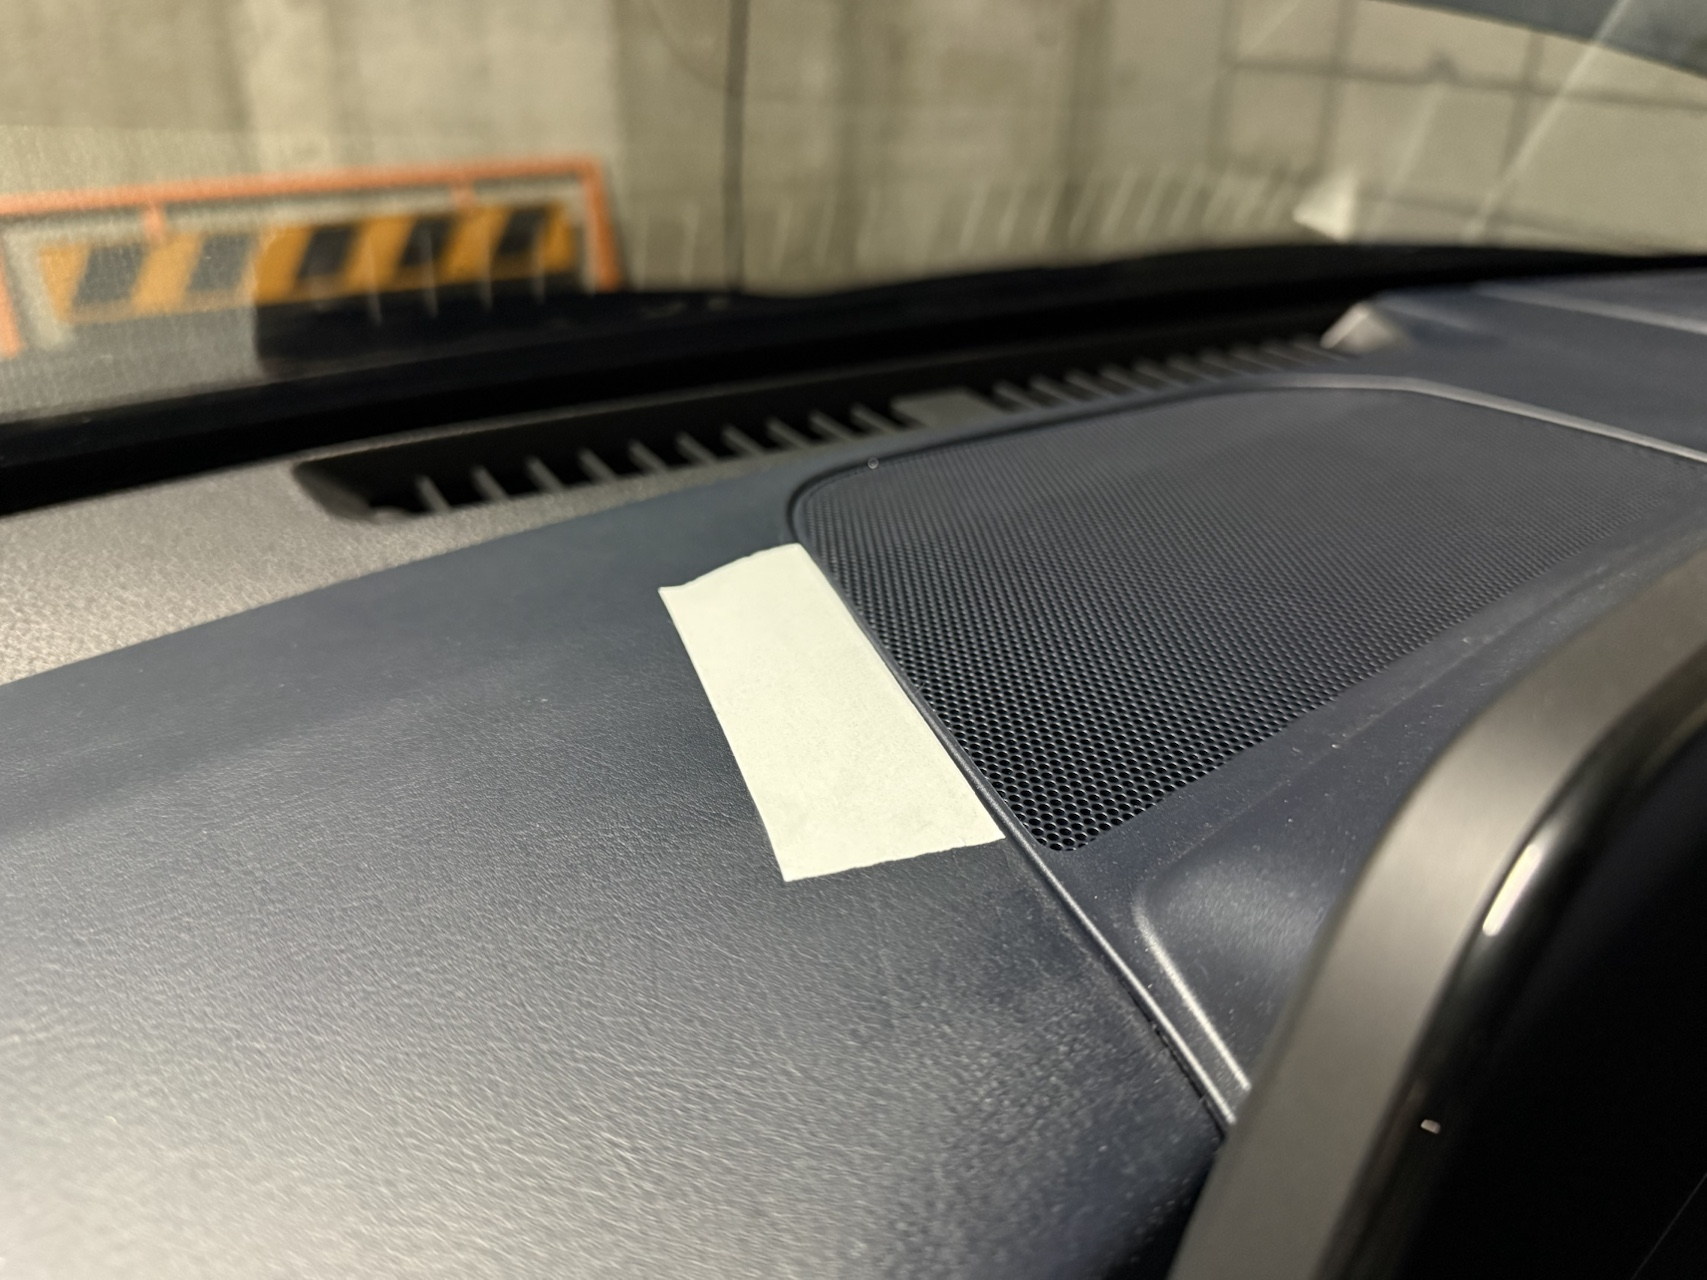
It can be easily removed using a trim removal tool as a lever.
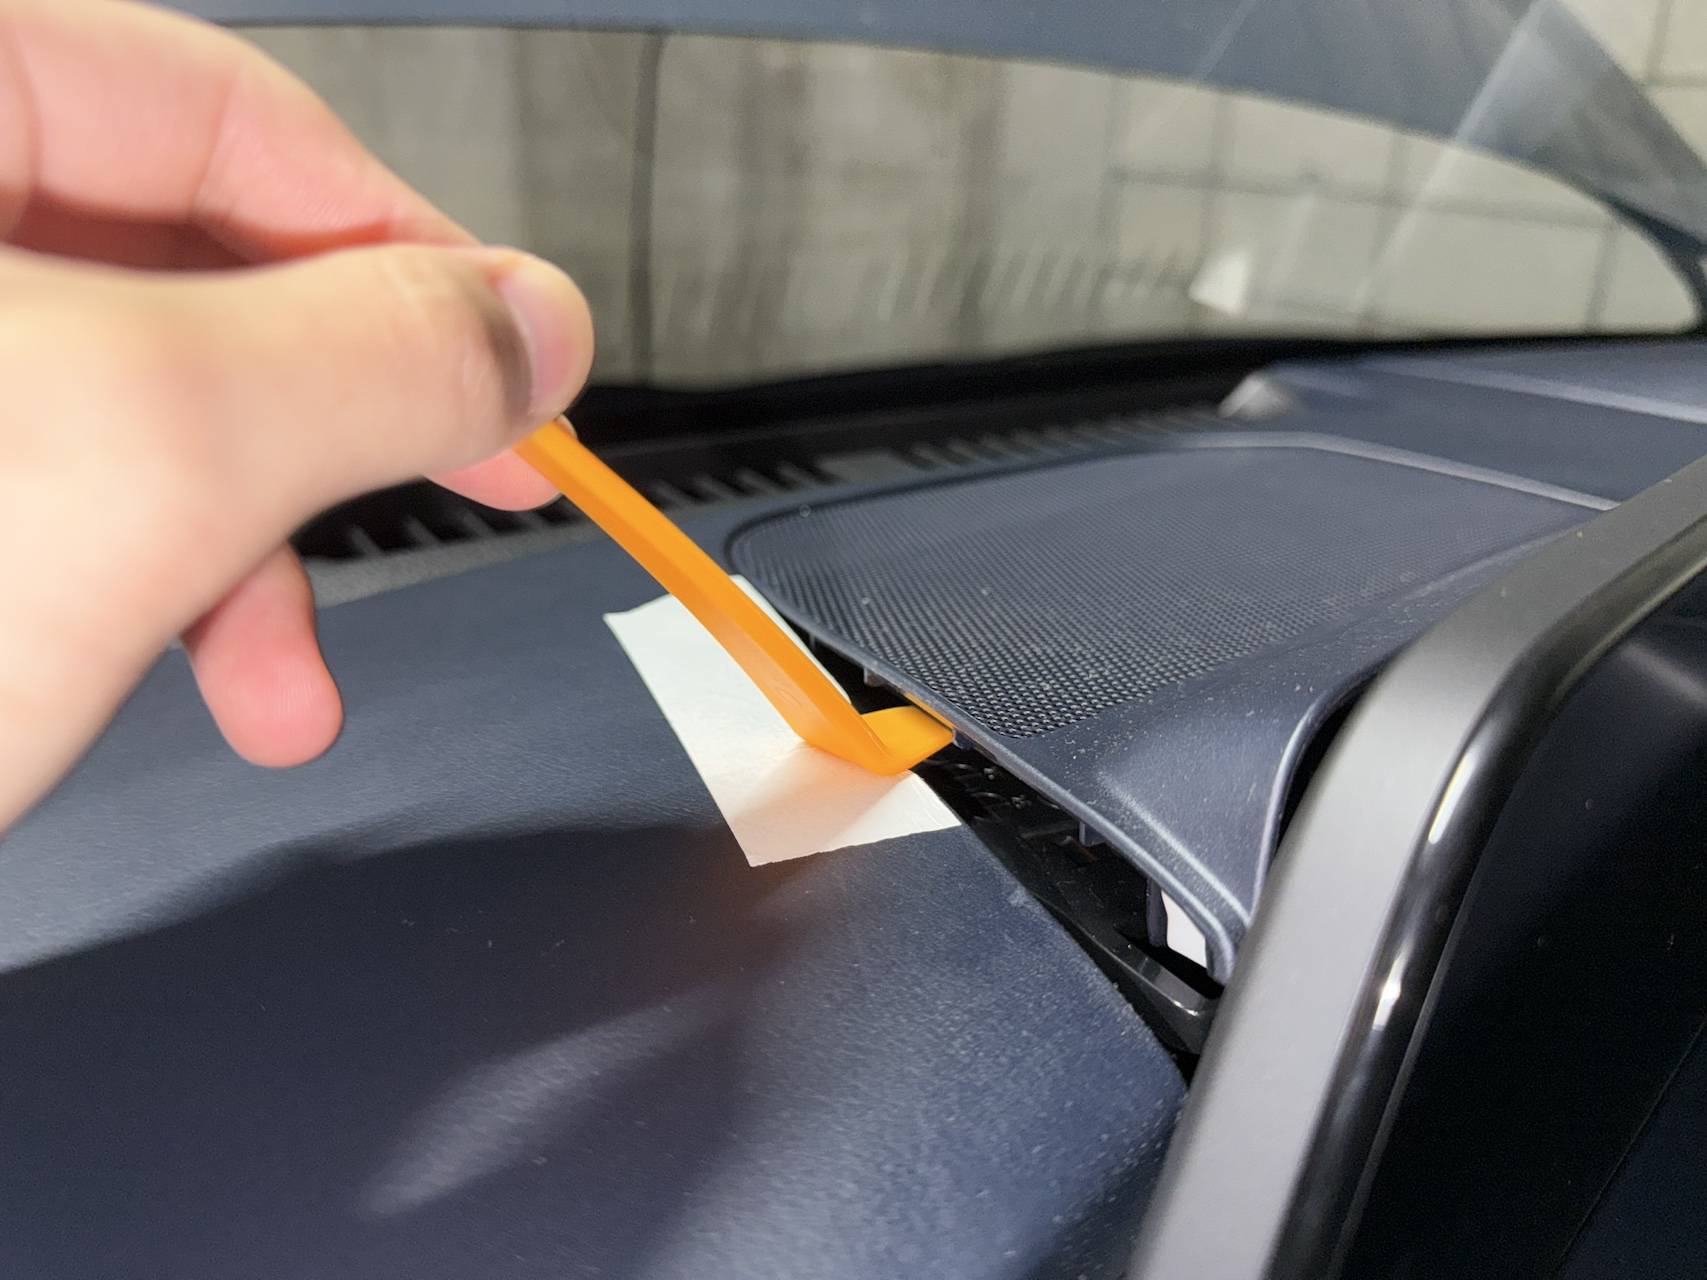
③ Remove two 10mm nuts
Once the panel is off, remove the two nuts securing the monitor.
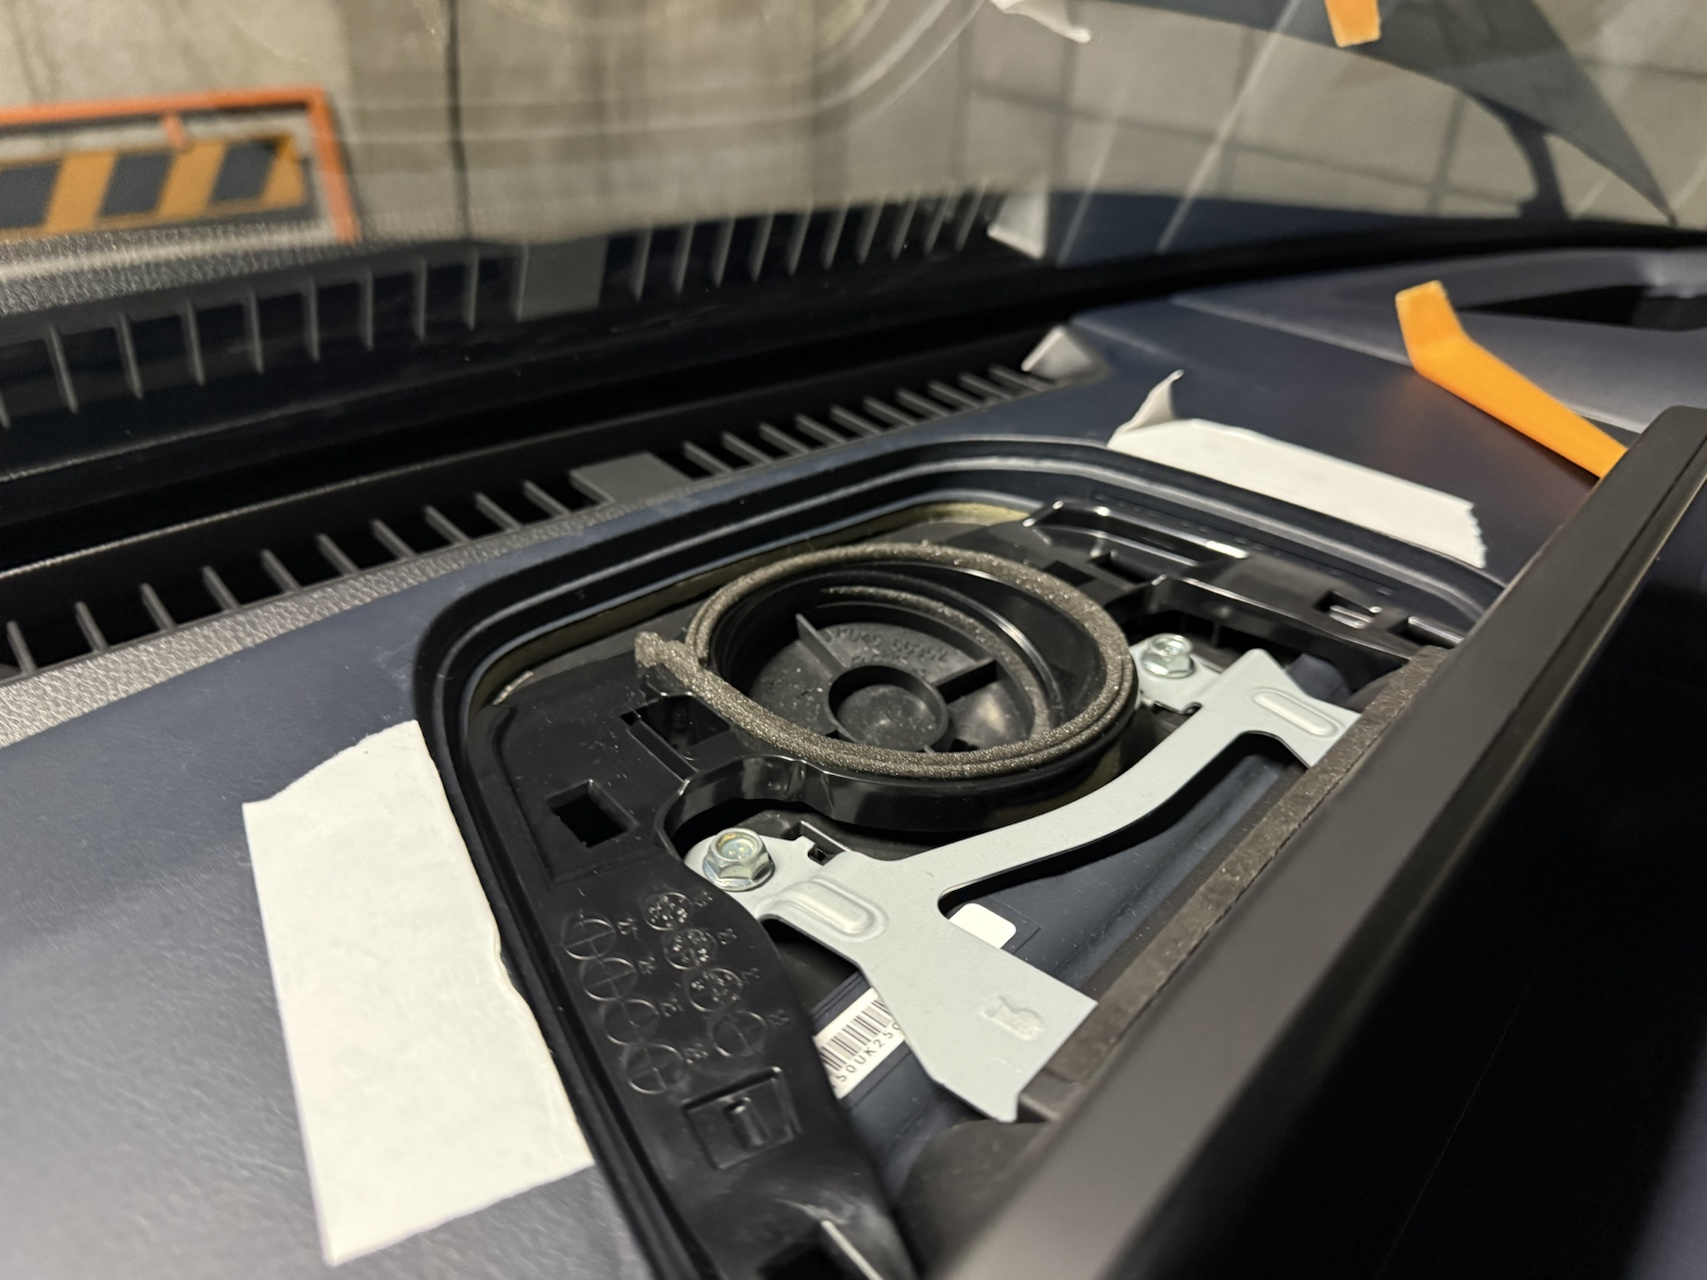
④ Pull the monitor upward to remove it
Pull it vertically upward and it will come off. Be careful not to break the windshield with too much force (lol)
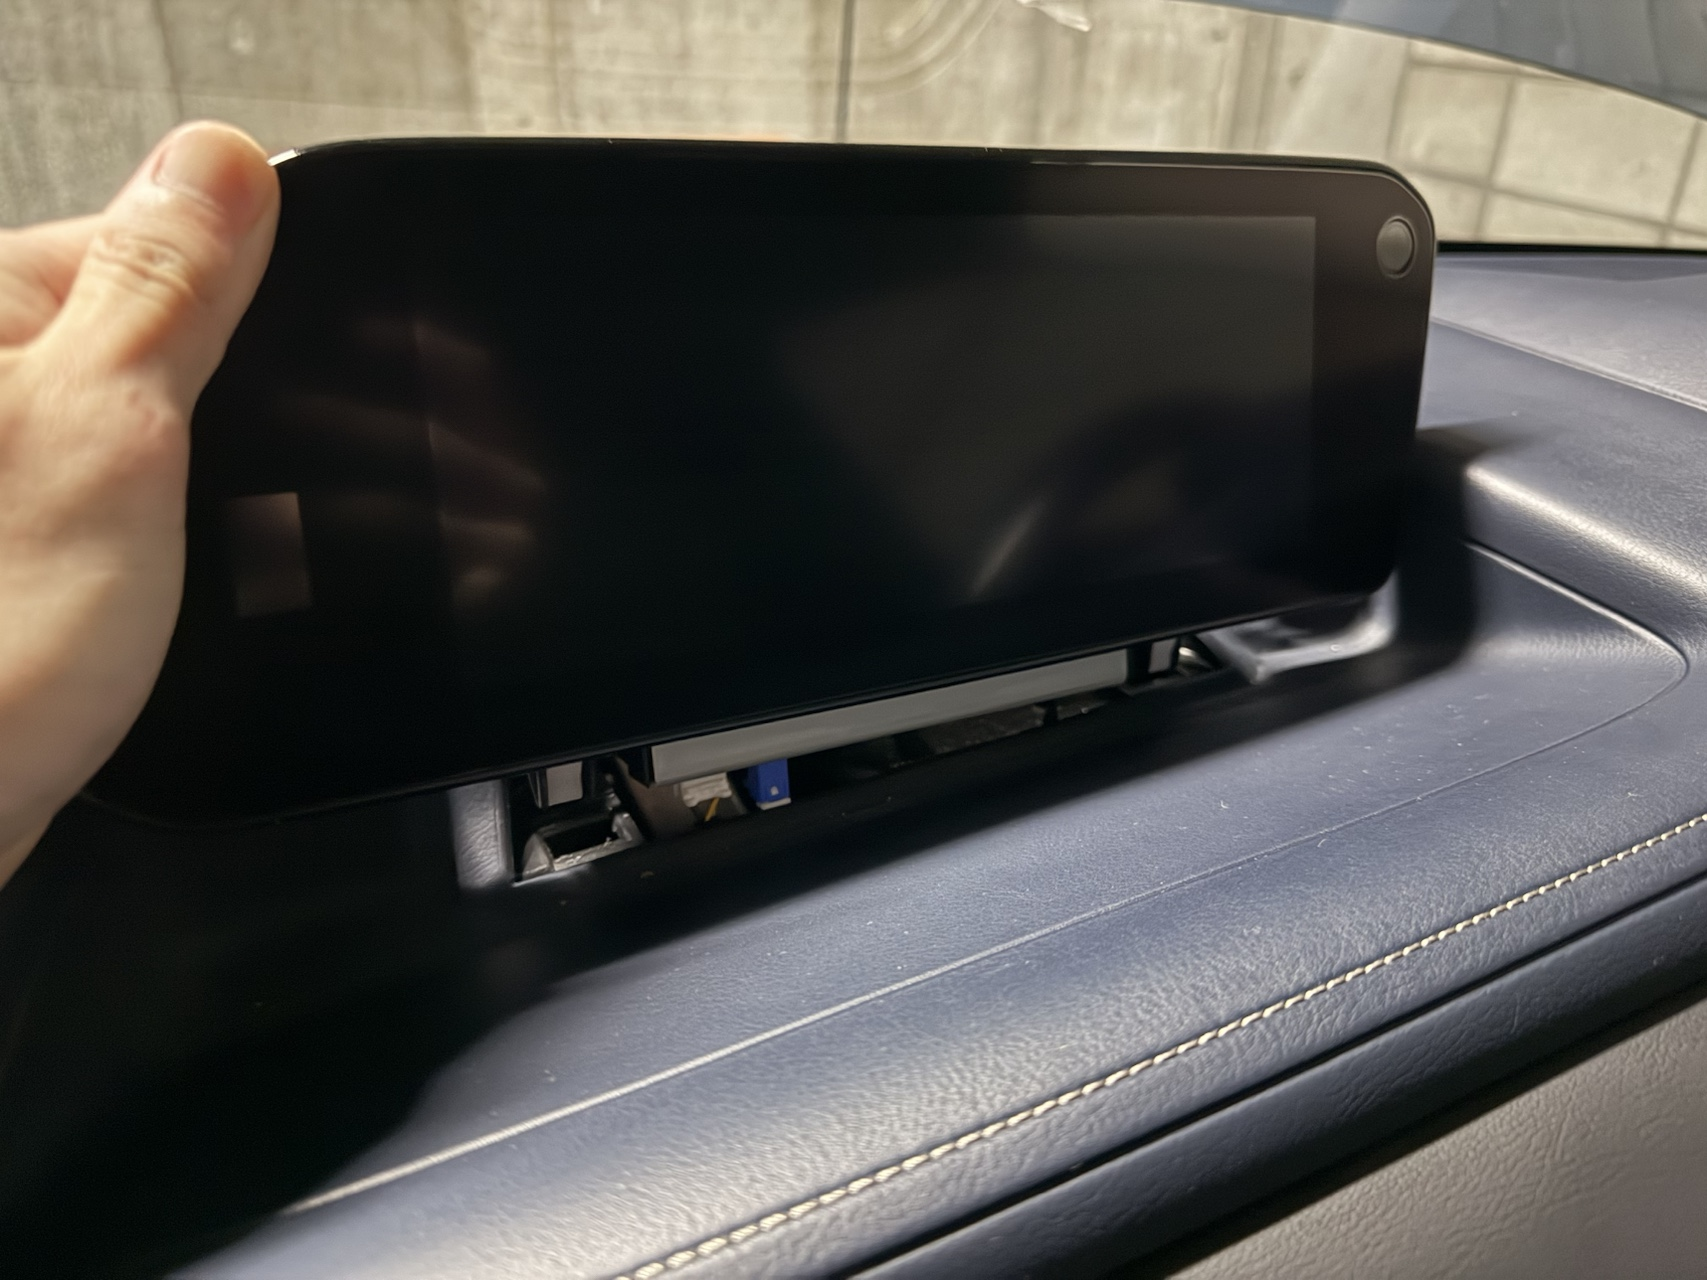
⑤ Disconnect the cables
If you have a model with driver monitoring, there are four cables, so disconnect them all.
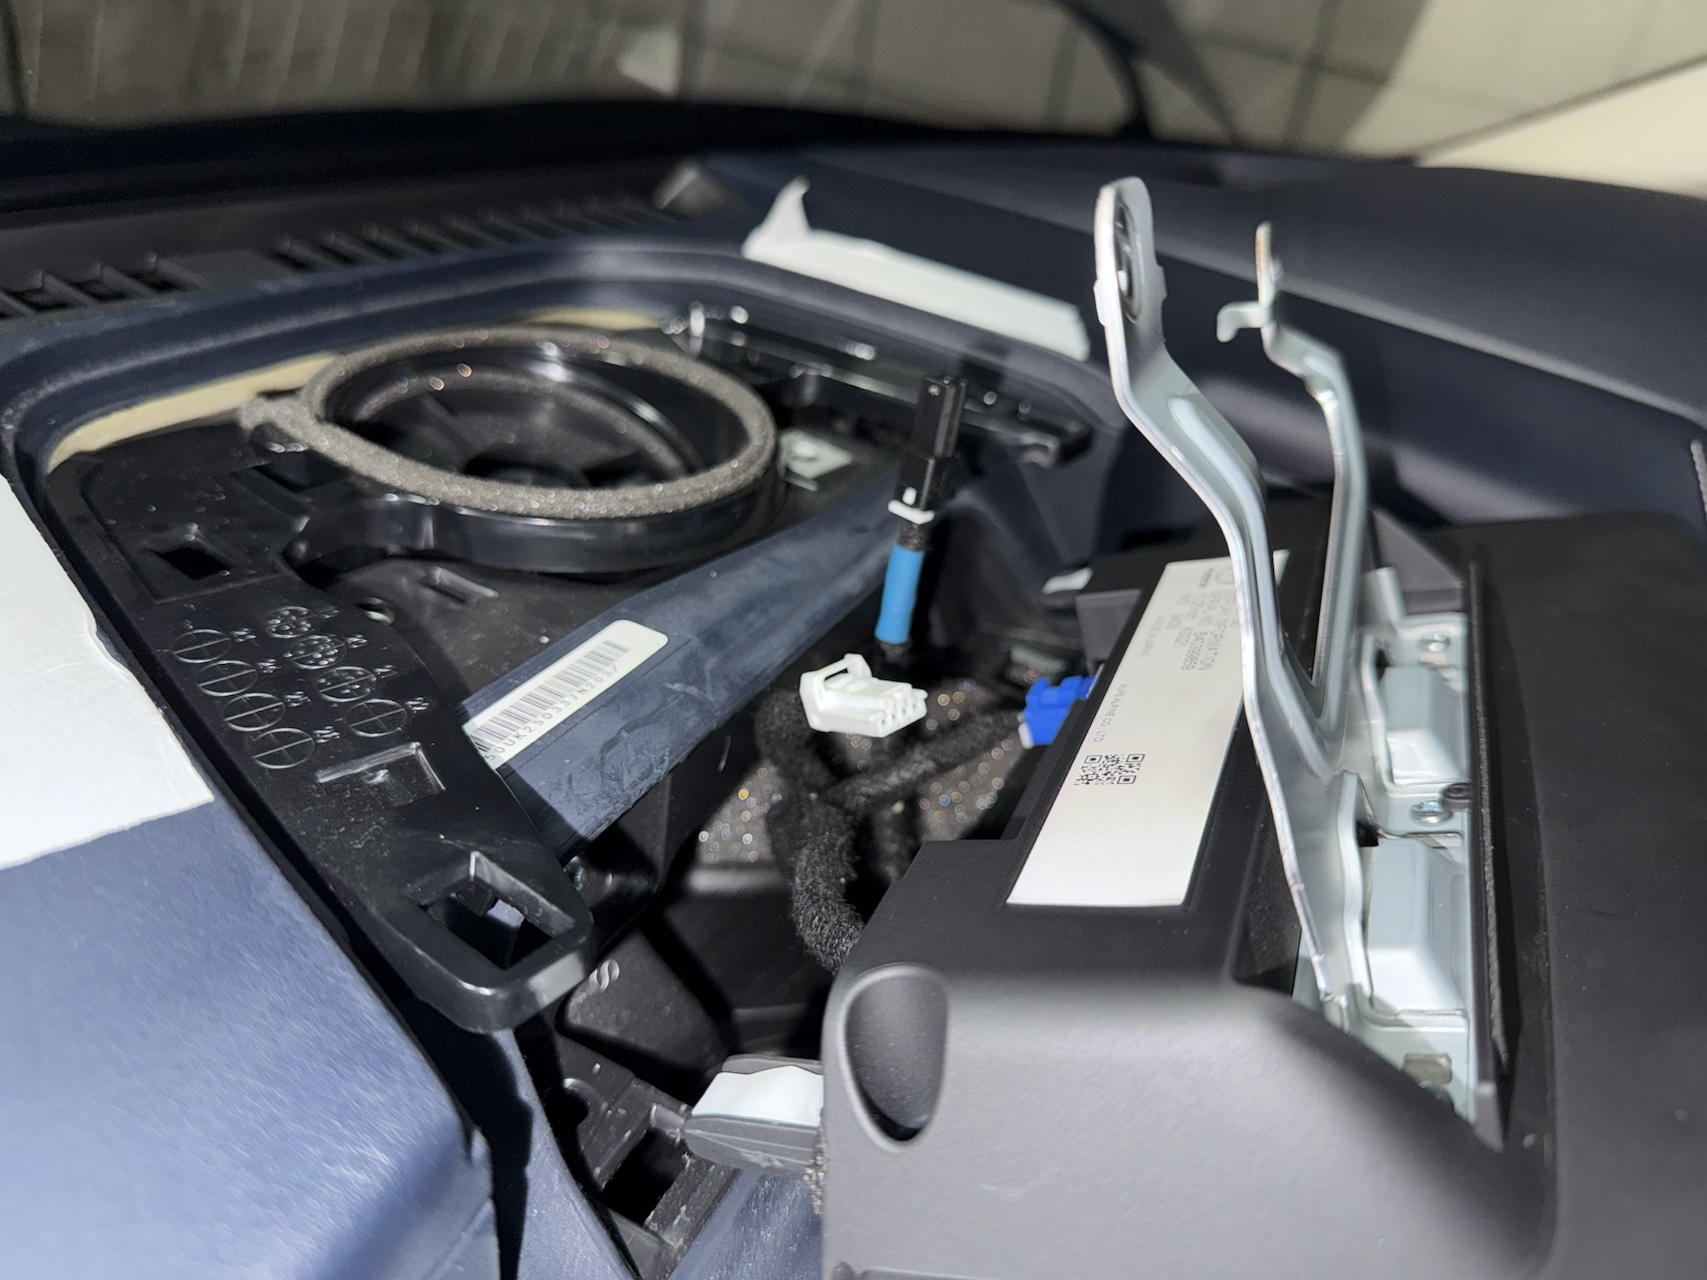
Two are already disconnected here, but this is what it looks like.
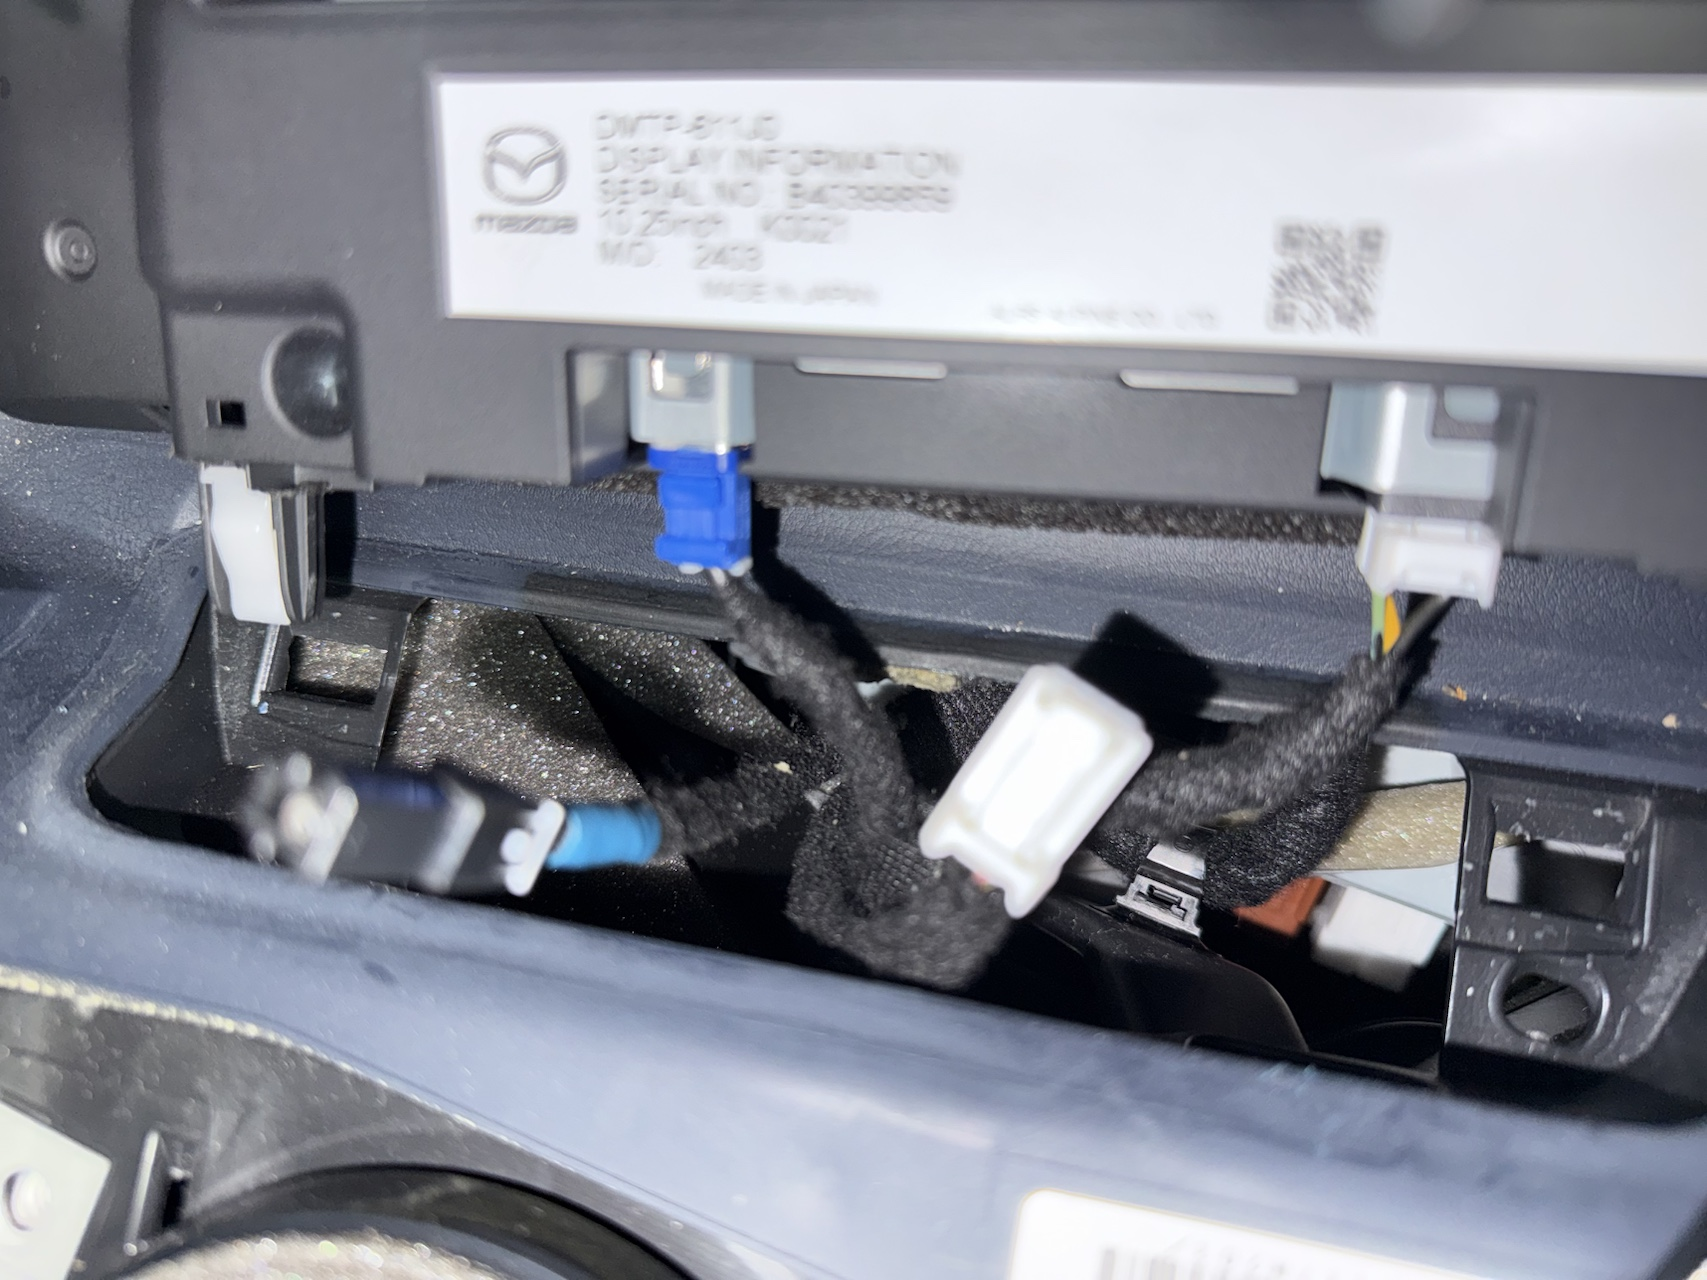
⑥ Connect cables to the new monitor
No image here, but monitors without driver monitoring only require two cables.
⑦ Reconnect the battery to restore power
Reconnect the negative terminal you removed and tighten the nut.
⑧ Start the engine and check operation
At this point, do a functionality check. If the Mazda Connect starts up normally without any issues, you’re good.
⑨ Insert the monitor from top to bottom
The red circled areas are clips that need to hook in before insertion.
If you don’t hook these in, the screws won’t tighten (lol)
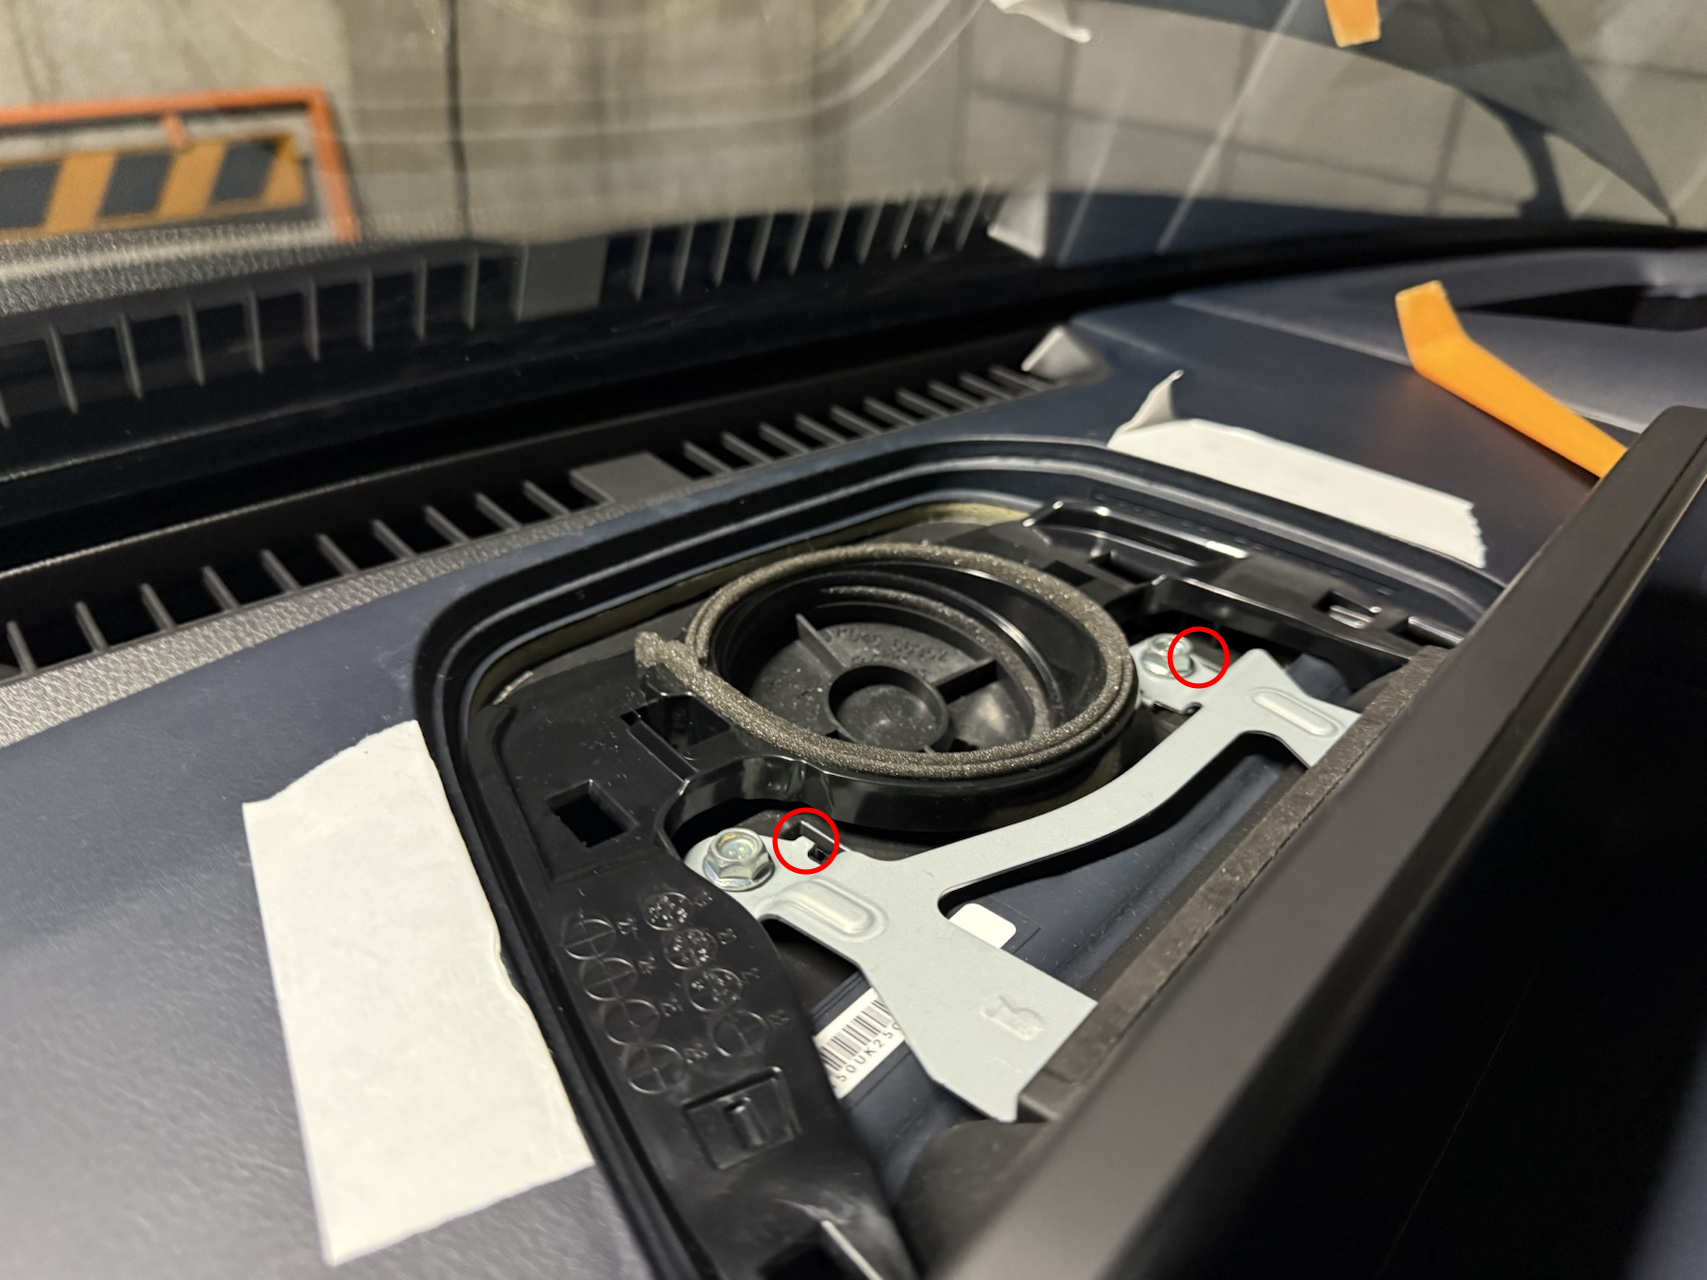
⑩ Install two 10mm nuts
Install the two nuts you removed.
*If the clips aren’t hooked in step ⑨, they won’t tighten.
⑪ Reinstall the panel behind the Mazda Connect
Just snap the panel back into place.
That completes the installation. Great work!
Operation Check
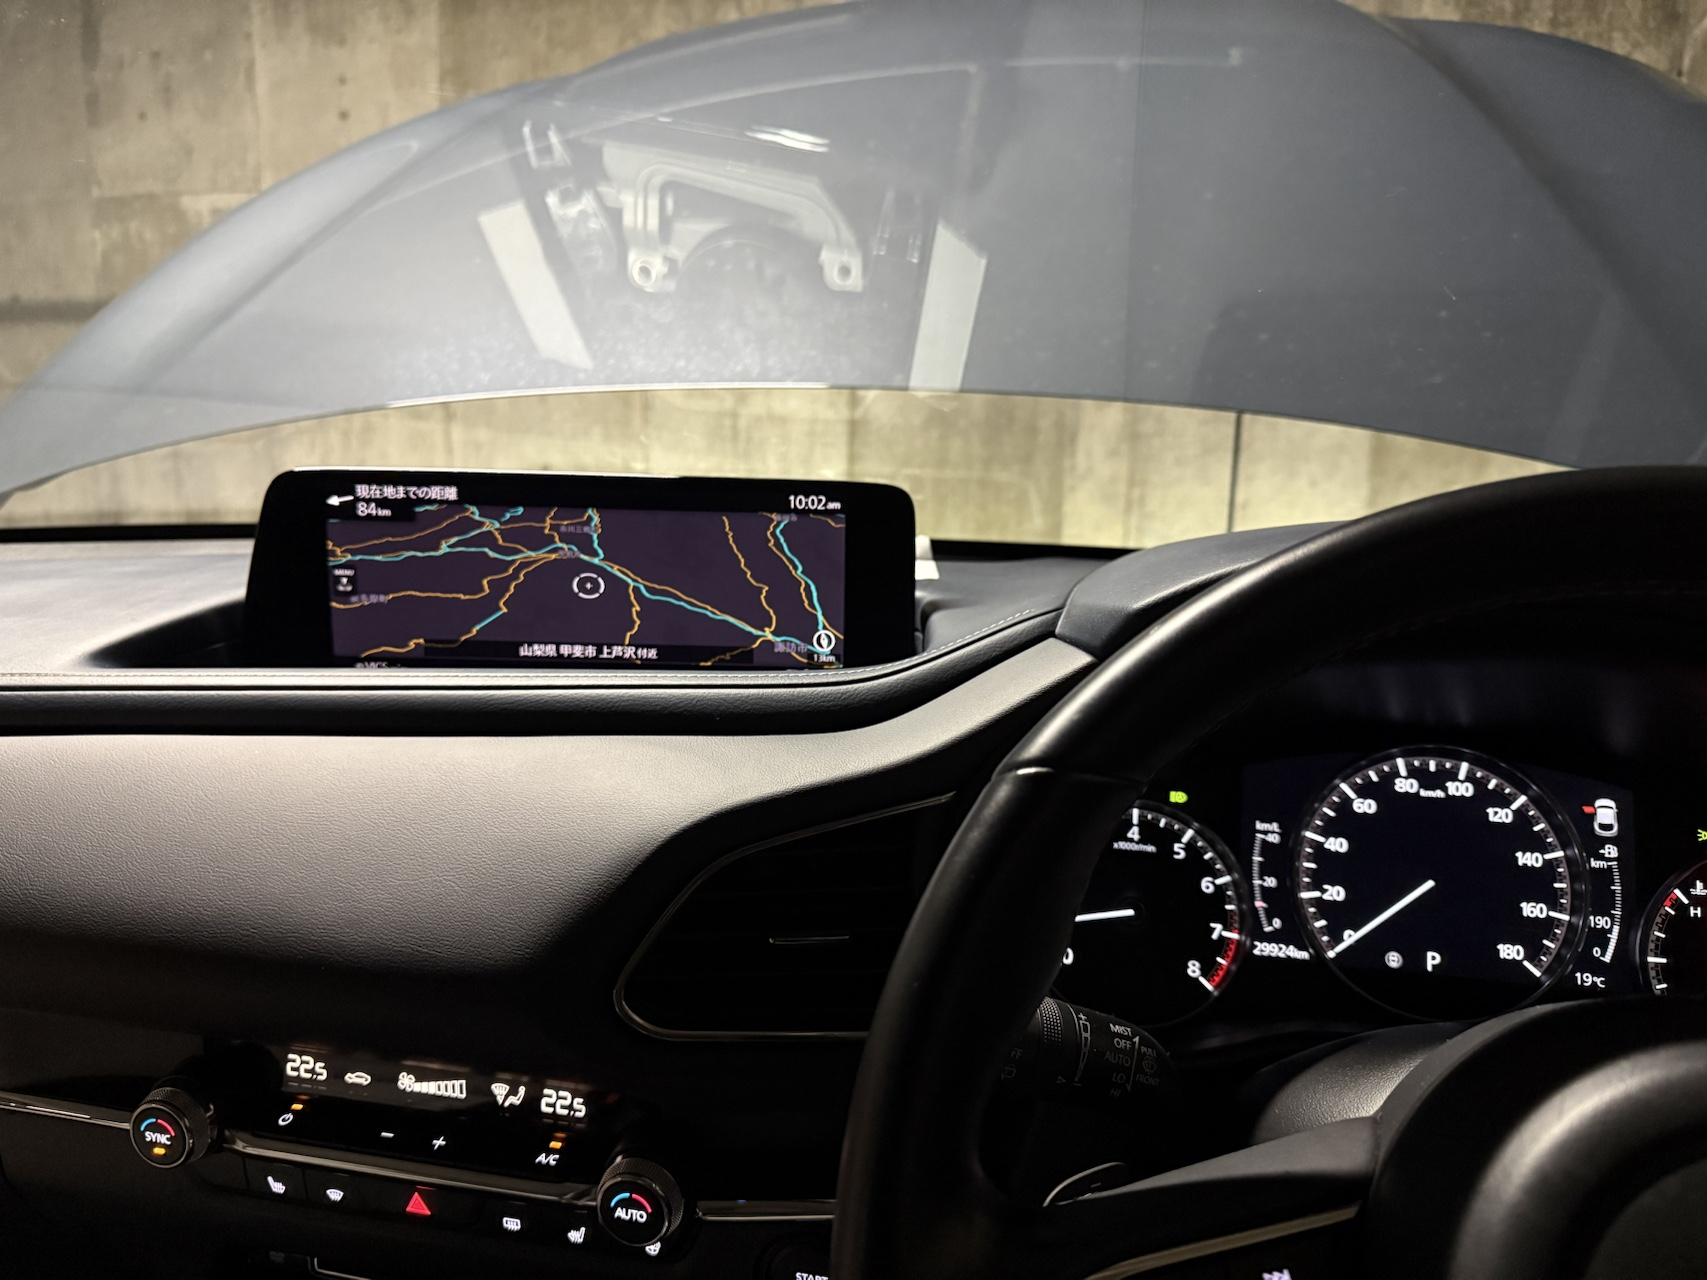
The 10.25-inch screen is definitely bigger!
The newer type has a semi-transparent black frame that’s even easier to see, but this is still passing grade.
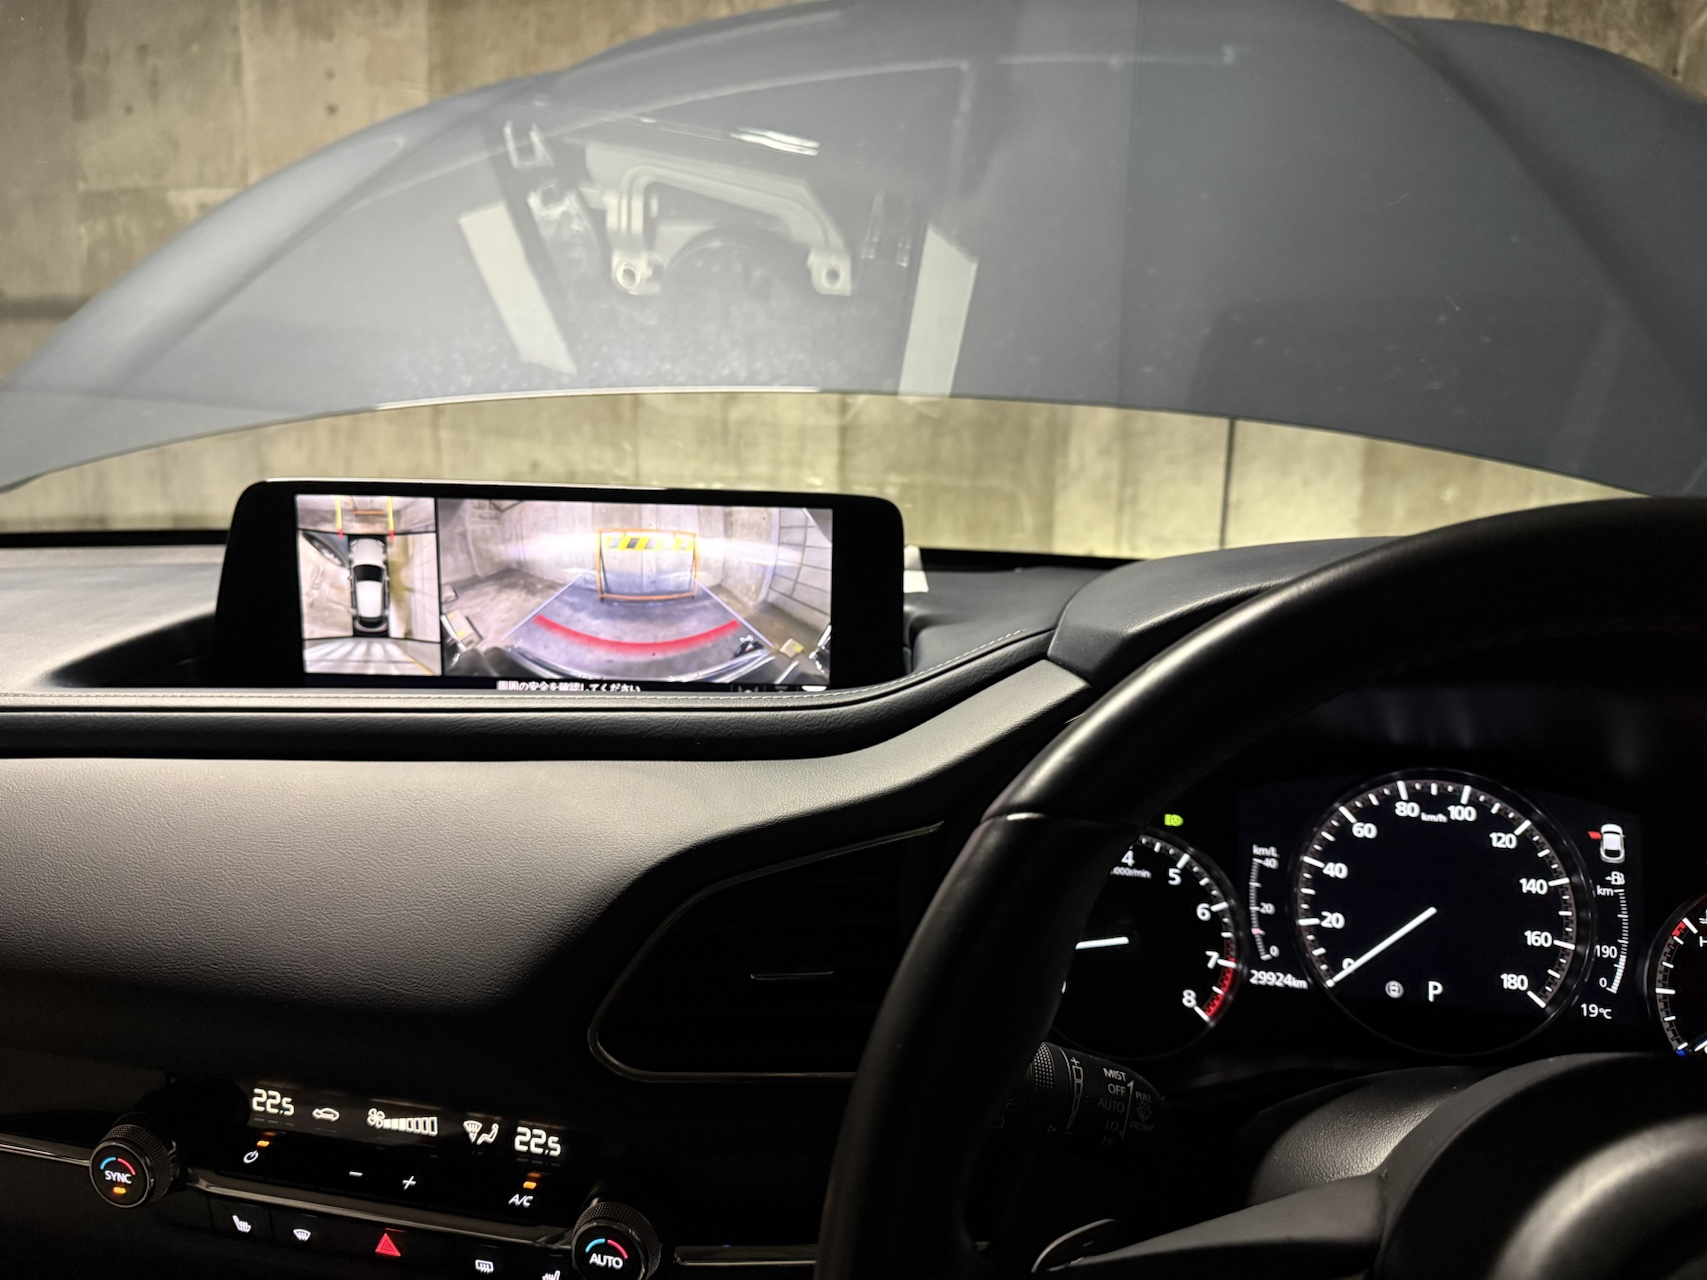
What I found most improved was the camera views. The 360-degree camera is so much easier to see!
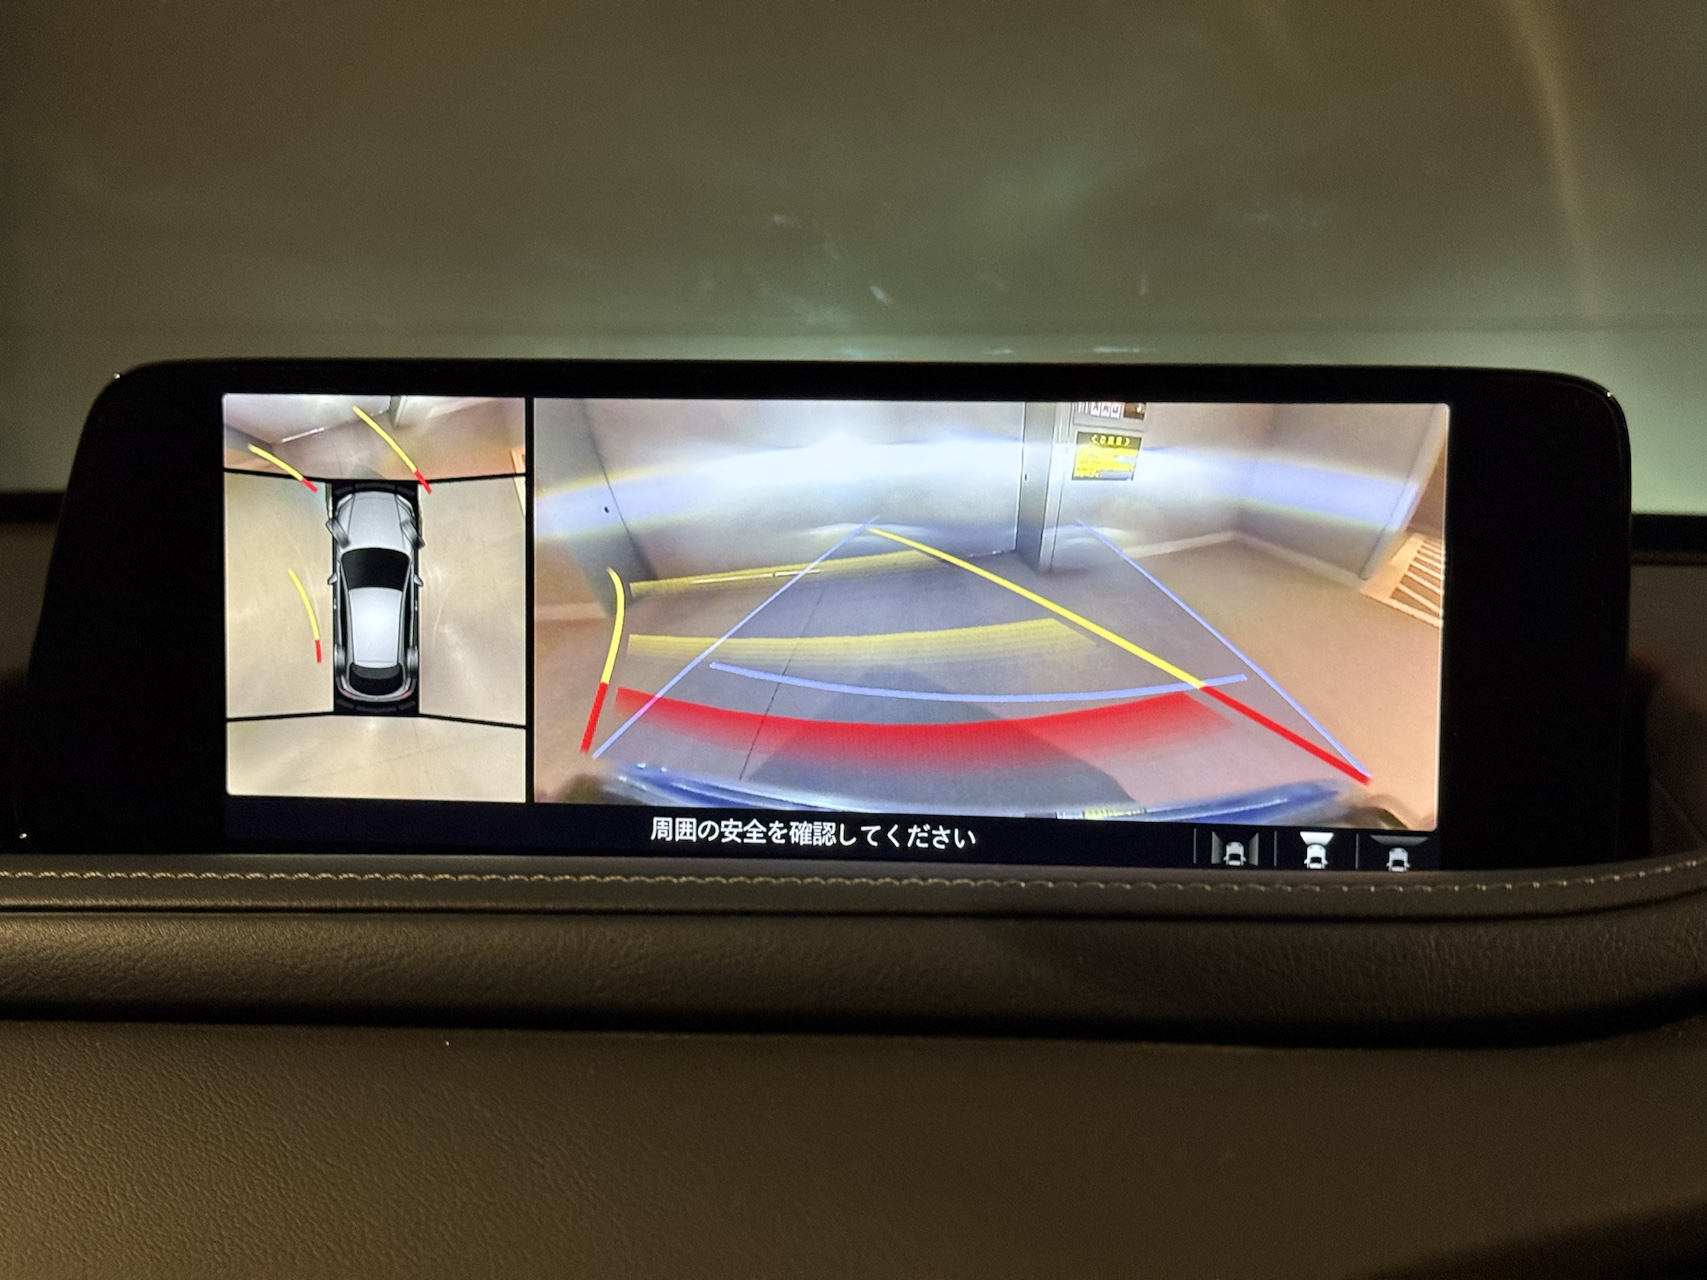
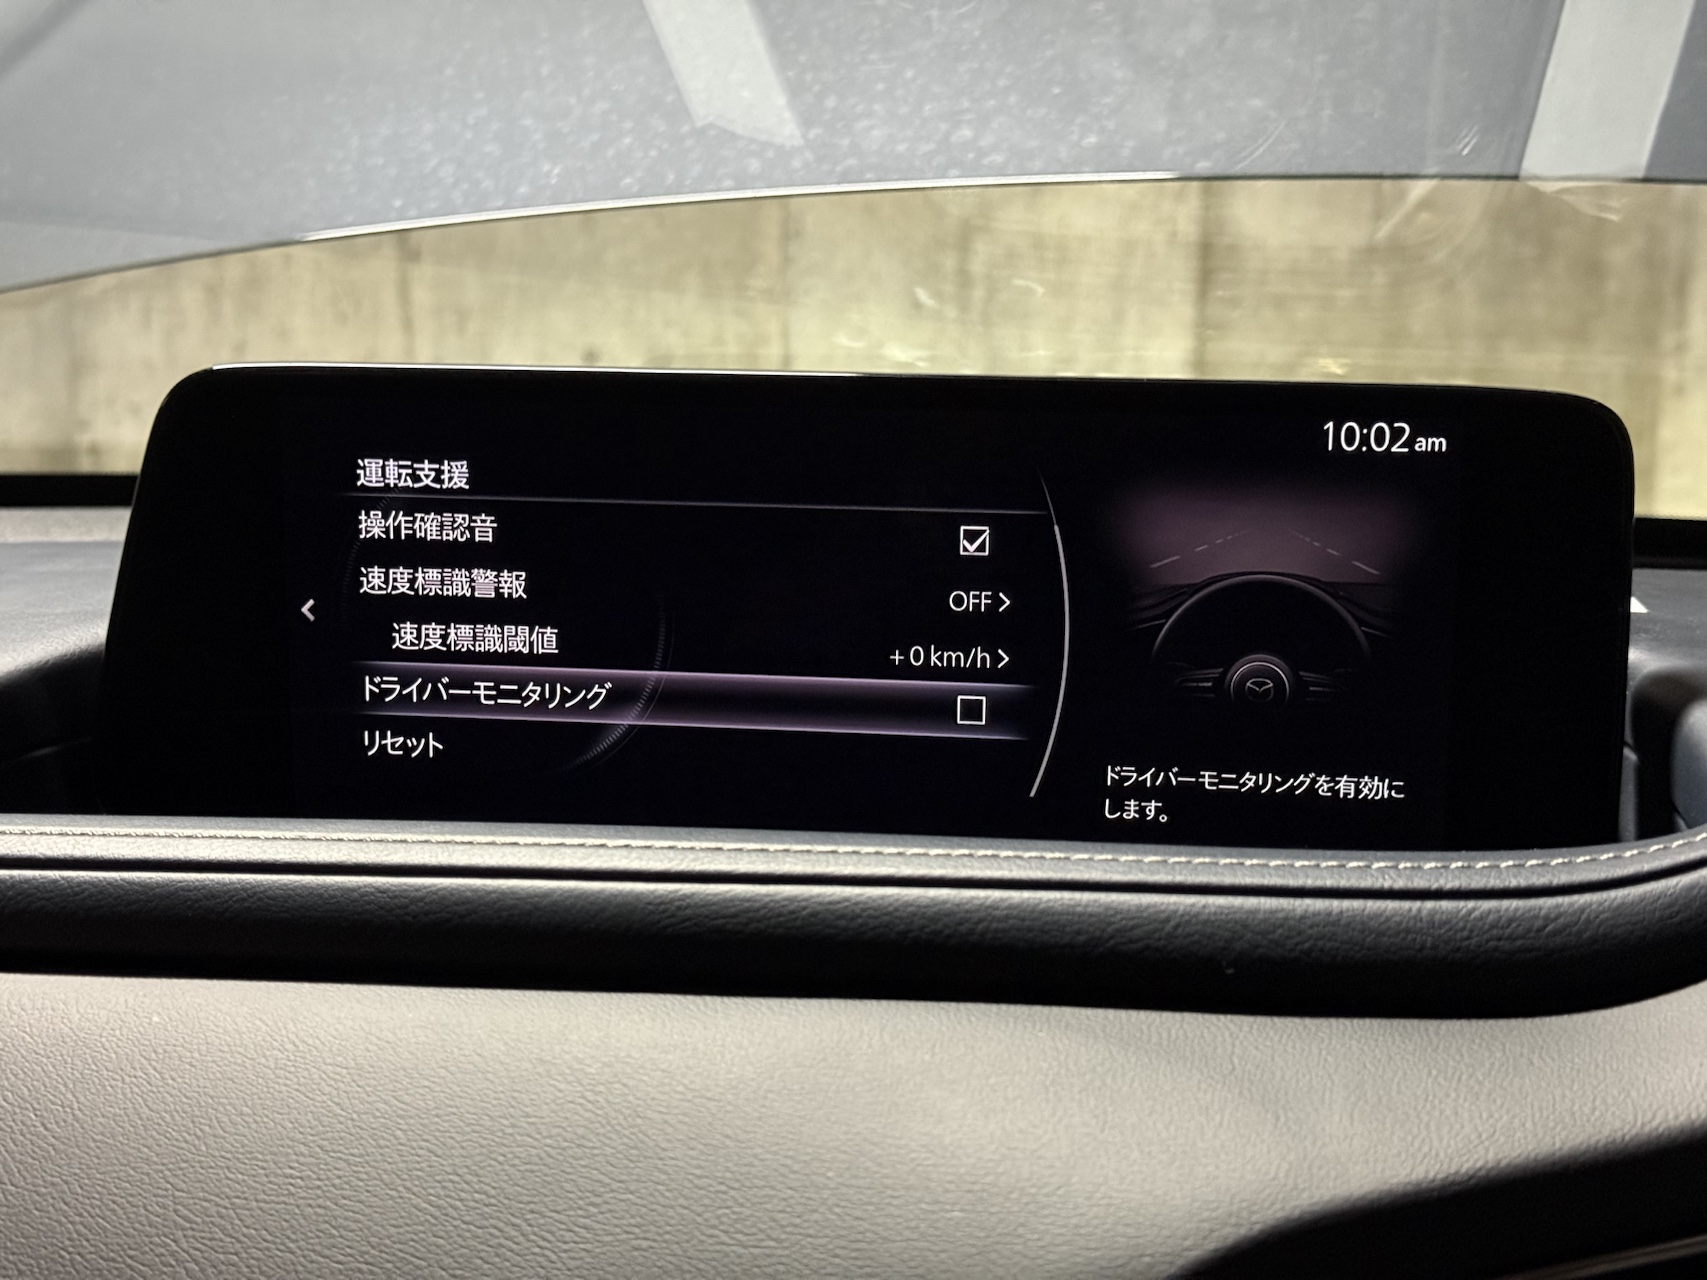
By the way, the Driver Monitoring settings menu remained intact.
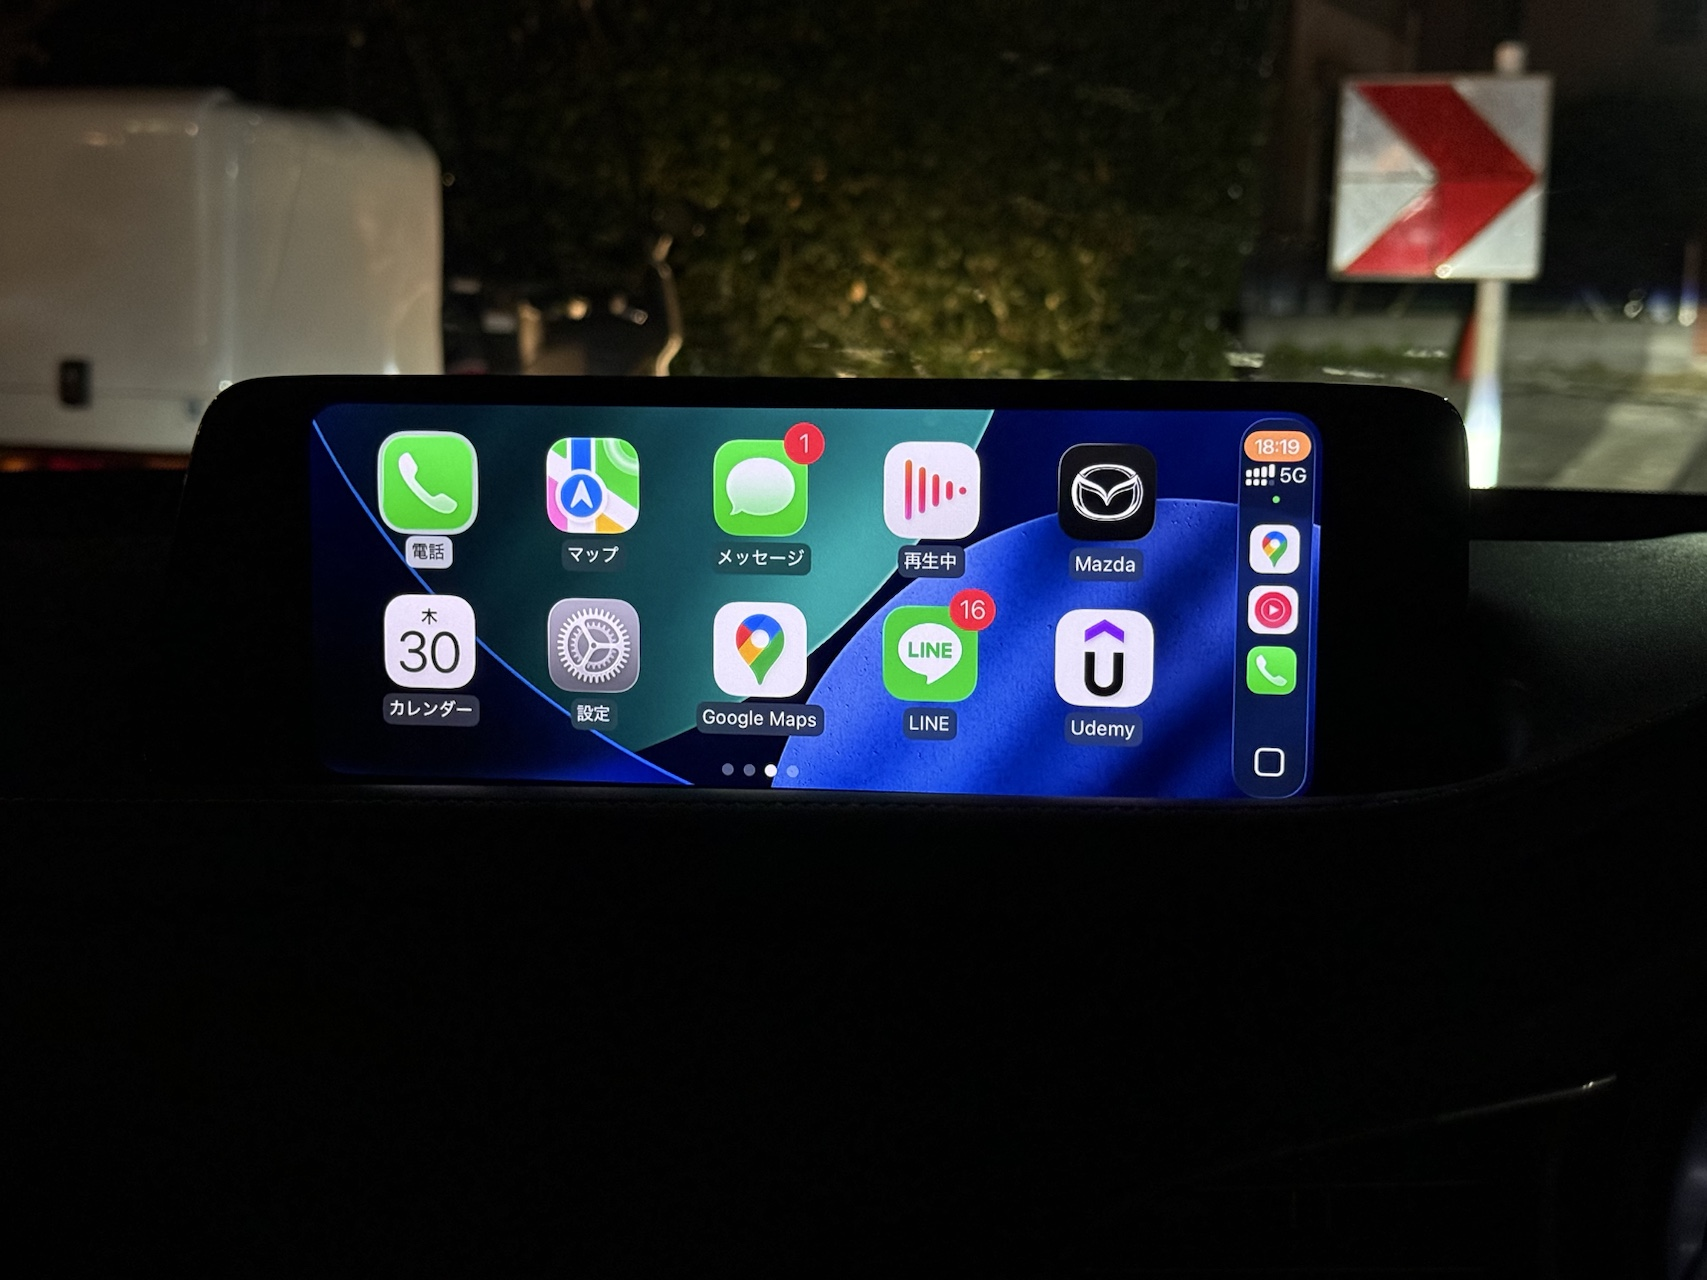
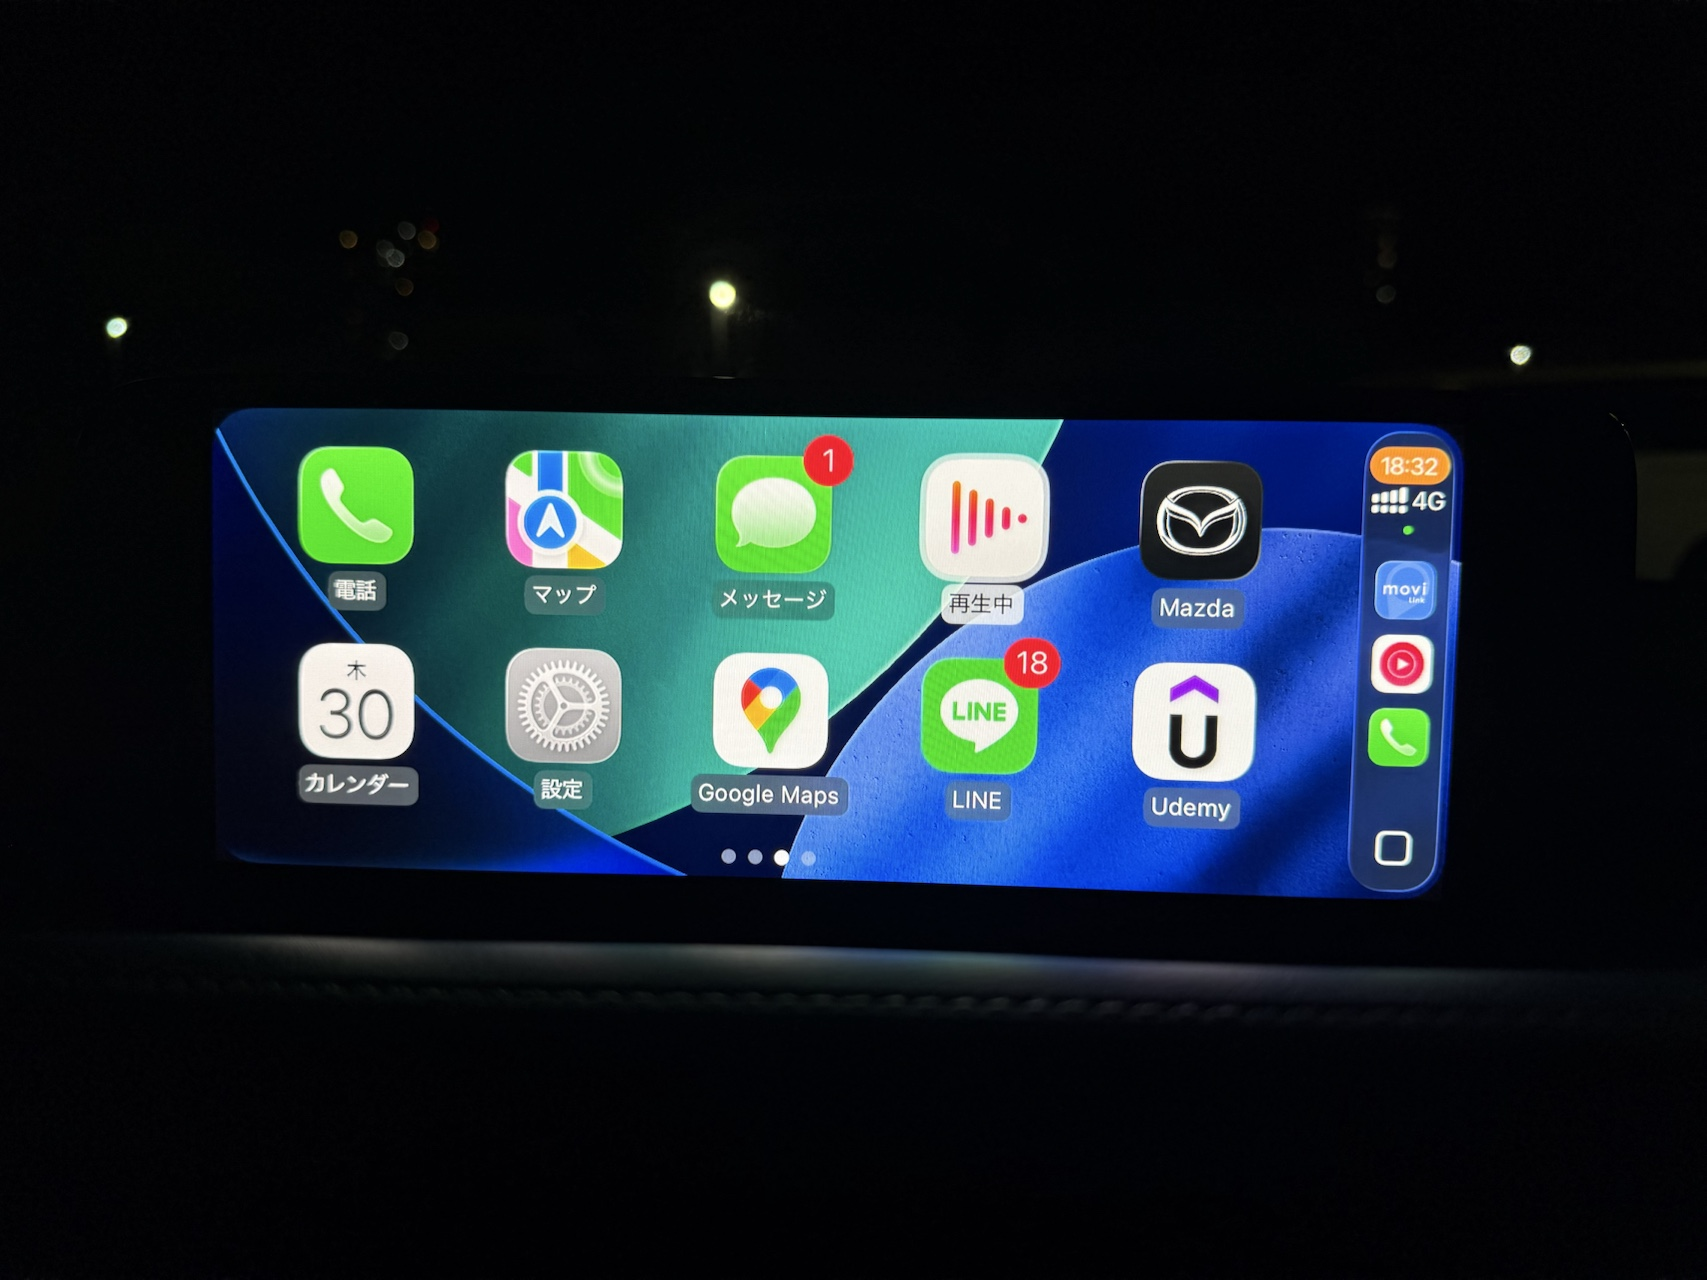
I don’t use it much, but the Apple CarPlay screen also became much easier to see.
There were posts saying “8.8-inch cars swapped to 10.25-inch don’t change CarPlay resolution, so the image quality is rough,” but I didn’t particularly notice this.
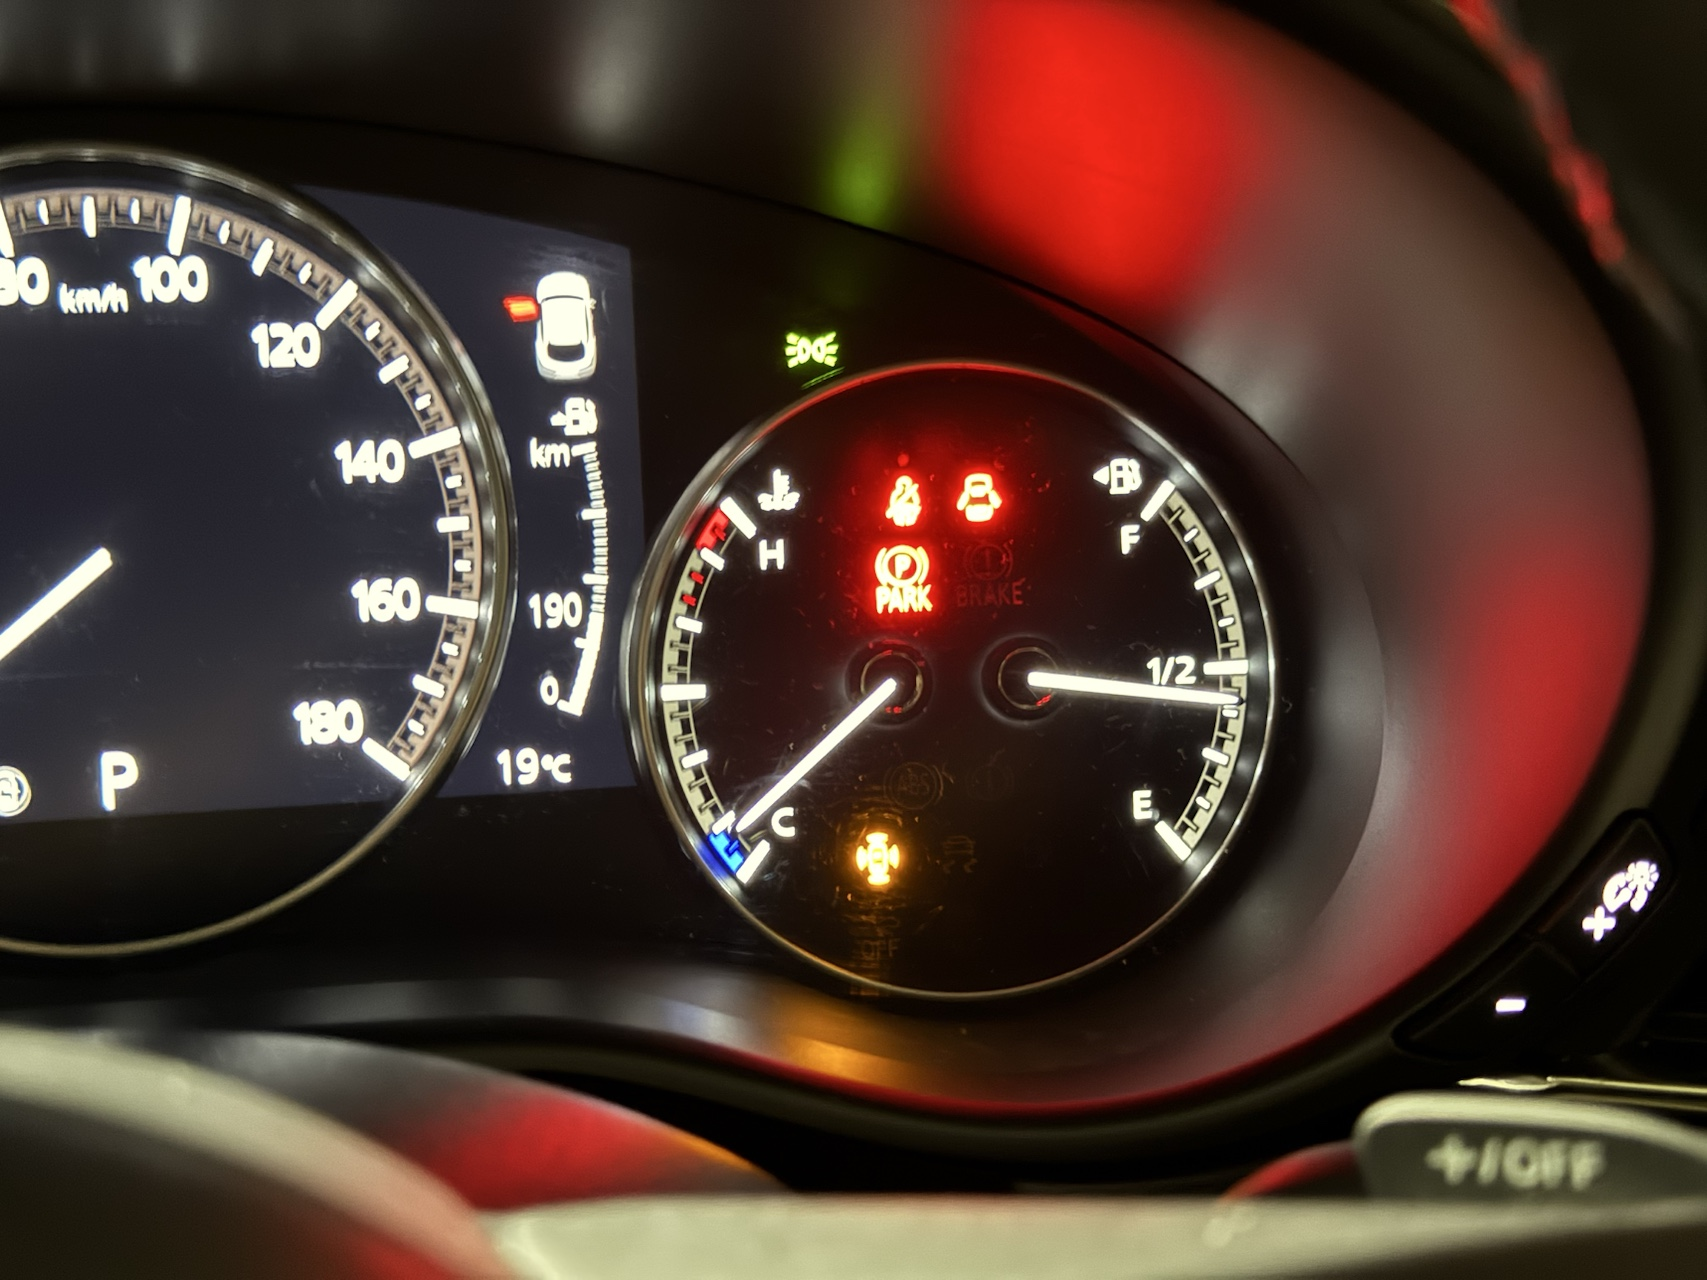
By the way, the “i-ACTIVSENSE warning display/warning light” lights up on the instrument cluster.
Even after driving for about an hour, no errors appeared on the LCD side, so I think it’s treated as a minor error.
(Doesn’t even get logged, perhaps)
Summary
This time, upgrading from 8.8 inches to 10.25 inches, I’m personally very satisfied.
My biggest complaint has been resolved, so I’m really happy about it.
While the cost is quite a concern, I think more 10.25-inch units will become available eventually, so it might be good to buy at that timing.
When I researched this, it seems many people want to do the same upgrade, so I hope this is helpful.
By the way, I have my dealer inspect the car every six months, so I plan to swap it back before taking it in for inspection.
(Inspection swap instead of inspection revert lol)
Recommended Items
Interior Trim Removal Tool Set
Essential for removing dashboard panels without scratches. Clip plier set recommended.
Amon Wiring Tape (Interior Protection)
Protects interior surfaces during panel removal.
Leave a Reply