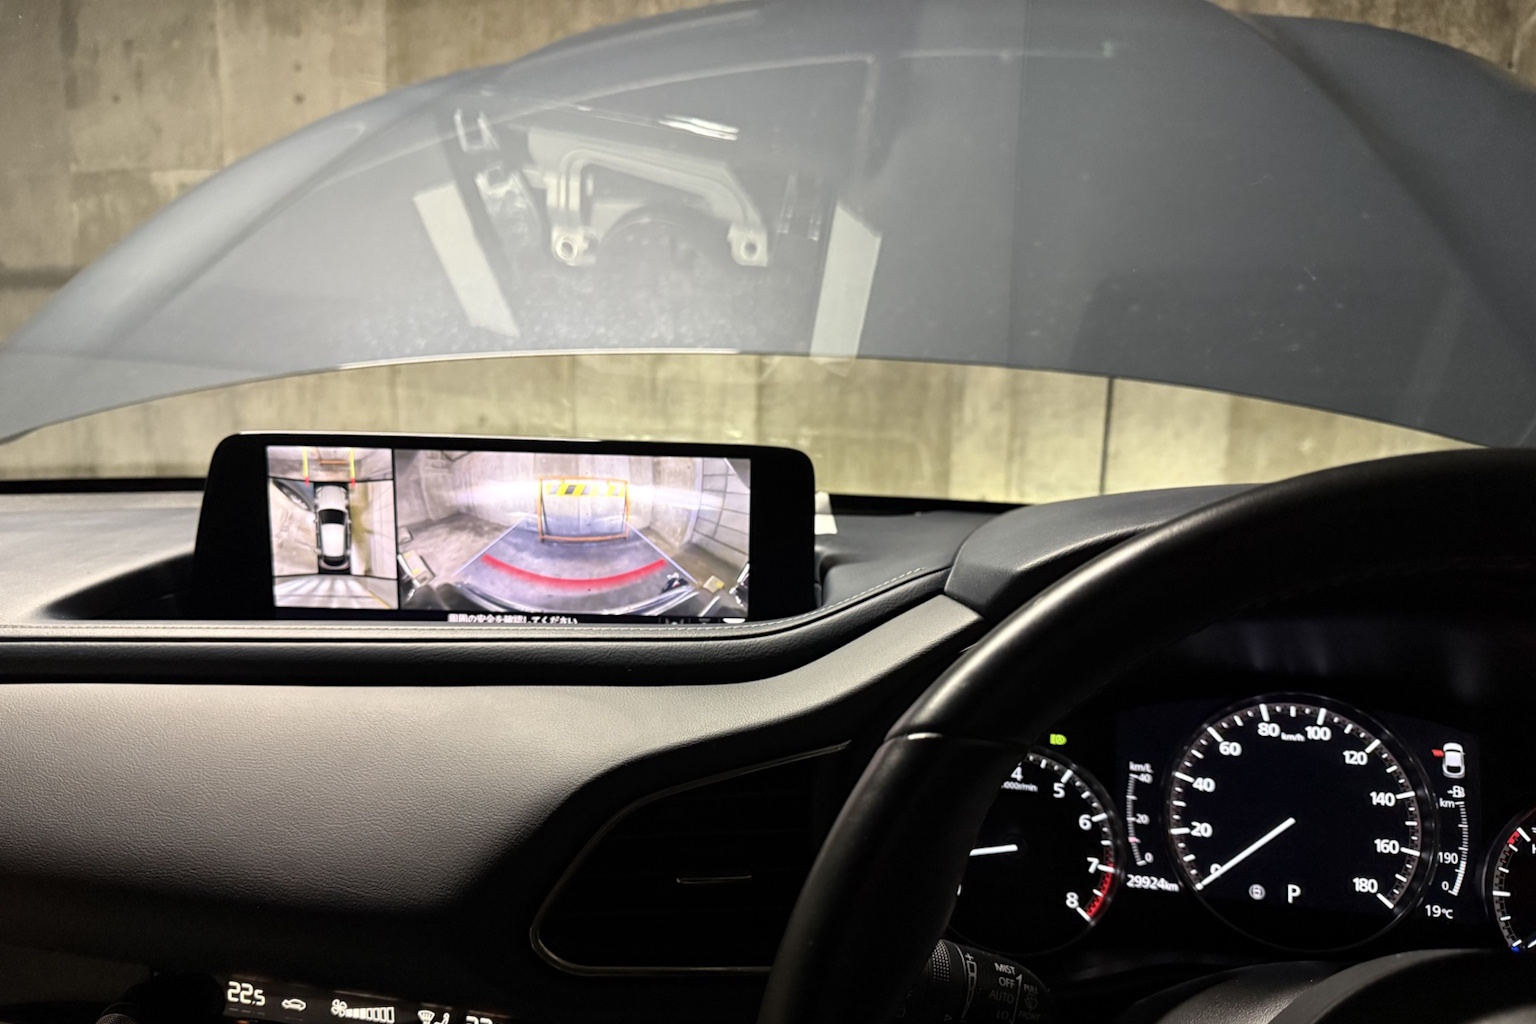
This is my first car-related article on the blog.
The topic: upgrading the Mazda Connect (infotainment) display on my CX-30 from 8.8 inches to 10.25 inches.
Since the CX-30 and Mazda3 are sibling models, the same swap procedure should apply to the Mazda3 as well.
Background
The biggest complaint I had about my CX-30 was the screen size.
I currently drive a Mazda CX-30, a compact SUV. I’ve always had gripes about poor visibility, terrible city fuel economy (gasoline model), and less cargo space than expected.
But by far the biggest issue was that the infotainment screen felt too small.
My 2019 model came equipped with an 8.8-inch display audio unit. Back then, only Tesla really offered large screens, so it seemed fine at the time. But as more and more vehicles adopted bigger displays over the years, 8.8 inches started to feel cramped.
When the 2023 model year refresh introduced a 10.25-inch display, I thought, “Wait — could I just swap in the bigger screen?” And that’s exactly what this article is about.
The Hunt for a 10.25-Inch Monitor
The CX-30 has certain trims that include a “Driver Monitoring” feature. The sensor for this system is mounted next to the display, which means there are two different part numbers:
DMTR-611J0 (with Driver Monitoring, right-hand drive)
DMTP-611J0 (without Driver Monitoring, right-hand drive)
I purchased the “DMTP-611J0” model.
My car is a 2021 “PROACTIVE Touring Selection” trim, so this was a switch from a unit with driver monitoring to one without.
* There’s some information suggesting the driver monitoring sensor cable connector has changed, making it incompatible. I saw a source for this somewhere but can’t locate it now.
I ended up buying the 10.25-inch monitor on eBay. I had been watching Yahoo Auctions for about half a year, but listings never showed up. (Perhaps there aren’t many totaled vehicles?)
I’d recommend setting up alerts on both eBay and Yahoo Auctions with the part number.

The Cost
You can see the price in the screenshot above, but here’s a breakdown of the purchase cost:
| Amount (JPY) | Original Price | |
| Item + Shipping | 67,000 yen | (GBP 333.00) |
| Import Duty | 4,900 yen | |
| Total | 71,900 yen |
Looking at it now, it’s not cheap. The weak yen really hit hard…
I’ve seen listings on eBay for around $199 at times, so it really comes down to luck and timing.
Shipping
The item was shipped via FedEx International Economy. Surprisingly, it came from Peru. I would have expected it from the UK, but why a left-hand-drive country…?

It arrived in exactly 7 days. Since I live in a FedEx direct delivery area, it was probably a bit faster than usual.
It came in a massive box — roughly 180cm size. I regret not taking a photo…
<No image available>
Installation
Time to install the 10.25-inch monitor.
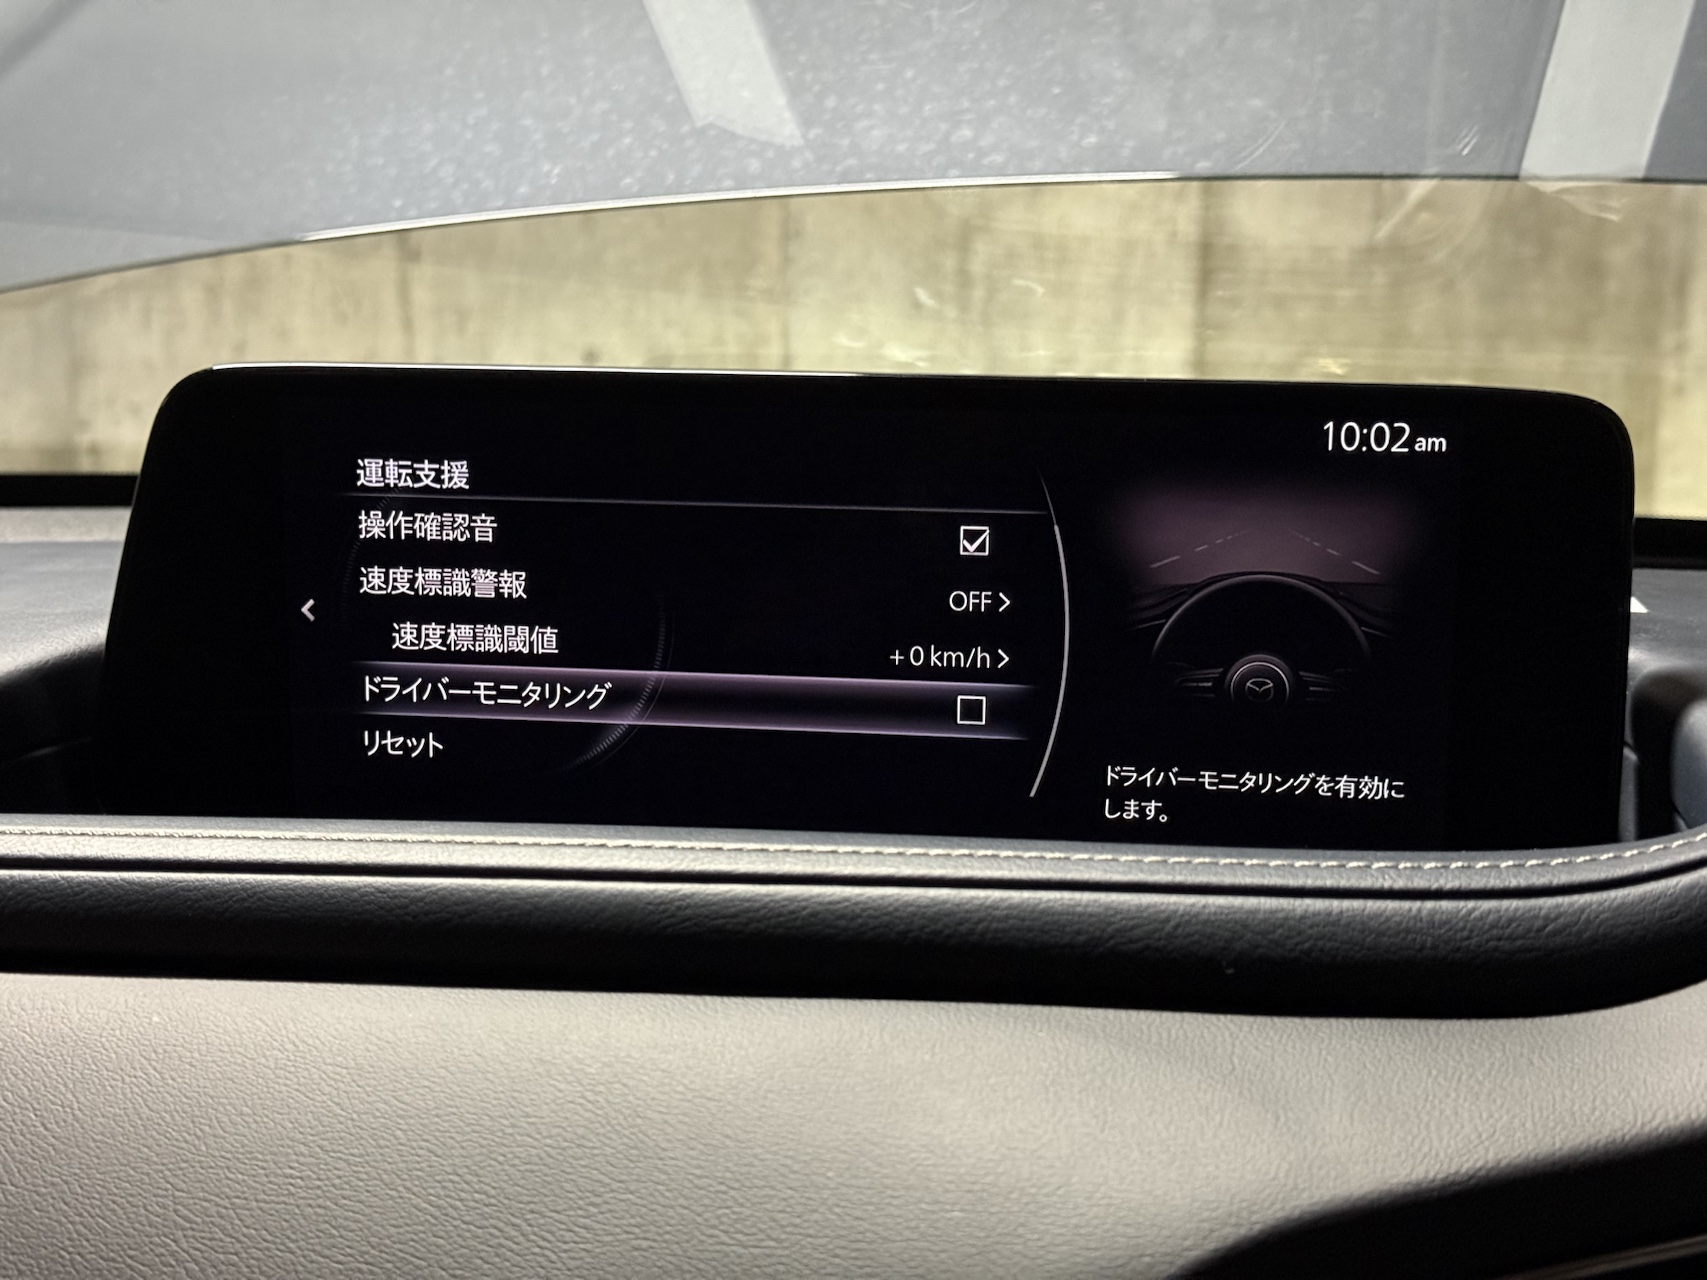
As a precaution, I disabled “Driver Monitoring” first.
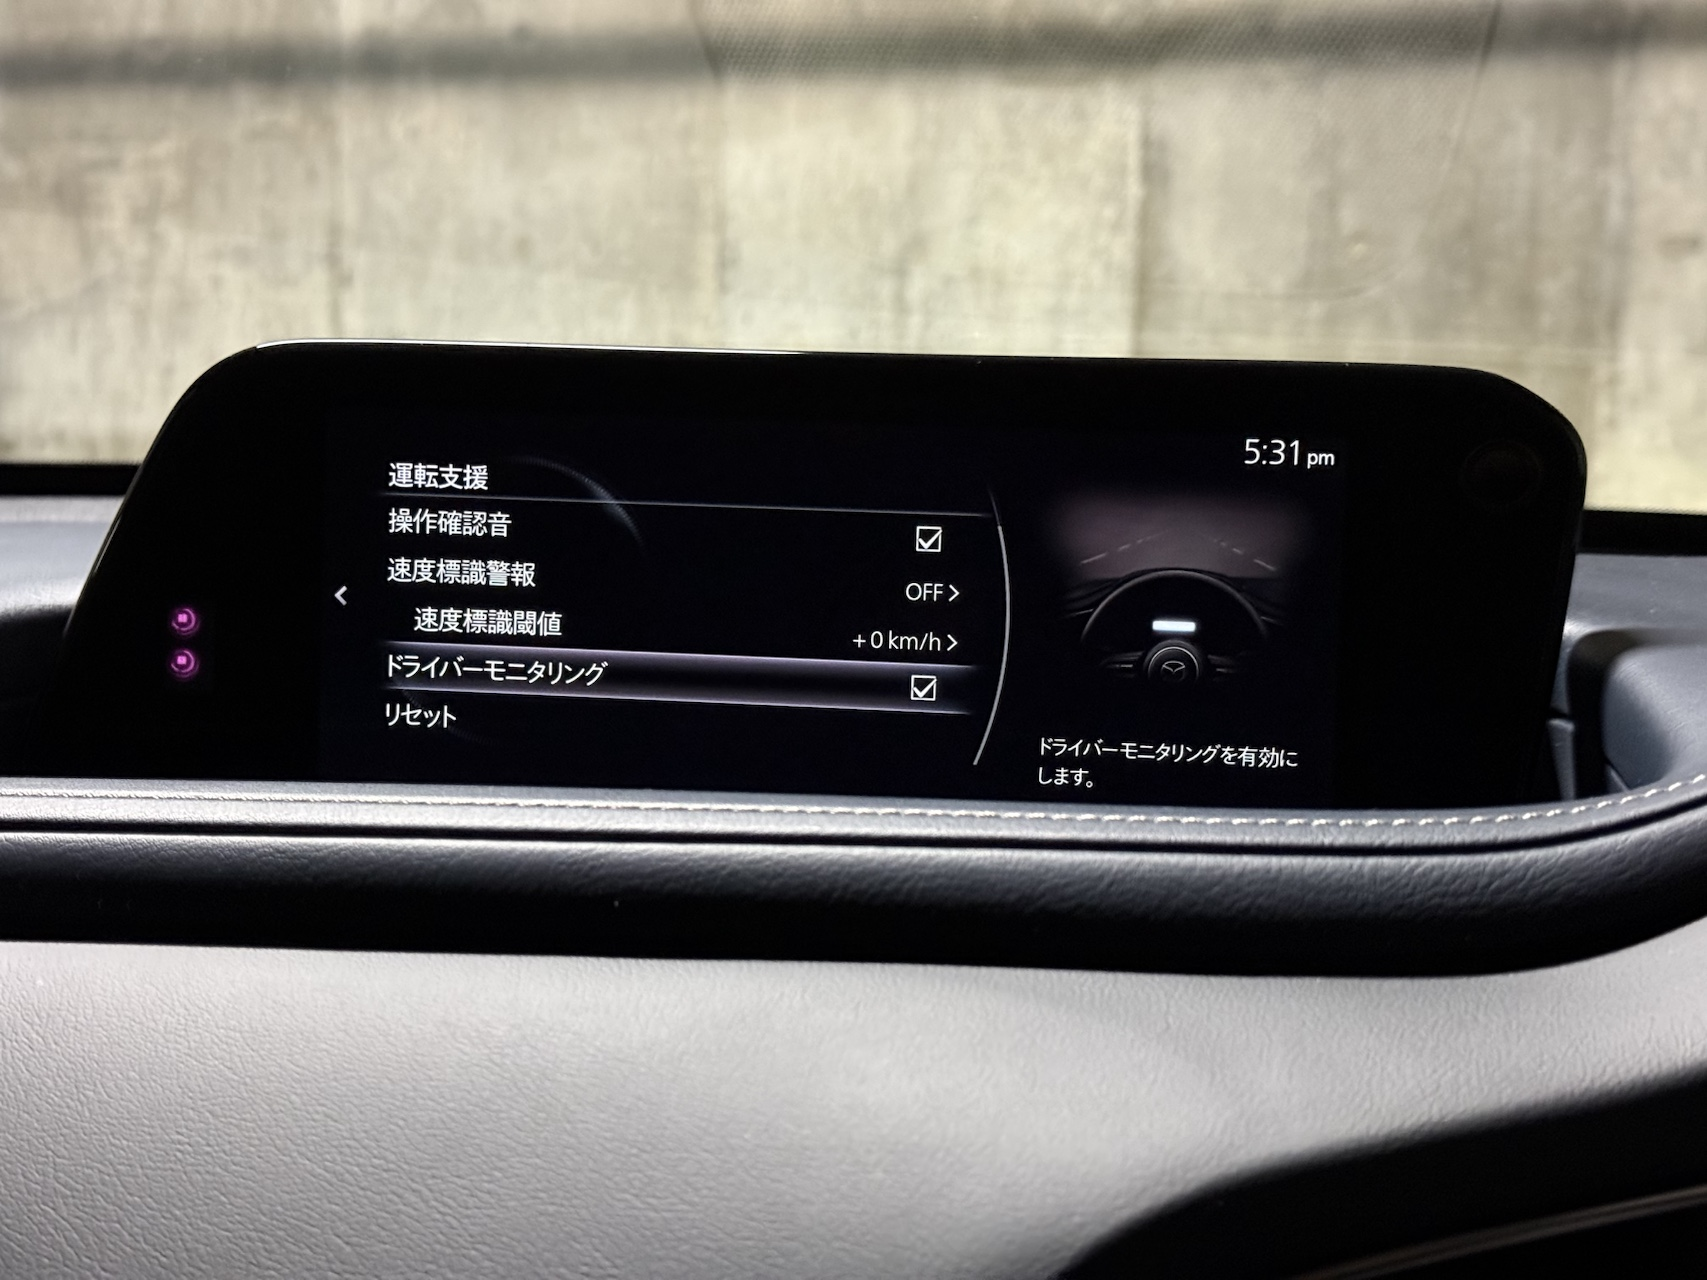
* I did this work in my apartment’s underground parking garage, so the photos are quite dark and hard to see. Apologies for that.
Step 1: Disconnect the battery’s negative terminal
Loosen the 10mm nut and disconnect the negative terminal of the battery.
Make sure to insulate the disconnected terminal properly to prevent any accidental contact.
Step 2: Remove the panel behind the Mazda Connect unit
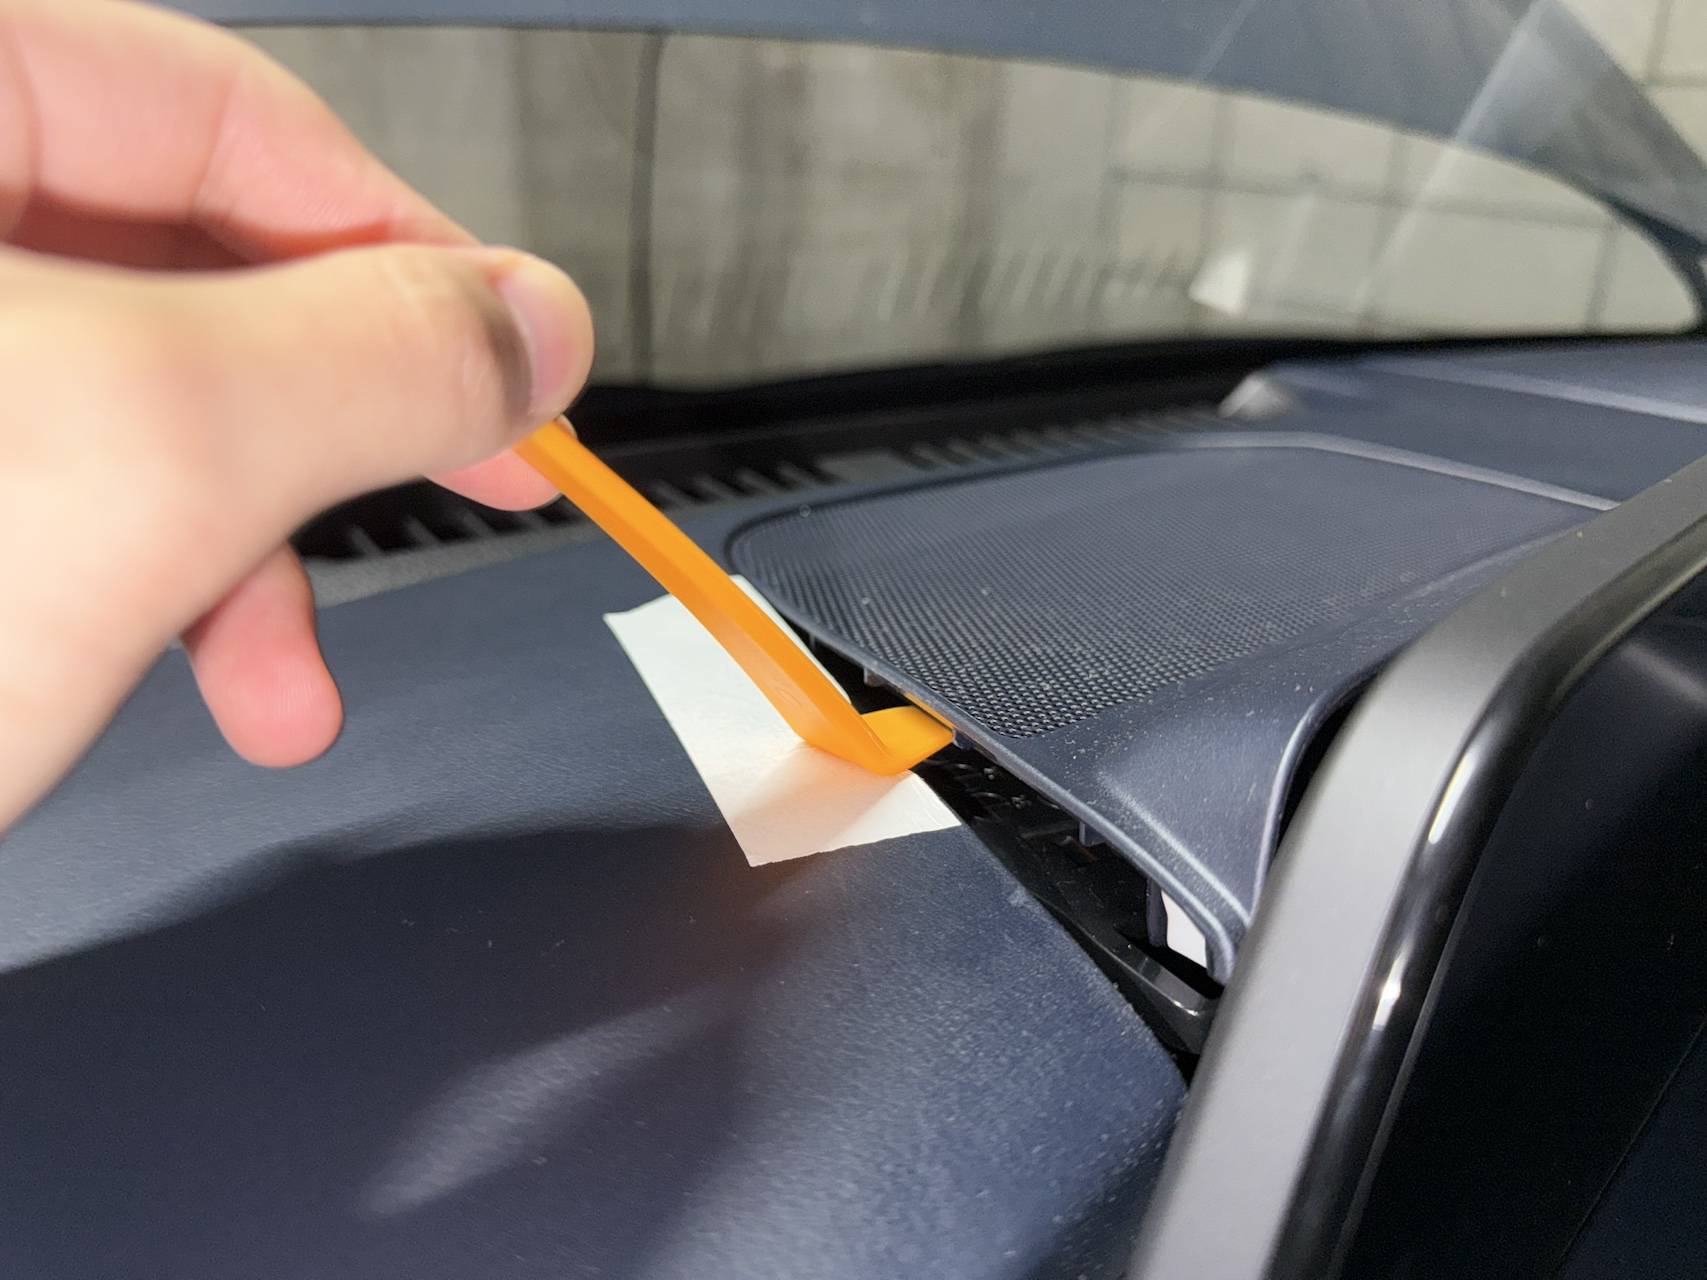
Remove the cover panel behind the Mazda Connect unit inside the cabin. Applying masking tape along the edges beforehand will help prevent scratches.
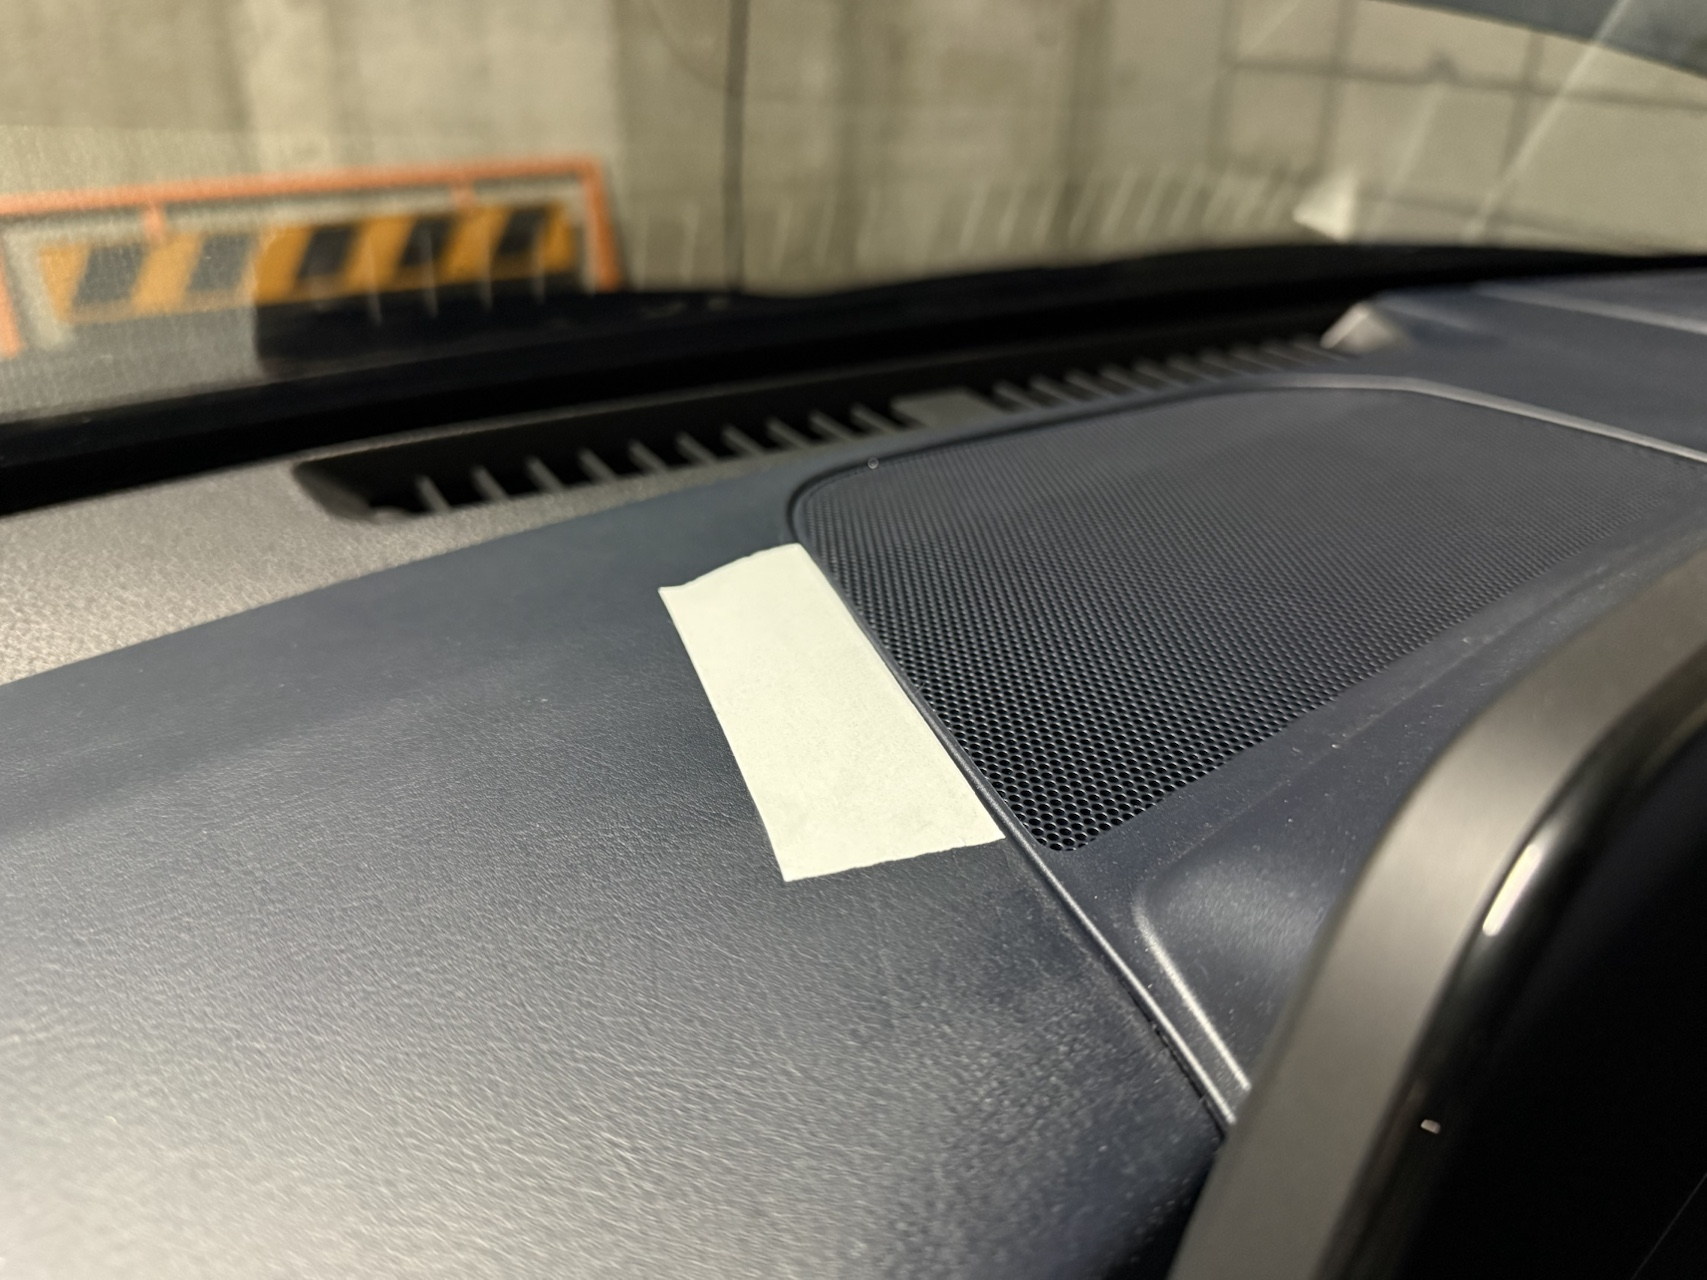
An interior trim removal tool makes this easy — just use it as a lever to pop the panel off.
Step 3: Remove the two 10mm nuts
With the panel removed, unscrew the two nuts holding the monitor in place.
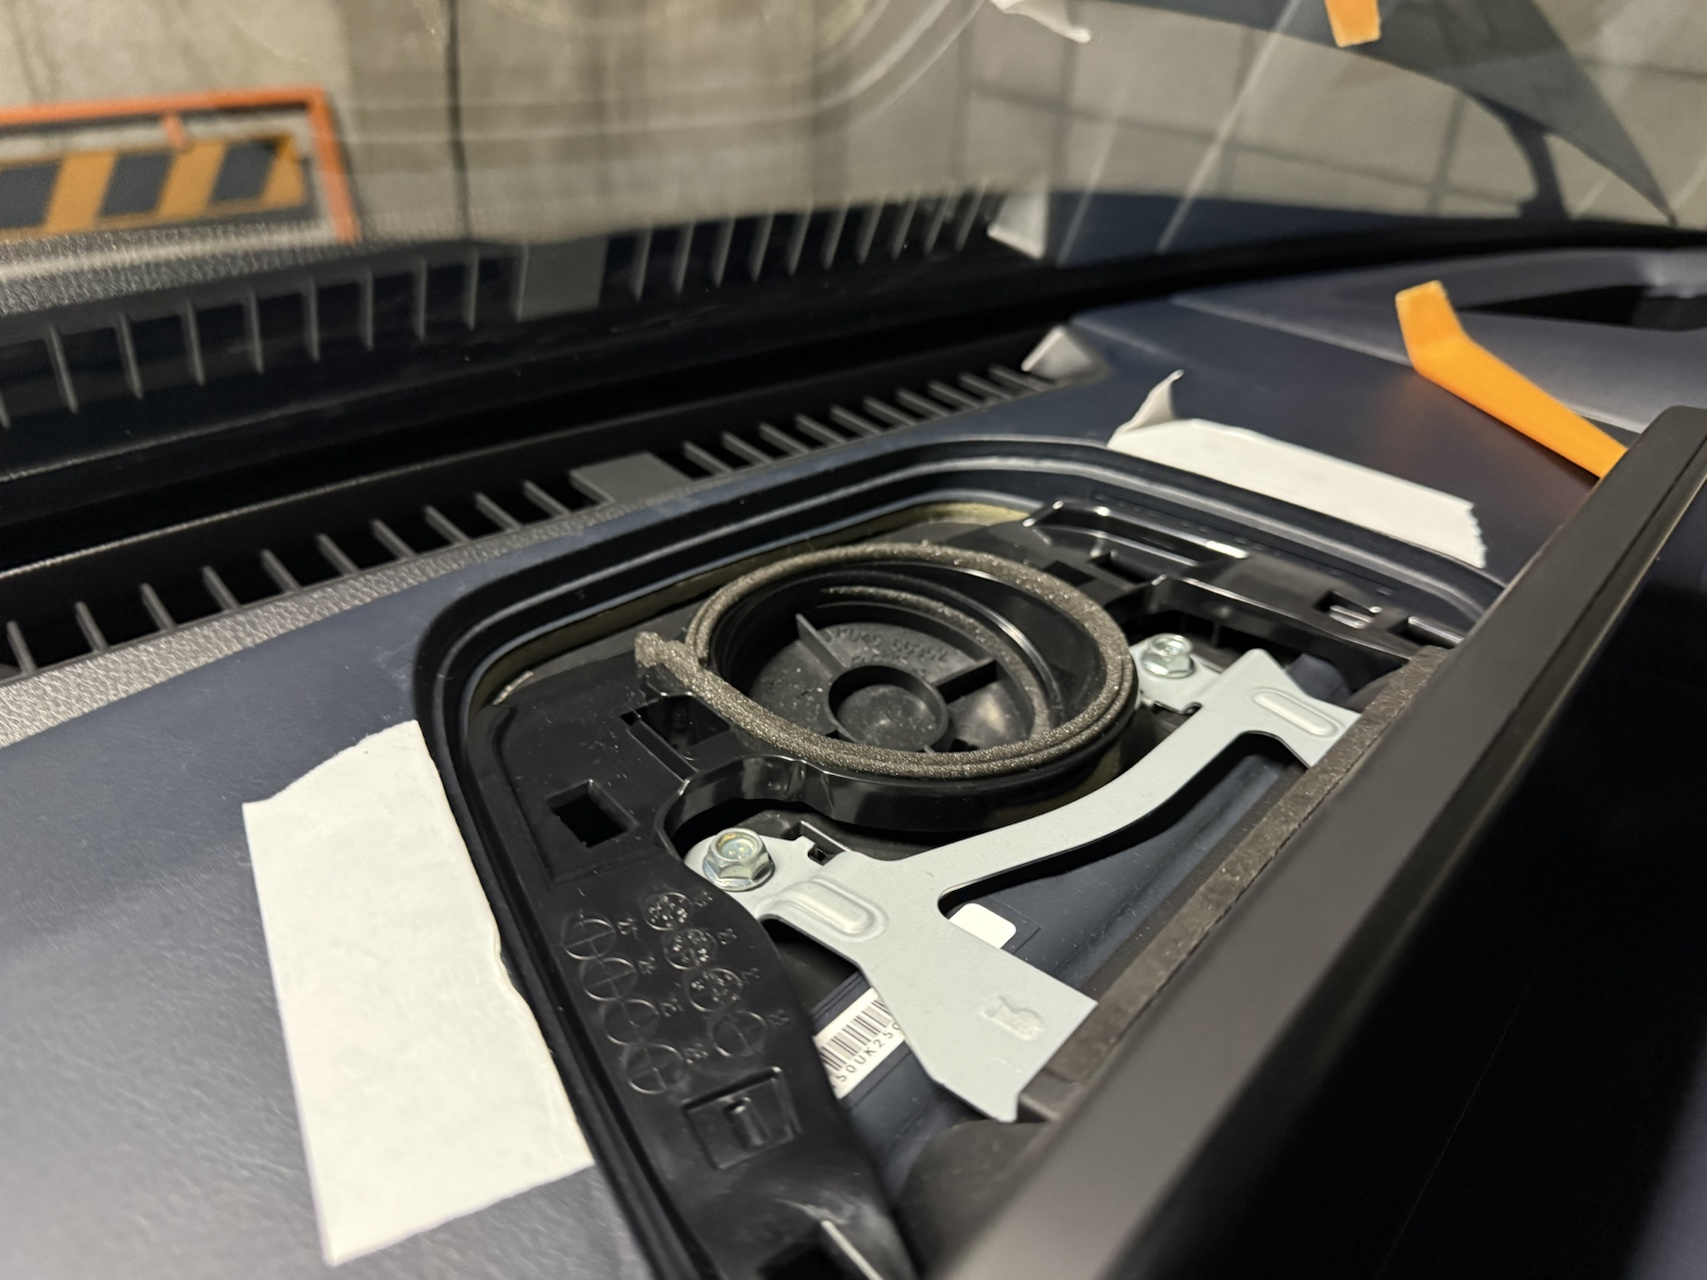
Step 4: Pull the monitor upward to remove it
Lift the monitor straight up to detach it. Be careful not to go too fast and crack the windshield!
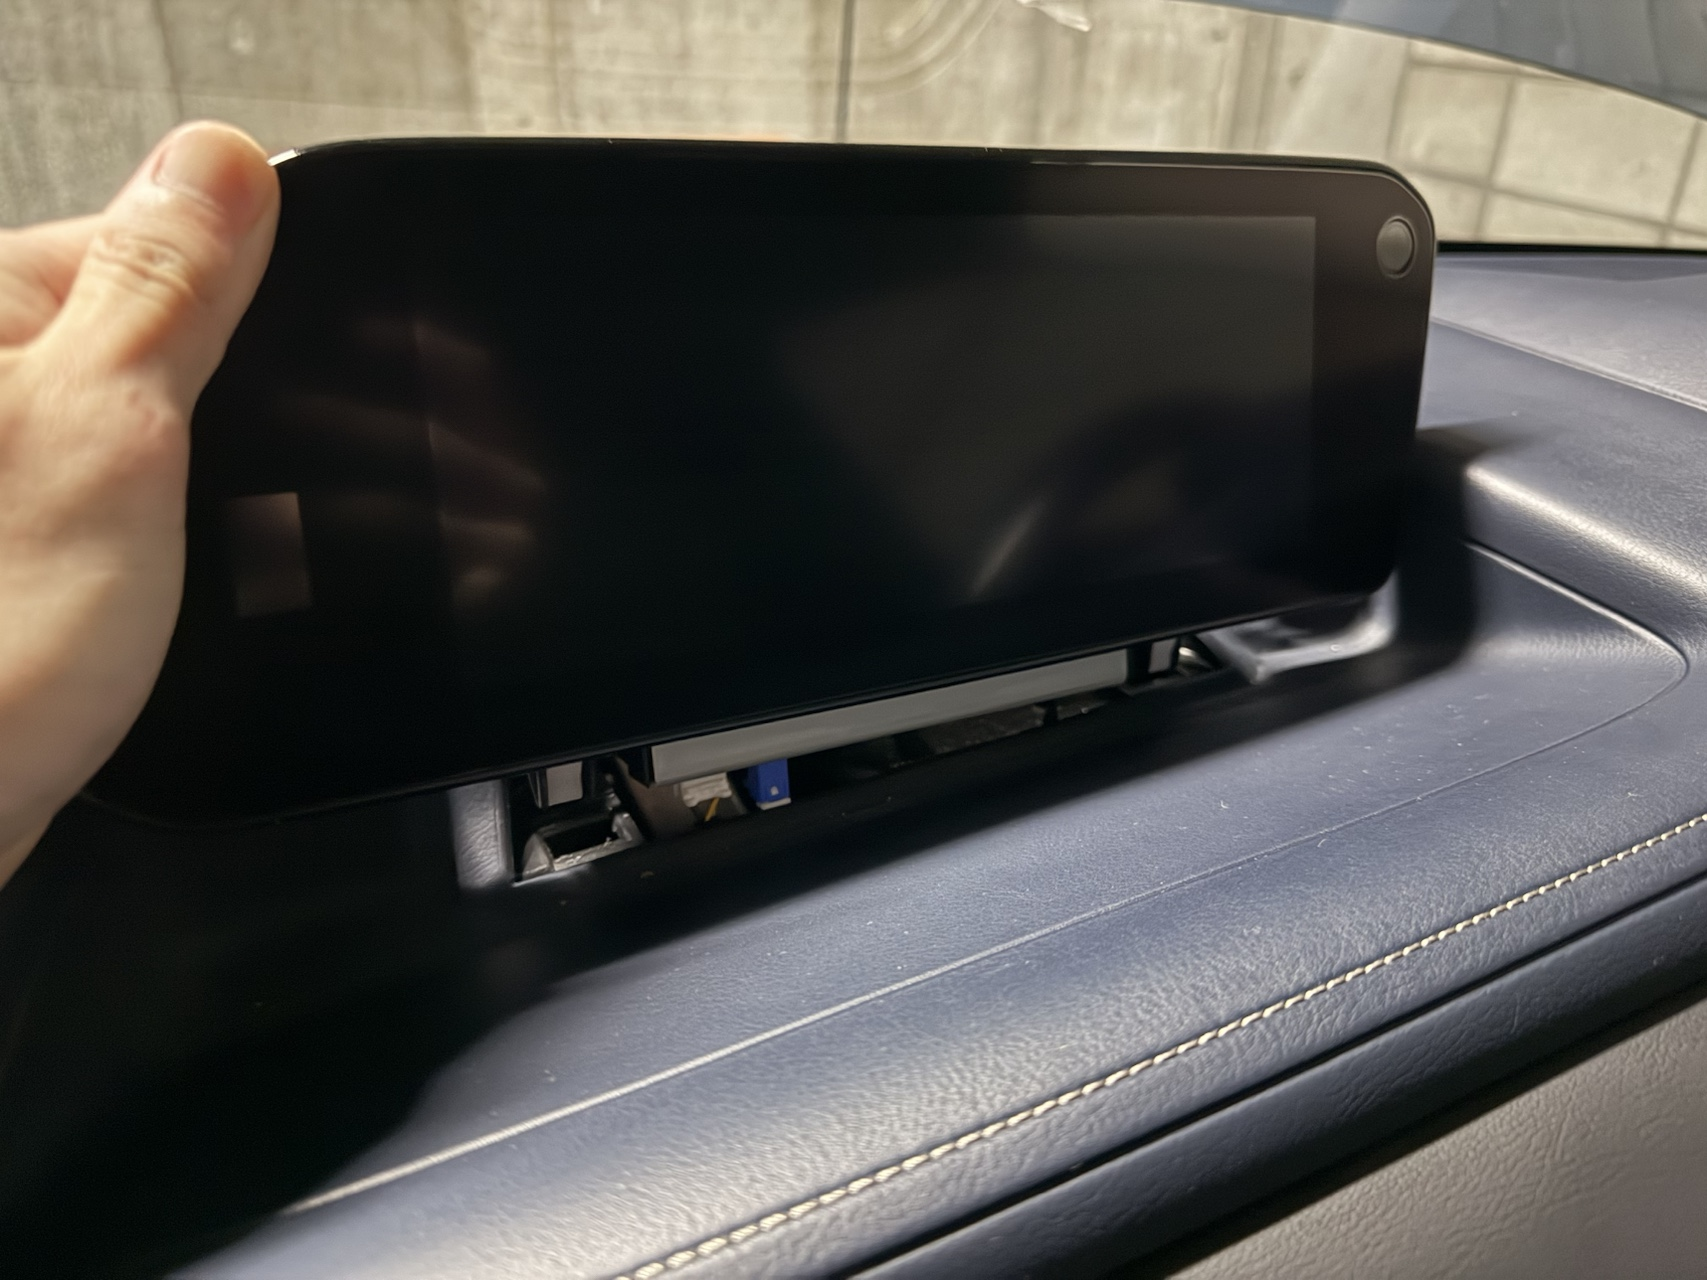
Step 5: Disconnect the cables
The driver monitoring model has 4 cables — disconnect all of them.
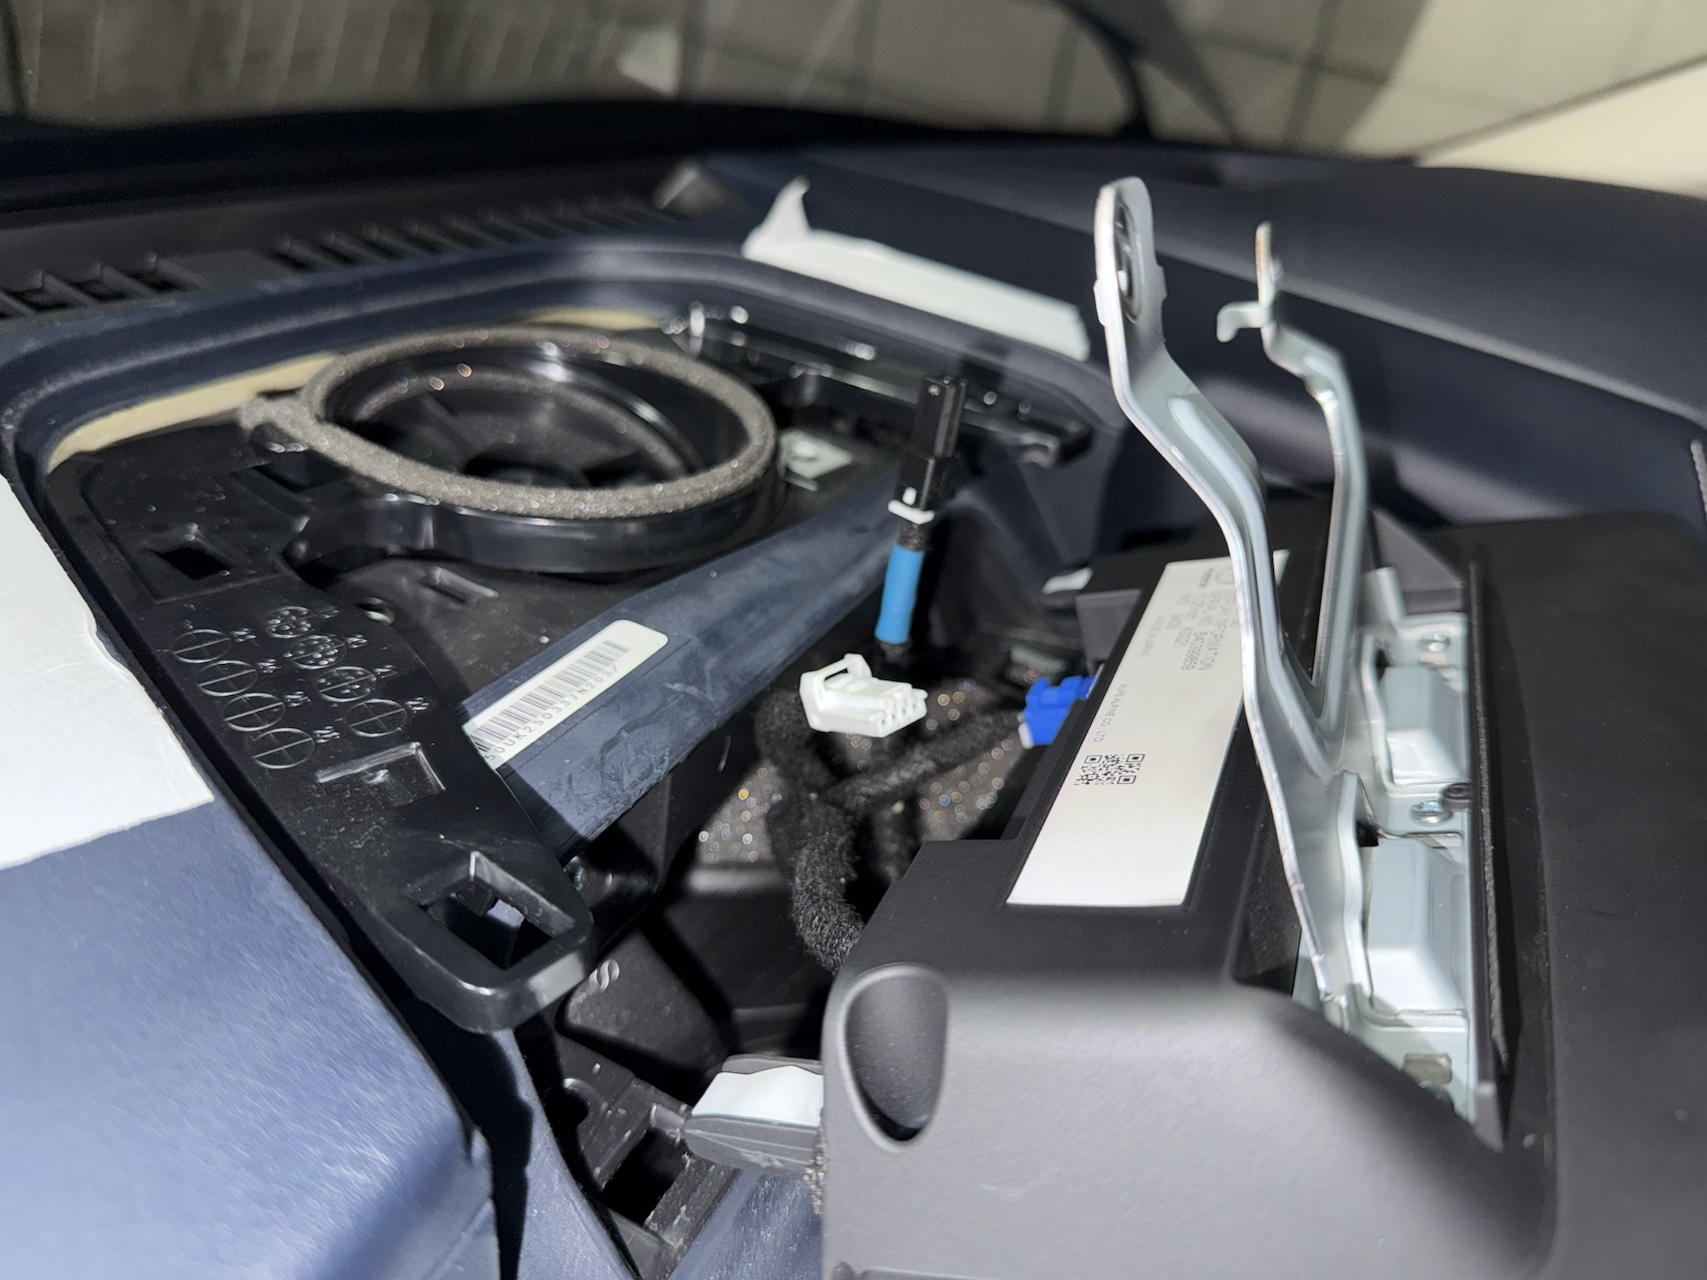
Two are already disconnected in this photo, but this gives you an idea of the layout.
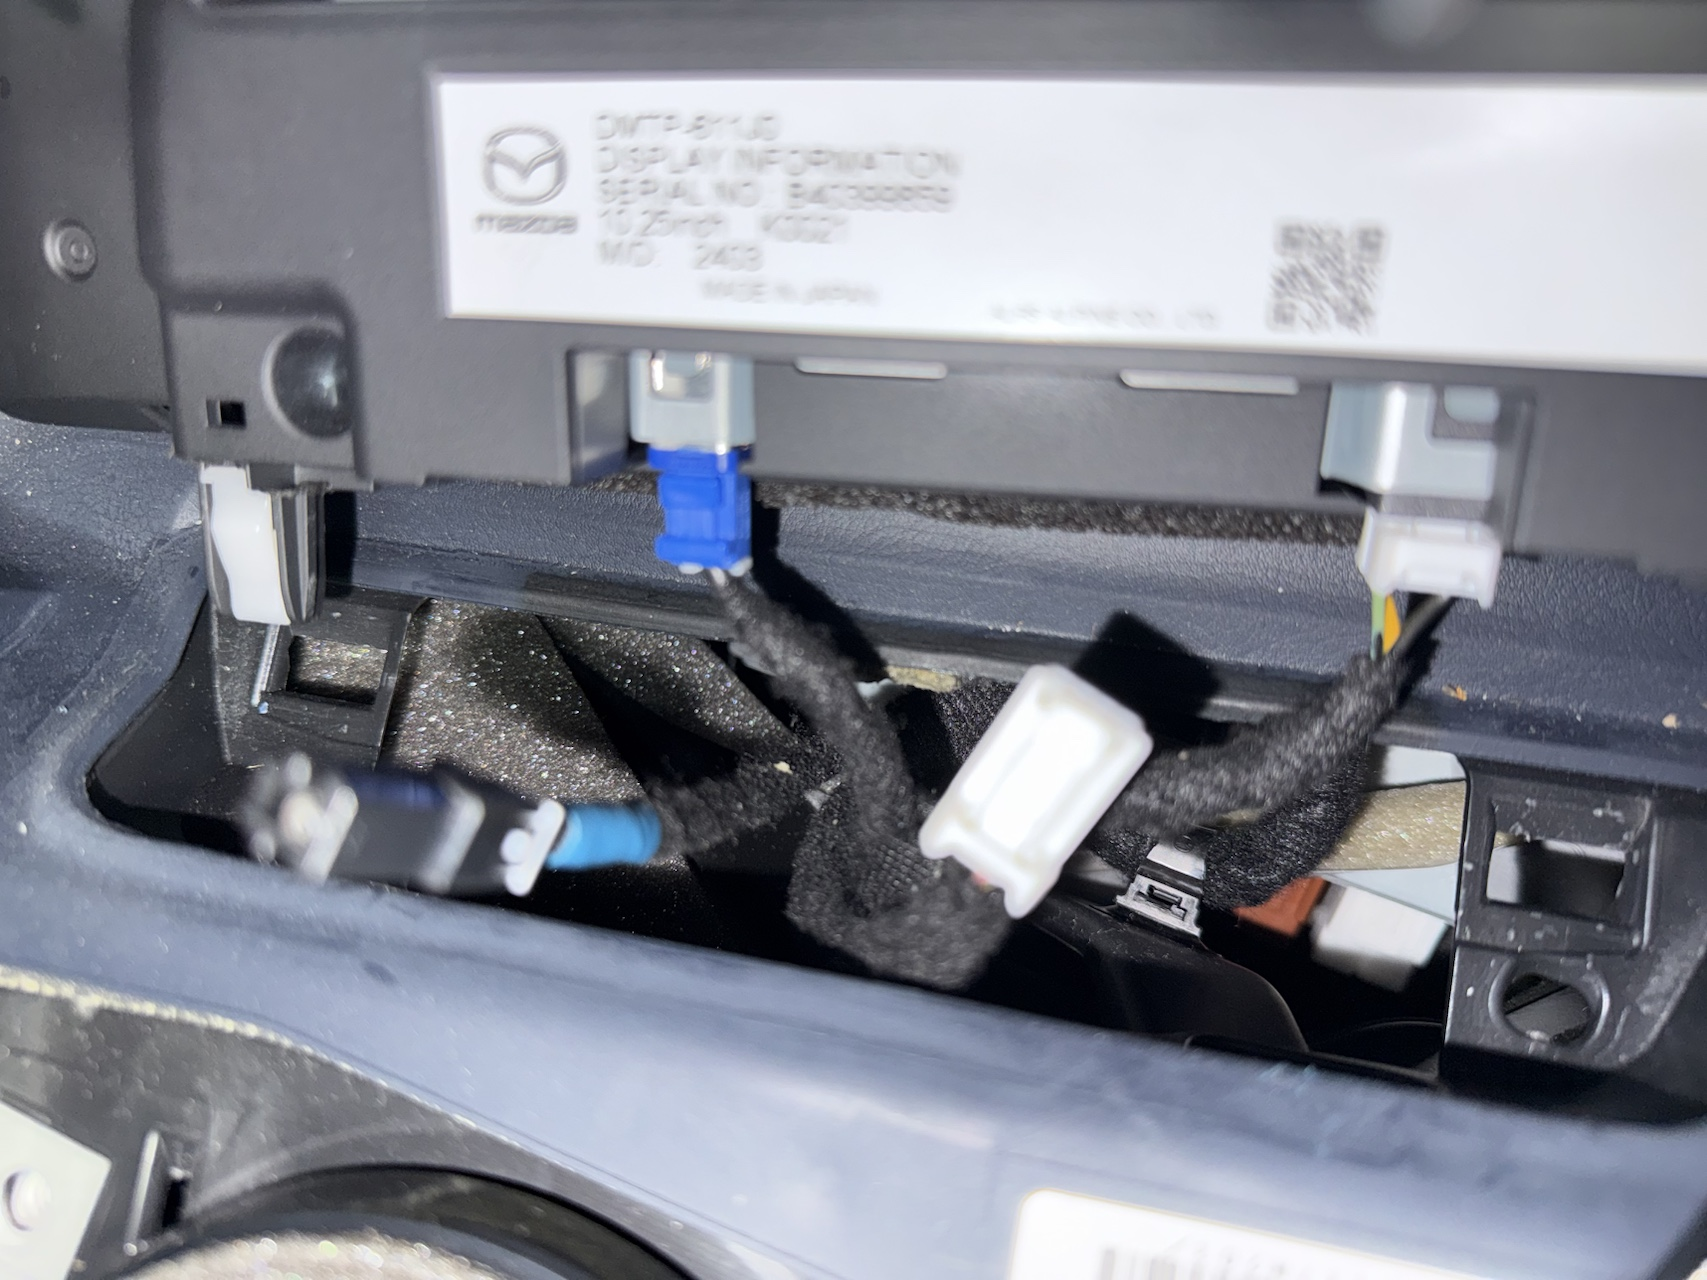
Step 6: Connect the cables to the new monitor
No photo for this step, but the non-driver-monitoring monitor only requires 2 cables.
Step 7: Reconnect the battery
Reattach the negative terminal and tighten the nut.
Step 8: Start the engine and verify operation
Do a quick test here. If Mazda Connect boots up normally without any issues, you’re good to go.
Step 9: Slide the monitor in from above
The red-circled areas in the image are hooks — latch them first, then slide the monitor down into place.
If these hooks don’t catch, the screws won’t tighten properly.
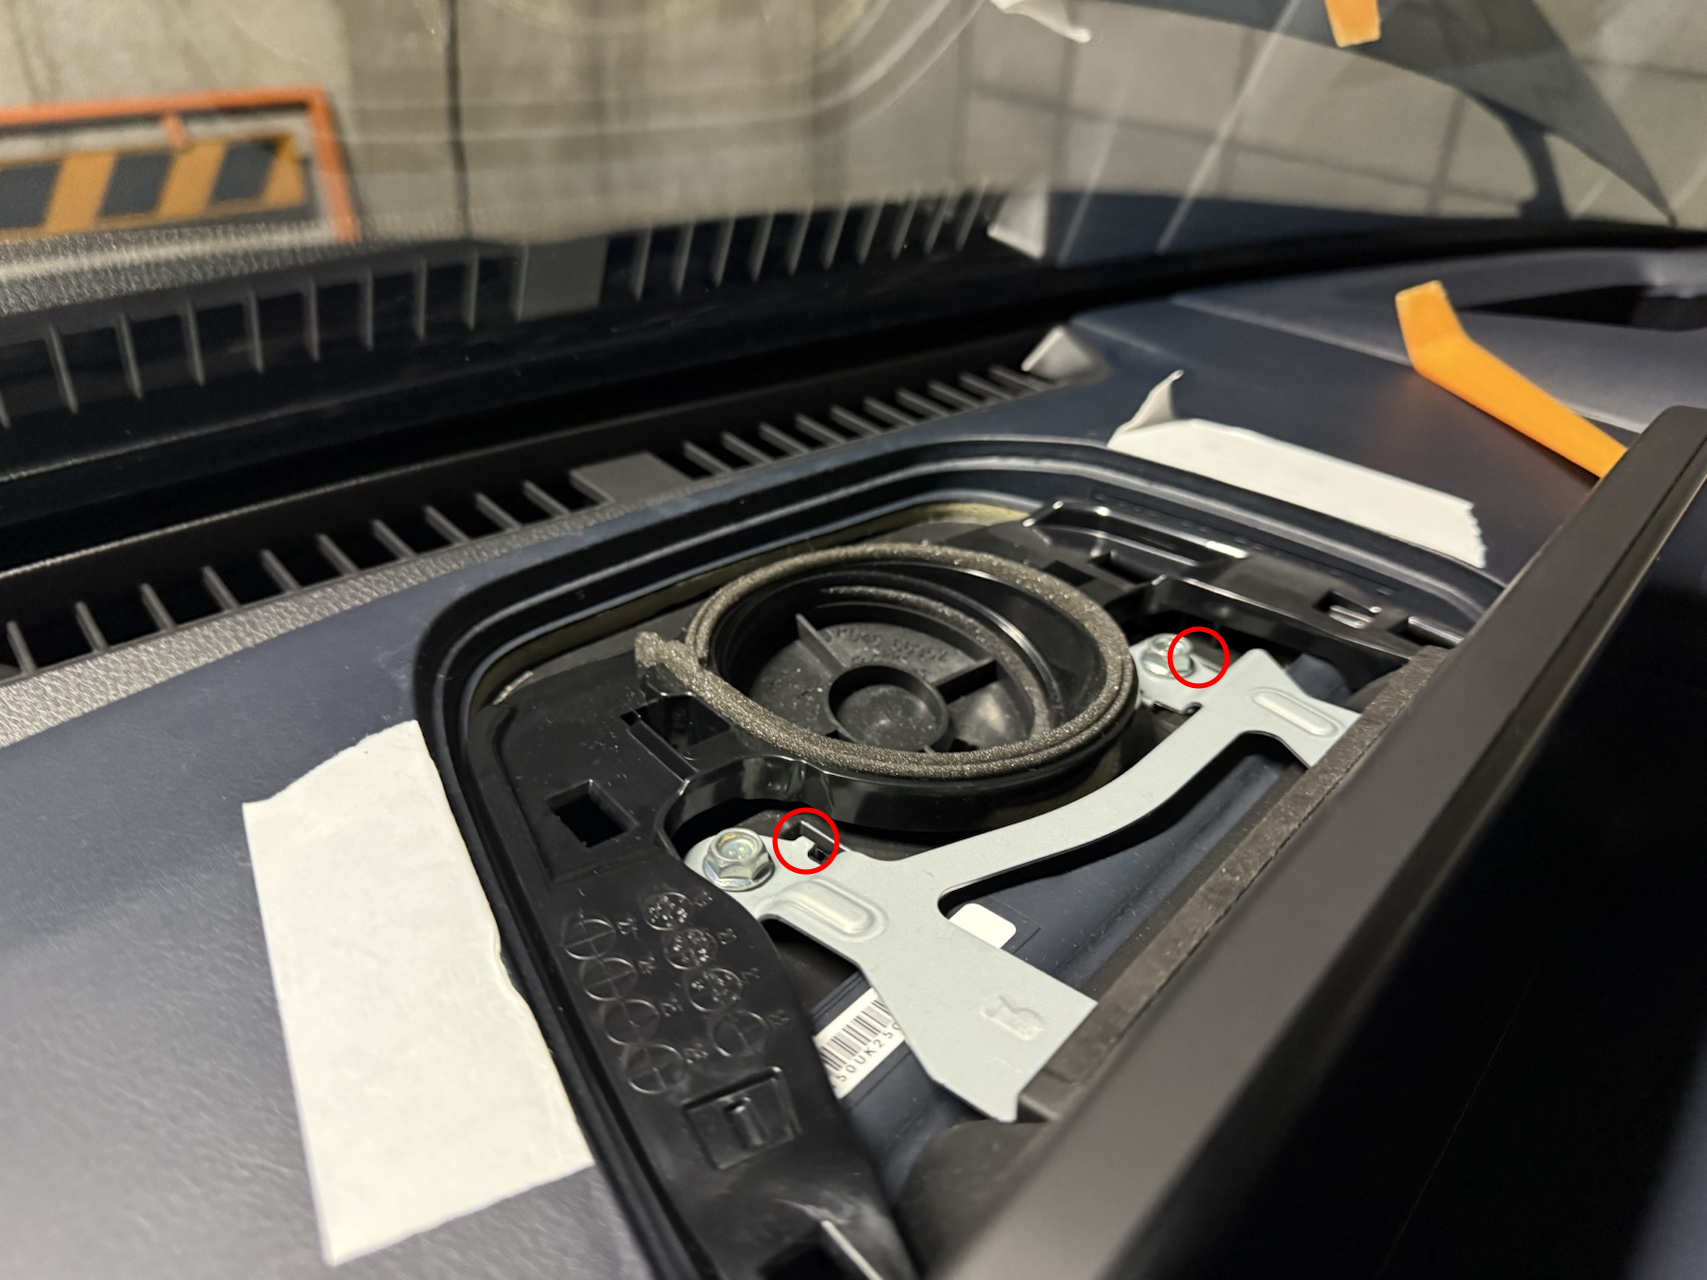
Step 10: Reattach the two 10mm nuts
Screw the two nuts back in.
* If the hooks from Step 9 aren’t engaged, the nuts won’t tighten.
Step 11: Reattach the rear panel
Simply snap the panel back into place.
That’s it — the job is done!
Testing It Out
The 10.25-inch screen really is noticeably bigger!
The newer models have a semi-transparent bezel that makes the display look even better, but this unit is still more than satisfactory.
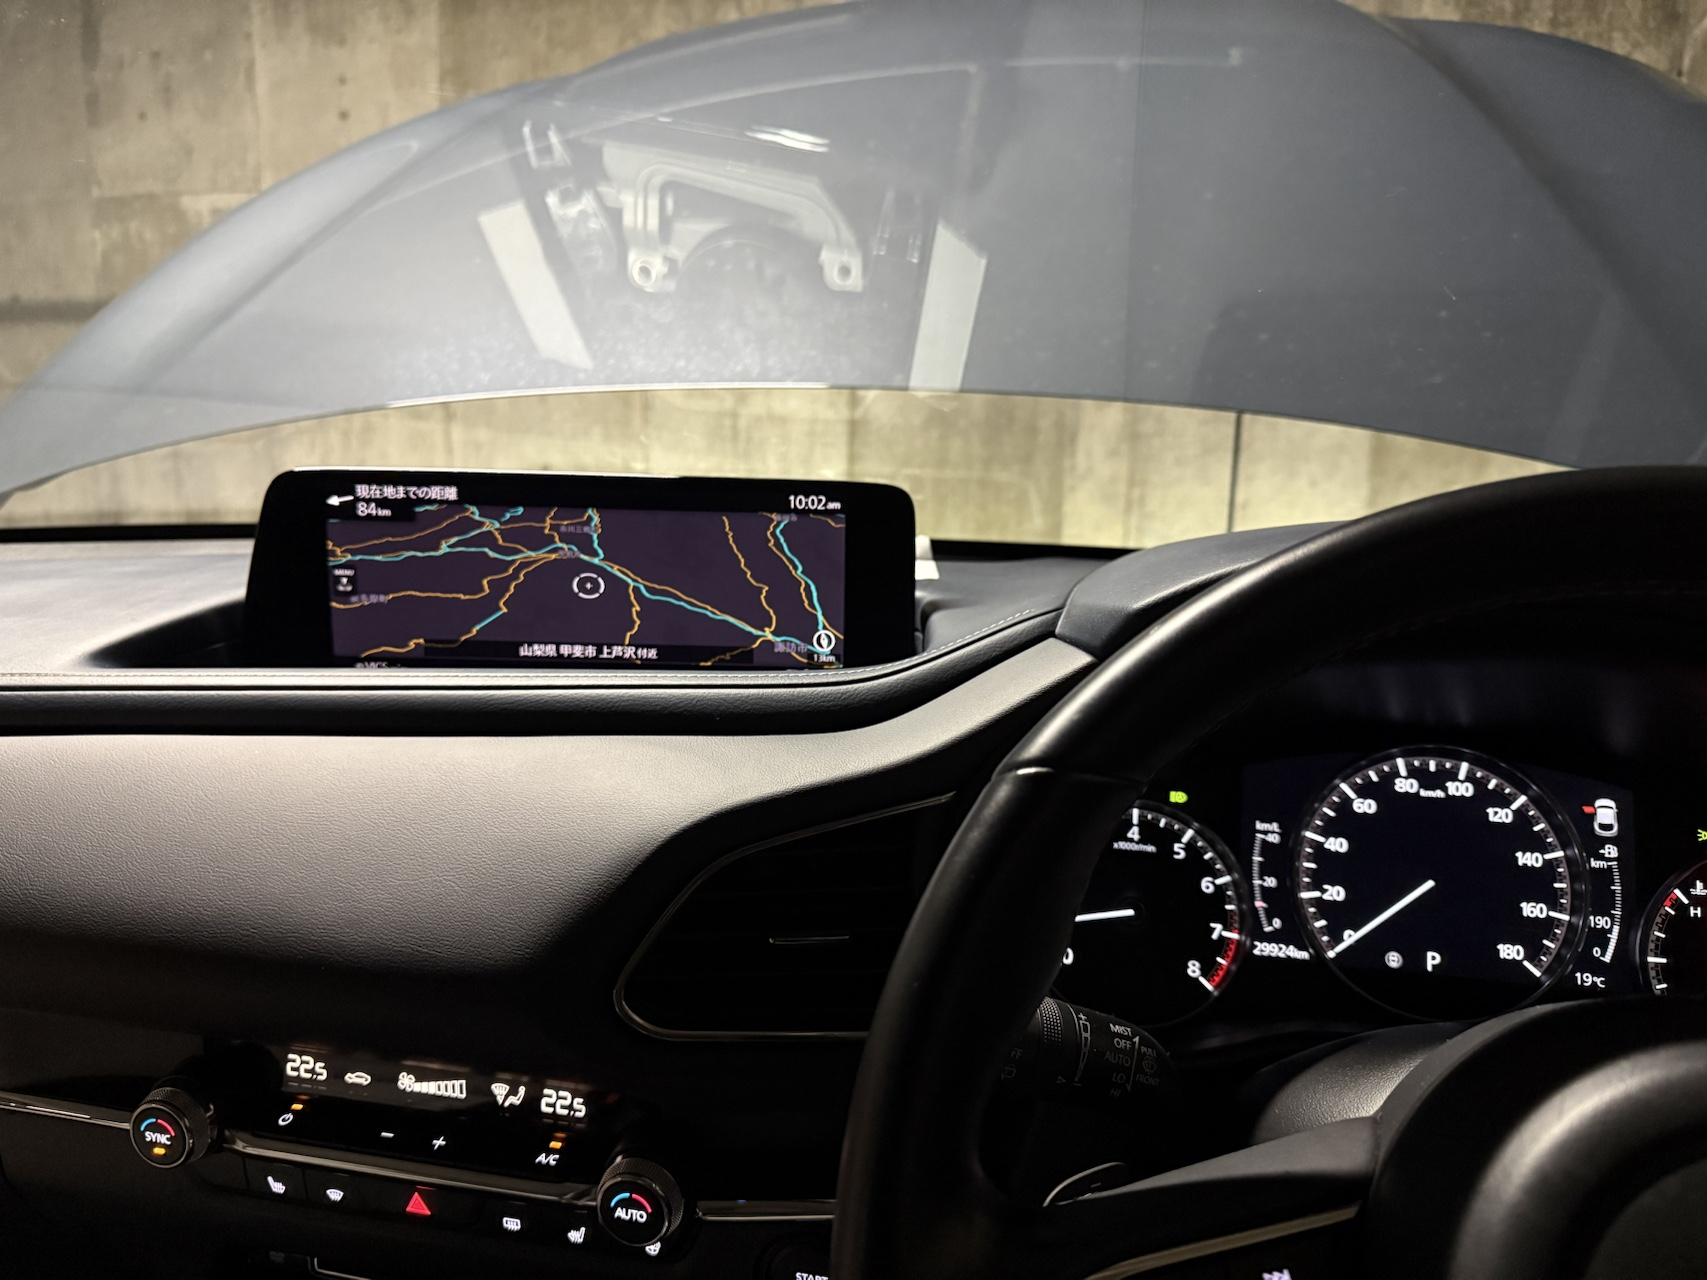
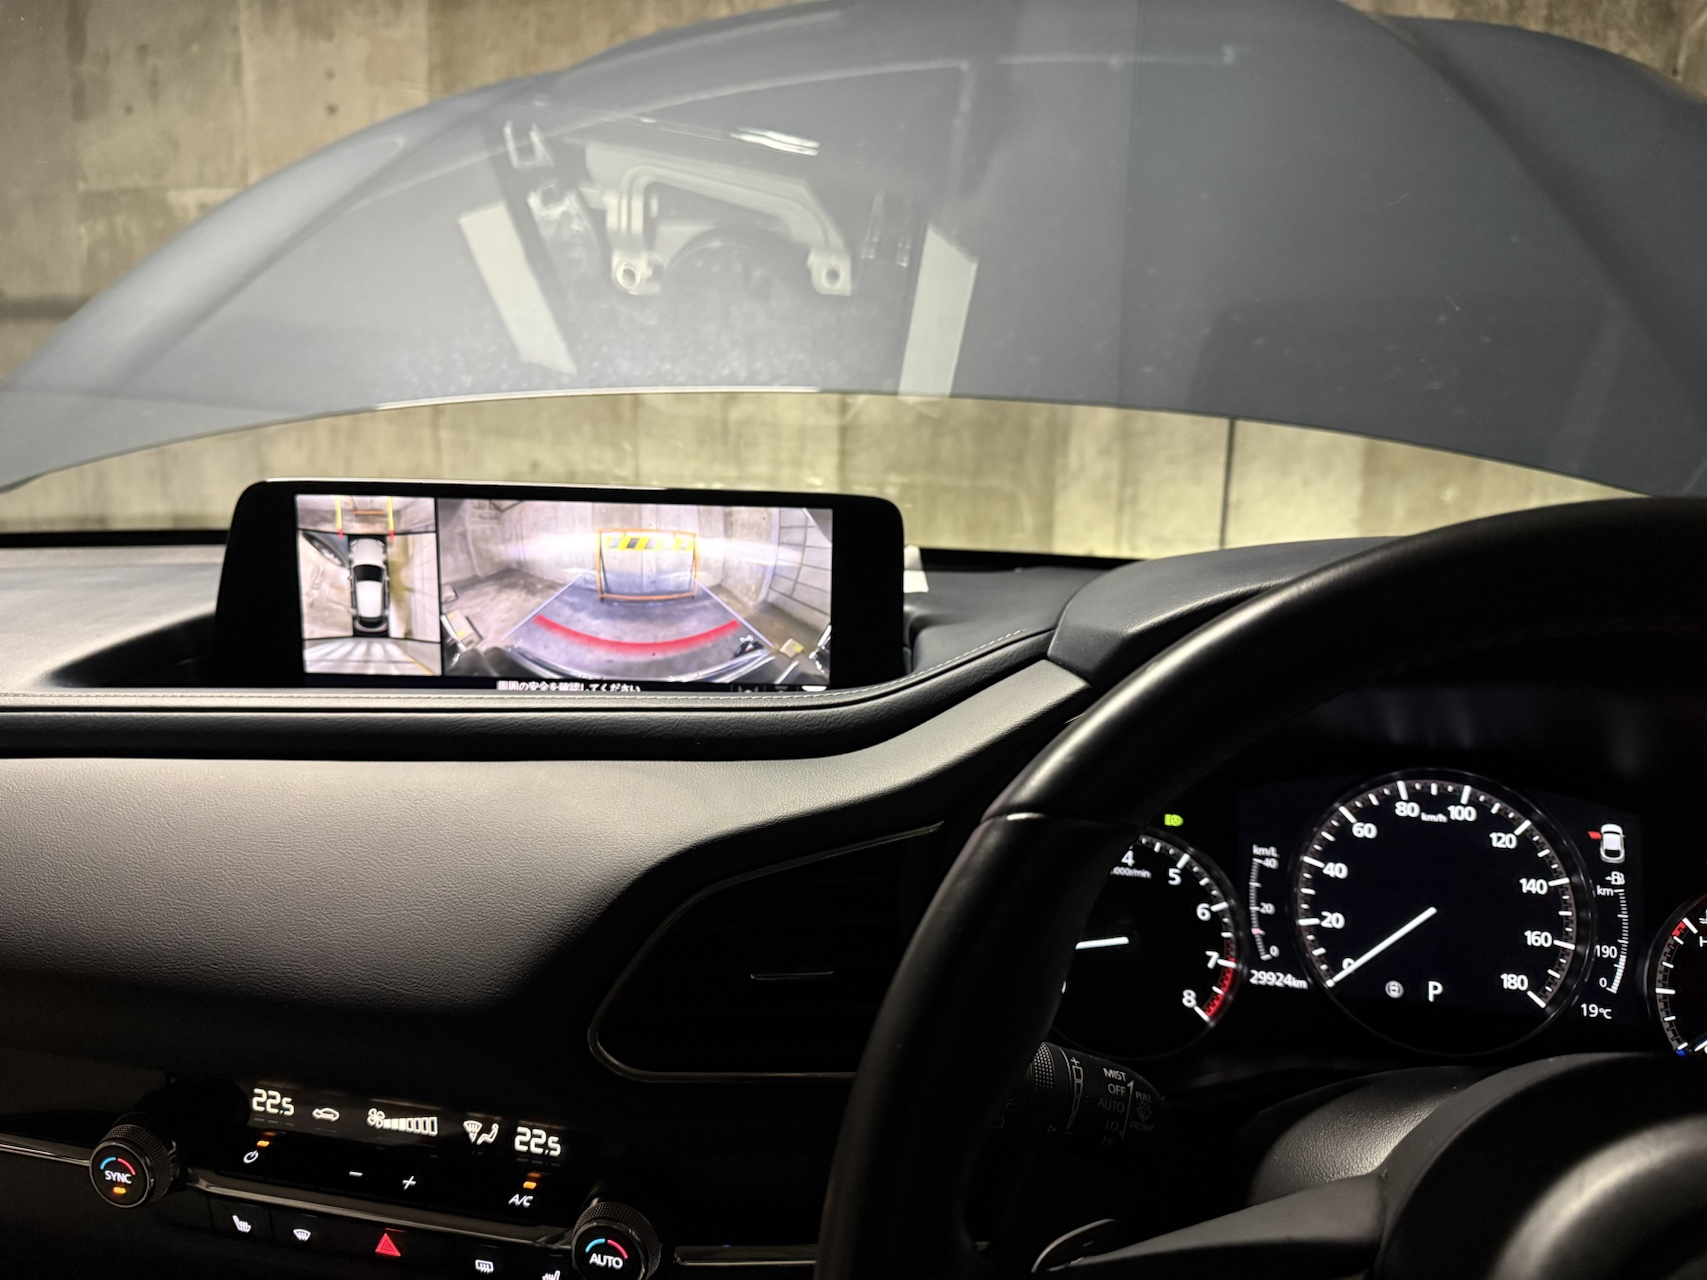
The biggest improvement I noticed was with the camera views. The 360-degree camera is so much easier to see now!
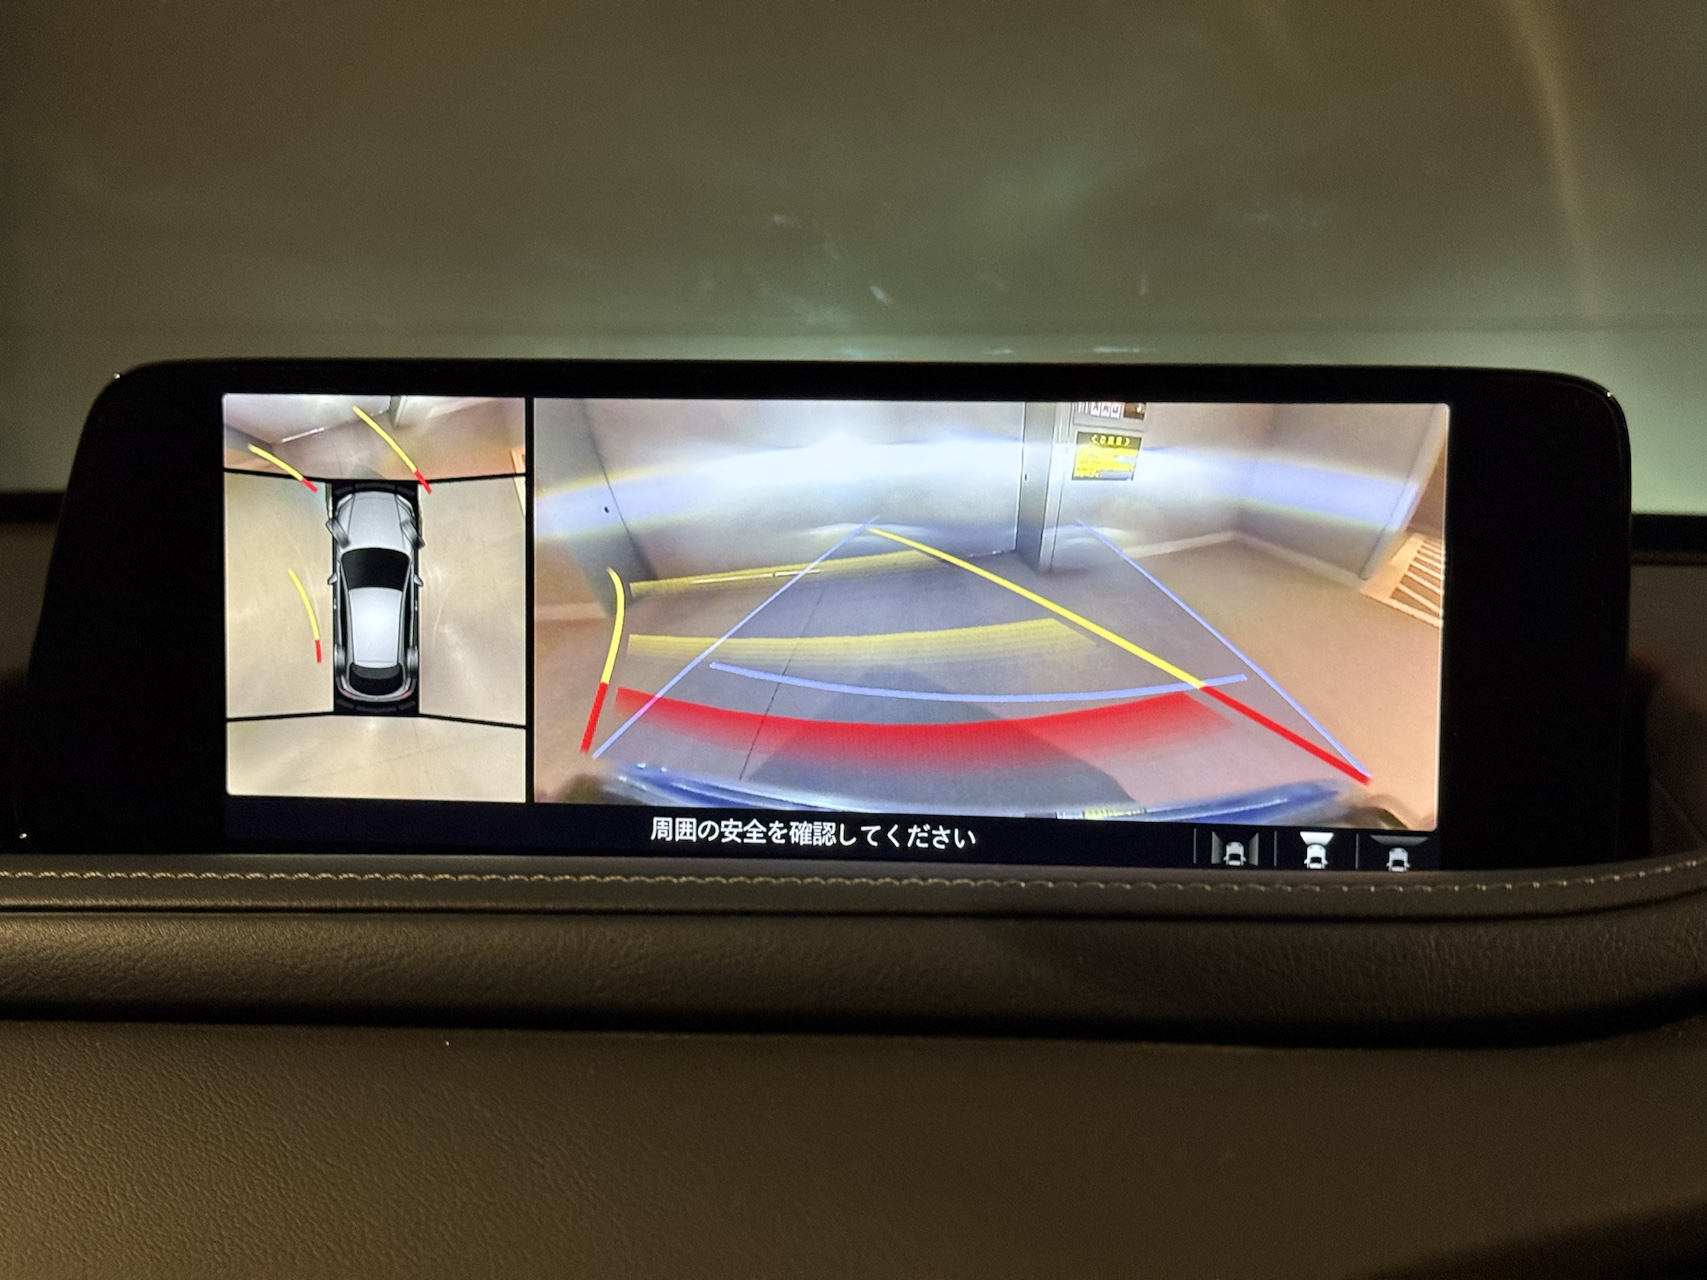
Interestingly, the Driver Monitoring settings menu still appears even though the sensor is gone.
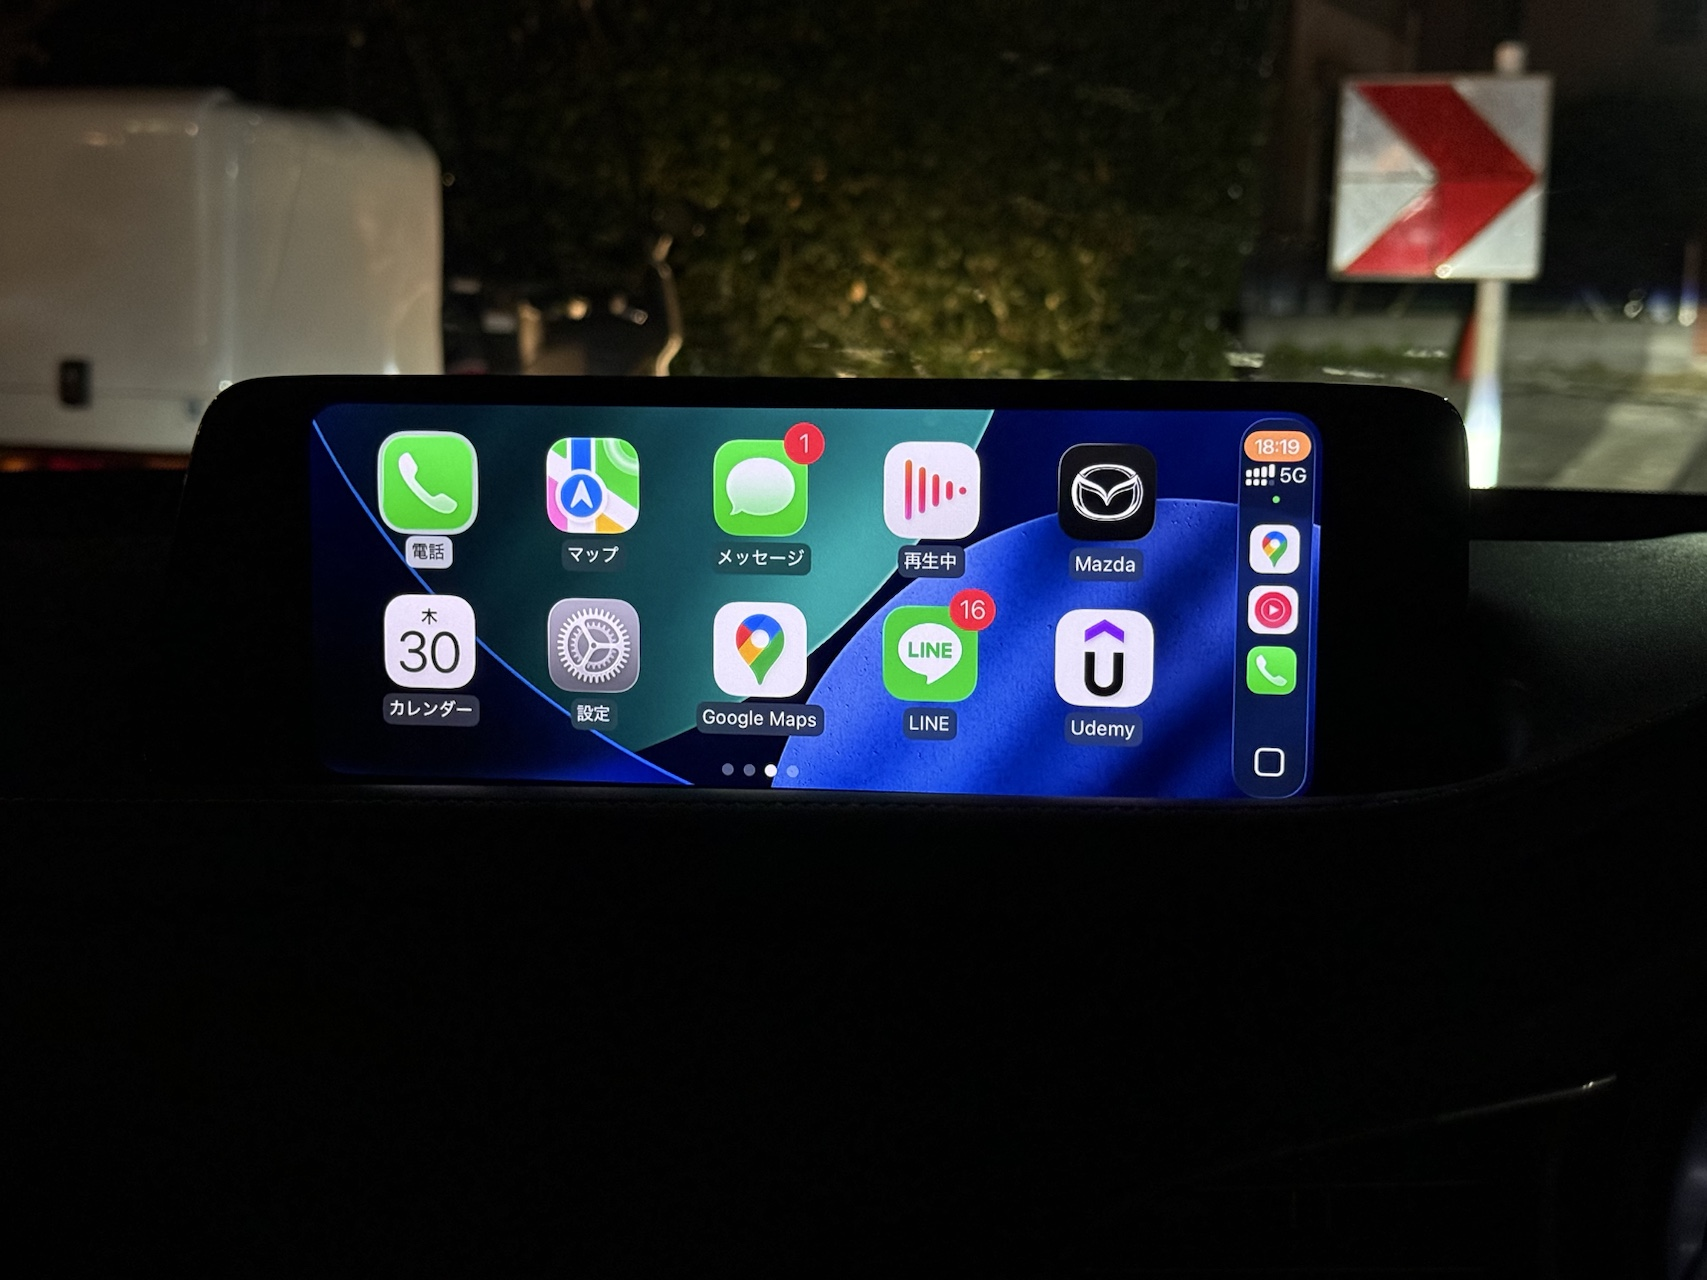
I don’t use it much, but the Apple CarPlay display also became much easier to view.
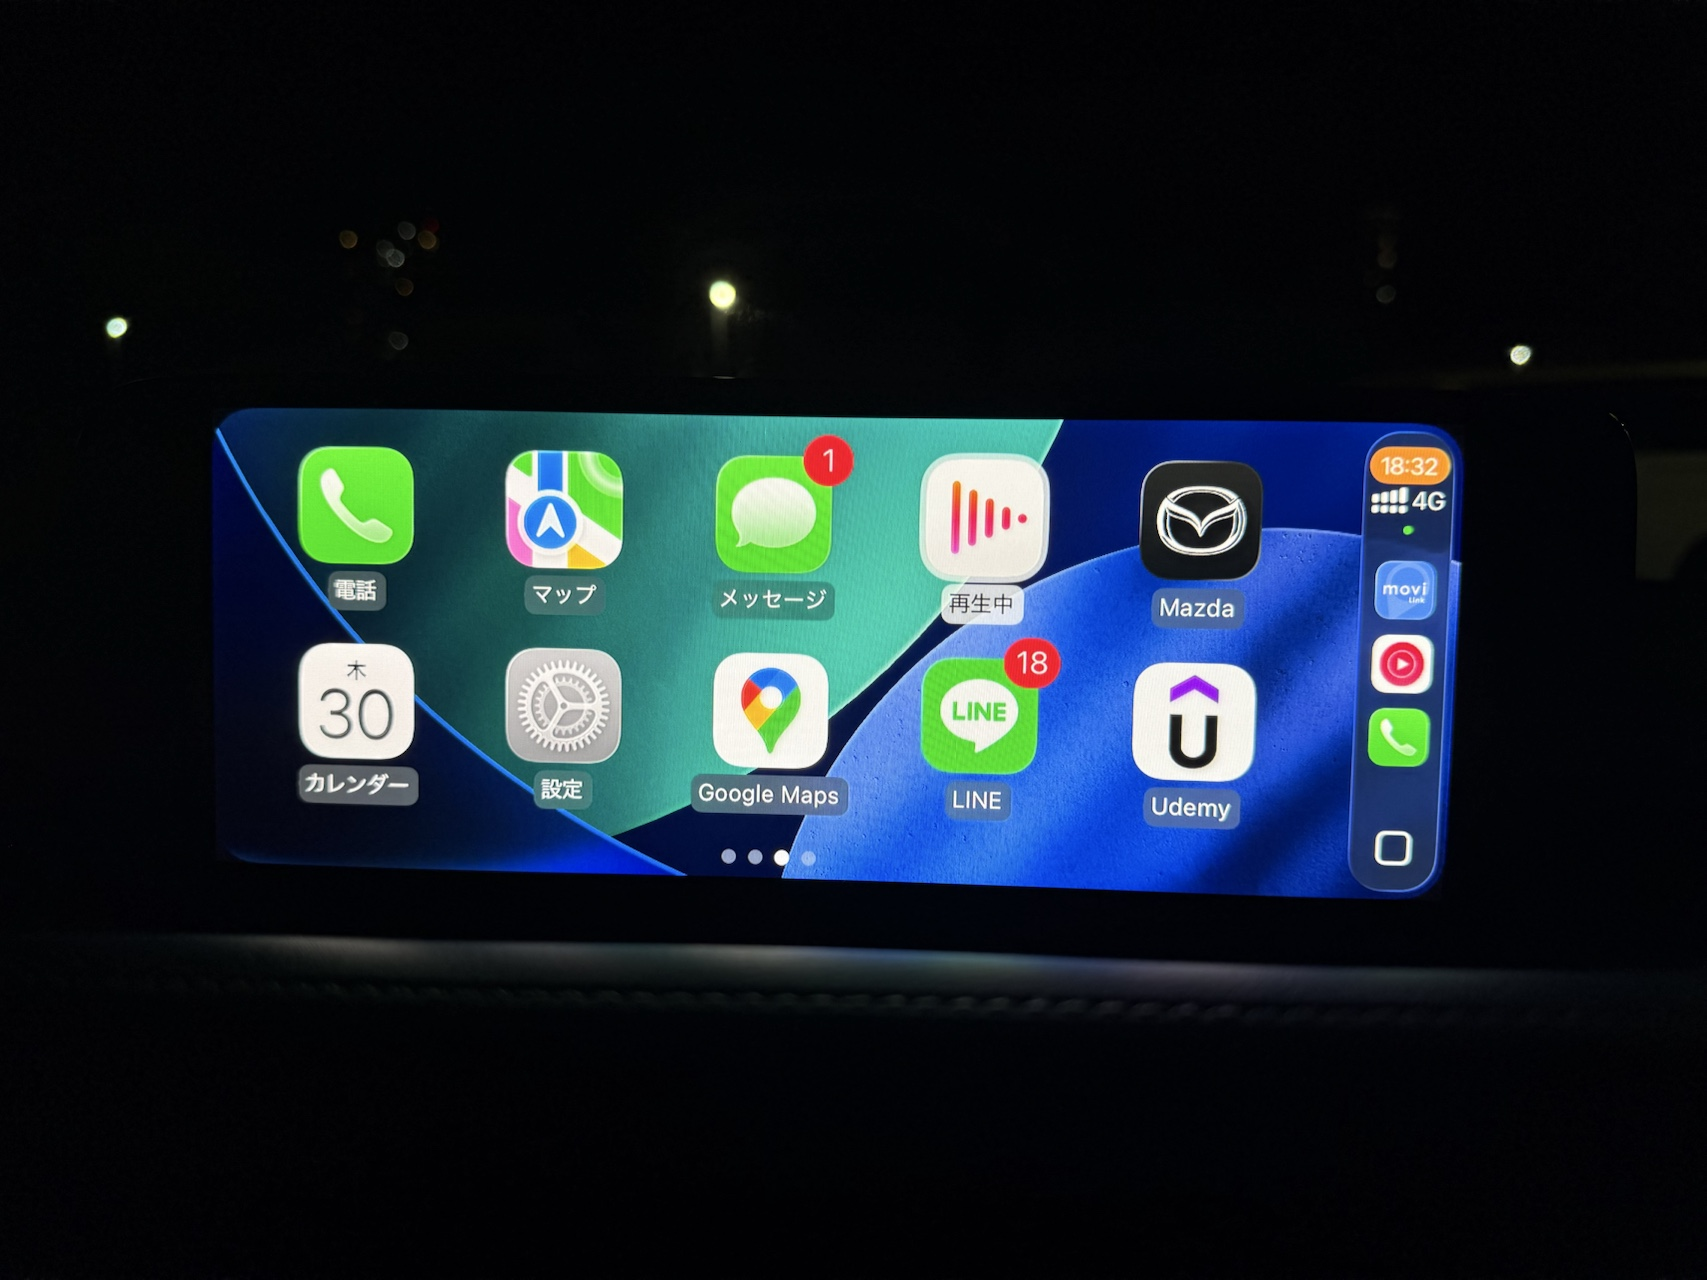
Some forums mentioned that “swapping to 10.25 inches on an 8.8-inch car doesn’t change the CarPlay resolution, so the image looks blurry.” Personally, I didn’t notice any issue with it.
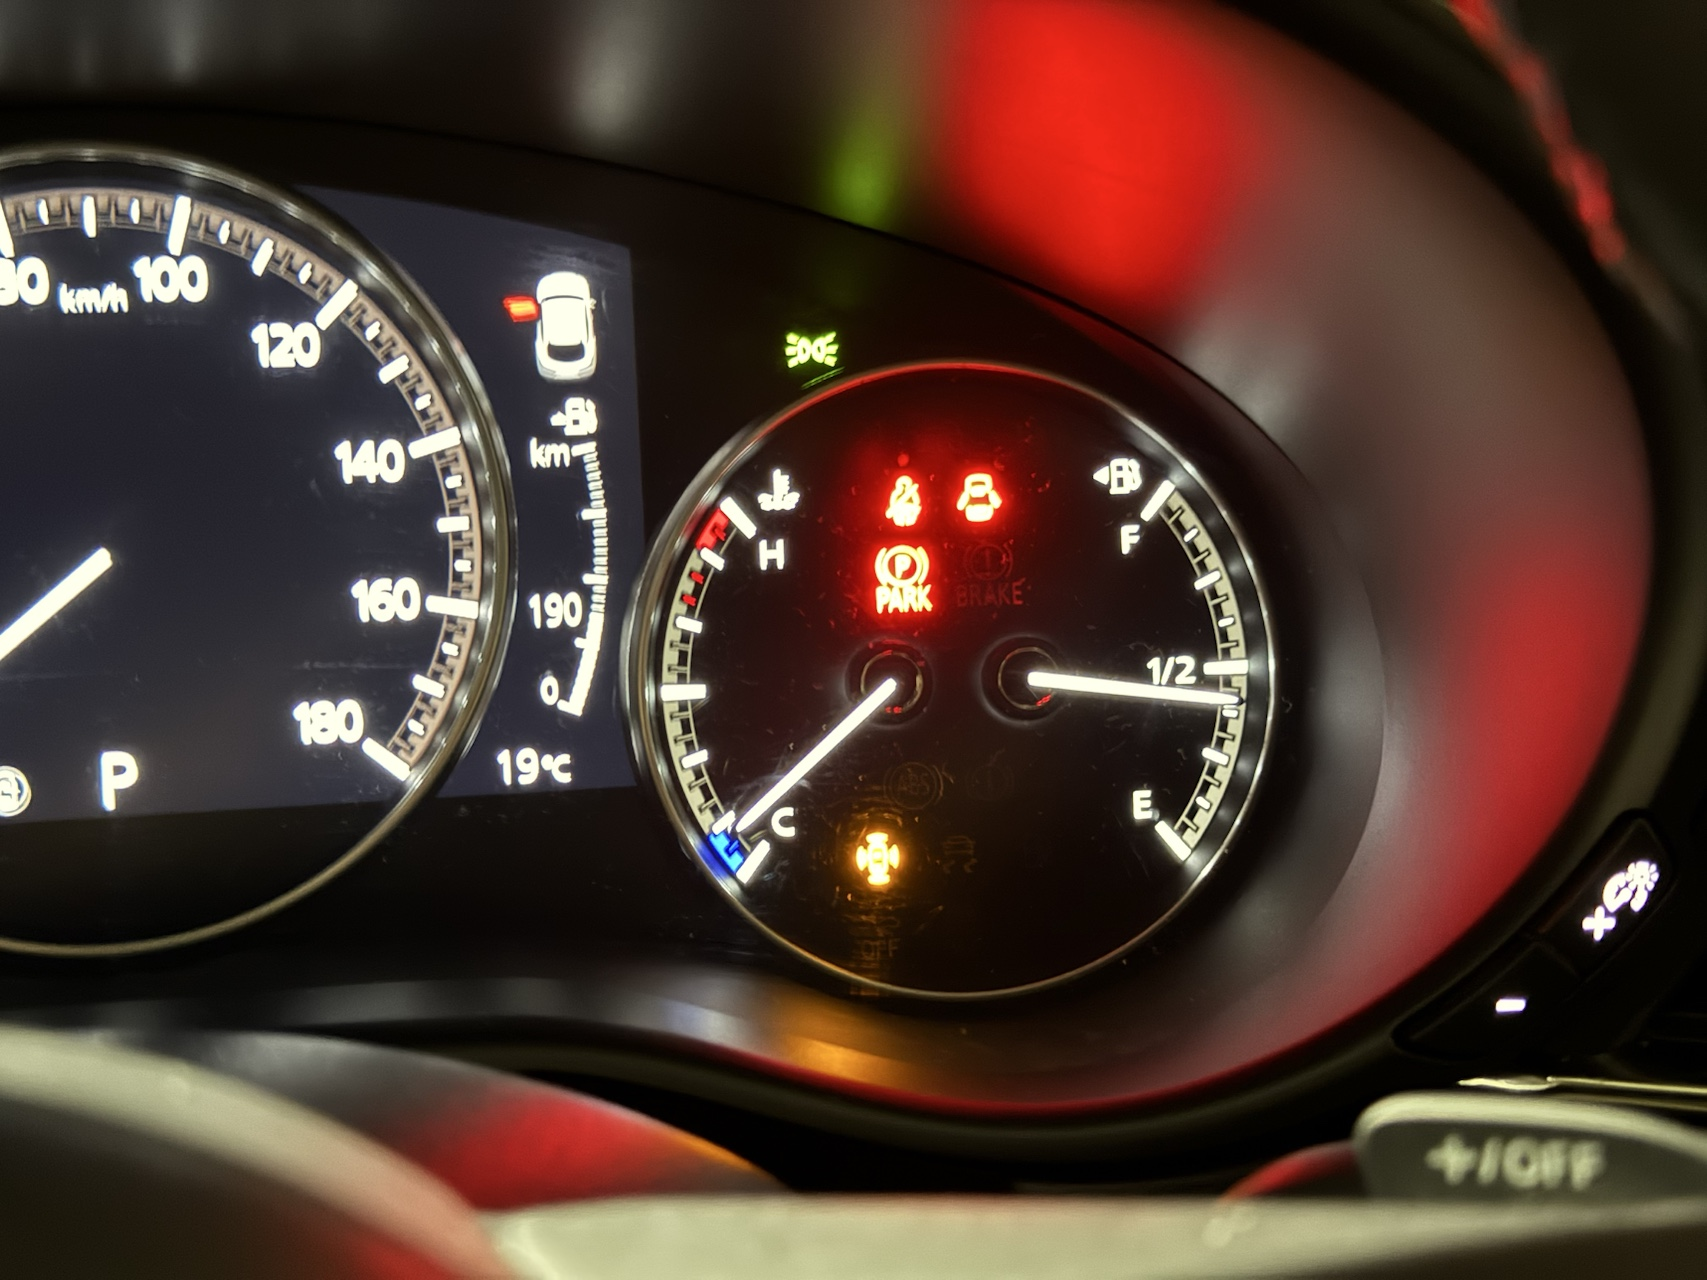
Note: An “i-ACTIVSENSE Warning” indicator does light up on the instrument cluster.
Even after driving for about an hour, no error messages appeared on the display itself, so it seems to be treated as a minor, non-critical warning.
(Reportedly, it doesn’t even get logged.)
Summary
Overall, I’m very satisfied with the upgrade from 8.8 to 10.25 inches.
It resolved my biggest gripe about the car, so I’m really glad I did it.
The cost is a bit of a hurdle, but as more 10.25-inch units become available on the used market, the price should come down — so it might be worth waiting for the right deal.
As for the work itself, even I — someone with zero car modification experience — was able to do it, so it’s a very straightforward job.
From my research, it seems like quite a few people are interested in doing this same swap, so I hope this guide is helpful.
By the way, since I take my car to the dealer for inspections every six months, I plan to swap the original screen back in before each visit.
(Think of it as a “pre-inspection swap” rather than a “pre-shaken swap”!)
Recommended Items
Interior Trim Removal Tool Set
Essential for removing dashboard panels without scratches.
Leave a Reply